


Craig Baldwin: We are going to start the Losant, Take a Deeper Dive Webinar series where today, we'll be talking about asset tracking. We have a couple speakers today including myself, I’ll play host. But we also have Scott Allen, who's a Solutions Engineer on the Losant team as well as Brandon Cannaday, our Chief Product Officer and he's going to help us out a little bit on our presentation and demo. Before we get too far into things, I wanted to take care of a couple admin items. First and foremost, we are recording today's webinar. So, you will get a copy of this recording hopefully before the end of the week and if you were not able to make it with us today, you will also get a copy so no worries there. We have 30 minutes scheduled. However, we do like to make sure we address all questions with the time that we have. So, we may go over. If you want to drop off once we get to Q&A, that's totally fine. Don't worry about that. You will get the full recording, so no issue. In terms of asking questions and how to do that, you have a couple options. We would prefer that you would use the Q&A feature built within the Zoom webinar tool. However, you can also use the chat option as well. I’ll be monitoring both of those. At the end of today's session, we'll make sure to address each of those questions. So, by all means, go ahead and ask your questions there. If for whatever reason we don't get to your question or perhaps it's better meant for offline, we'll do direct follow-ups. Just a quick review of Losant and the platform that we offer. We're going to touch on a couple of these components today but the five key components that we offer as a part of the Losant Enterprise IoT platform really focused on application enablement is Edge Compute, Devices and Data Sources, Data Visualization, Visual Workflow engine, and User Experiences. I think today you'll see a lot with data visualization, visual workflow engine, and user experiences. This is just a review of some of the customers we work with today in the enterprise space, some of which actually do utilize asset tracking solutions. So, very topical for today's conversation. Now, let's get into the details of what we're going to talk about today. We recognize that there are many different types of asset tracking solutions that are out there. Asset tracking is not a new topic by any means. There are loads of fleet management and GPS trackers that are in the marketplace. That's really not the focus of what we deliver work on and really try to power for our customers, partners, and developers. What we are seeing is this new type of asset tracking solution which involves much more contextual information that is received via sensors that are more than GPS trackers. Perhaps they're temperature, humidity, accelerometer, many more components. It's really about drawing additional context from these trackers to deliver a relevant tailored solution. To go through some of the architecture of today's solution, we have a couple key components that we'll be utilizing. First and foremost, asset tracking always starts with the thing itself, right. Whether that's a vehicle, a package, a piece of equipment, there's probably a sensor living on that thing whether it's hardwired or not that's sending data back to, in this case, the Losant platform. Common protocols that we see for this type of communication MQTT, HTTP. And then we also have one we call AtTrack. [Phonetic 00:03:54] AtTrack is a proprietary protocol leveraged with the QuickLink family of asset trackers. That's an asset tracker that we use commonly internally for many different solutions but there are many other proprietary protocols used on asset trackers whether those are cellular or otherwise. So, there may be protocols which are not supported by default by the Losant system. However, there are many ways to convert that type of data into something readable within Losant. Those might make for good questions afterwards but just know that we've seen many different protocols from those trackers today. As the data comes in, it gets sent to the Losant cloud. We get the full power of those components, the workflow engine to set up alerts and notifications and then pipe that data through some end-user experience. We'll be lucky enough today to receive a walkthrough of this with Brandon but this is really about presenting your data in the way that you would like to under your brand with user authentication so that the end-user is just interacting with an application that they know and use every single day. With that, I’m actually going to toss it over to Scott Allen, our Solutions Engineer so he can begin the walkthrough for you.
Scott Allen: Okay. Thanks, Craig. As Craig mentioned, we wanted to show you an example of asset tracking. So, what we're going to do is we picked the assets that we wanted to track. Something that moves quite a bit and also, we can record other information from it. The example we're going to show you is an imaginary food truck company that manages several trucks as they move around the city serving lunch or other meals. We're going to show first of all, how we can track them as they move across the city but also how well the equipment within the truck itself is performing. Asset tracking can really be useful to several different groups within your organization. First of all, there's the on-site staff, in this case, the staff within the truck itself. They may not be aware of some of the situations going on if they are running low on propane or any of their other expendables. They need to know about that and that's something that the remote operation center can provide to them. Also, there is the ROC, remote operations center, which is going to track several trucks as things are going along and so they need to know the latest conditions of each truck and anticipate any kind of supply or emergency situations that may arise. And then of course, there's management, who needs to know how the equipment is performing and what can be improved to make the trucks more efficient and increase profit. Now, for those you aren't too aware of food trucks, there are a lot of equipment involved with this besides the truck itself which we can monitor several of its functionality through an OBD port but they also contain a lot of other equipment like a refrigerator, freezer, a range or grill or griddle for serving food, a deep fryer, three-compartment sink and also tanks of information. We will need to monitor its freshwater tank, its wastewater tank, the propane tank for powering the griddle and the deep fryer. Also, a power generator and possibly a point-of-sale system and various other alarms and fans. Of course, that may change based upon the cuisine of the food being served from the truck. But for the sake of our demonstration today, let's assume that I am the owner of the truck. I need to monitor where the trucks are as they move around the city. At our first and top-level dashboard of our Losant application, we're going to be tracking these trucks as they move around the city. You can see right now, I have two that are moving. I have one up near the university area and then I also have another one that is in the downtown area around the city square. For each of these trucks, I can identify when the truck is actually moving and when it's stationary. Now, you may notice this one that is uptown in the university, its marker turned blue, which means it just arrived at its lunch location. So, it's going to be stationary for a while and we should be able to tell that it's should be gathering income, serving food and everything is great. The truck down here is moving around the city. It's either returning to the headquarters or on its way out to a location. The other thing that I am controlling for each of the trucks is that when I click on the marker, I can decide what information I want to show here. In this case, I’ve got the truck's identification number, its location and latitude and longitude, whether it's moving or whether it's stationary. And, if I click on this link, it will take me to a detail for that particular truck. I’ll come back to that in just a moment. Now, for this particular map, you may notice, I’ve zoomed out a little bit because I have a third truck that I monitor but today, I’m noticing that it's way out of its location and I’m trying to figure out what's going on with that. It's not something you could see but I also received a text telling me that this particular truck has actually left the downtown area. Also, when I have a truck and it does leave the downtown area which I have defined as a geofence, I get an event over here in my list that lets me know that that truck is out of the area. Can you see, I just received that a few minutes ago. Now, this area on the right here are events and these are items or conditions that you can control and define what you want to record. This information is part of the long-term application data. When I receive a notification like this, I have a workflow that is creating the event at the warning level telling me what's going on and the date and time. As part of working with the events, I can select this event and now I remember this truck is actually going or went out of the area because it needed repair. So, as the manager, I’m just going to acknowledge that and put in a brief description so we know what was going on. Now, I can save that and as I said, it's now part of the permanent history of this application. We can start tracking how often our trucks leave the area and if it's for a known condition or if something's going on that we don't exactly know about. We have all of this information here, and, for the top-level management, that's really about all I need to know. Now, with the map, of course, I can zoom in, move map around to an area that I want that way I can see what is happening. But really between the map [Inaudible 00:12:13] and the event list, this is a map that we've set up. I defined two things here for the right behavior. First of all, you remember how I said how it will change marker colors based upon whether it's moving or not. That's something I can define here as part of the point display. In this case, I’m just checking to see if one of our data attributes is moving is true. If so, then I’m using the green color, if not, I’m using that blue color. Of course, you can expand that to other levels, other attributes that you want to check, whatever you need to show that information. The other thing I wanted to point out was how we change the information when I select a particular item. That's done here in the pop-up bubble display attribute for this block. I can just say here at the very top, I want to display that truck's code number, then the latitude and longitude and we formatting it to match the coordinate. And then once again, we're just checking a data attribute. Is it moving or not, and that's what we're going to show here followed by a link to the details for that. Now, when I select a particular truck, I showed it to you briefly but let's go into detail now, for all the information that I want to collect for a particular truck, in this case, it's for the one in the downtown area. I can see right now that the truck is moving. It's moving in the northeast direction. I can figure it out. But now, I can also see the equipment that is onboard the truck. The top row is showing me the temperatures of the refrigerator and the freezer, both the last reported values and the information over the last hour or so. The middle link is showing me the water levels of the tanks. In this case, it showing me the freshwater tank and also my wastewater tanks. In this case, part of the cycle we're moving out so we've got plenty of water and again, we can show that in a history chart. Finally, we're showing you the propane levels where we are using that and then when we reach a certain location like the Fountain Square, we can tell that the generator has been turned on. There are no alarms off. What the temperature in the kitchen is, that's important for food preparation and safety and other values like if the vent is on. From the top level, I see everything I need to see but then I can zoom in and see everything I need to see about a particular truck. Now, the application behind the dashboards really, I focused on two main areas. That is defining the devices that we are recording. In this case, we do have three trucks and for each truck, we have a variety of sensors that are being reported in. Everything from GPS to propane tank levels, temperatures and so on. Let me select one. Here this is the GPS coordinate for truck A155. One of the things you'll notice is that we've defined these sensors as peripheral devices and they're all using the same gateway. Our trucks have one gateway that all our sensors are sending information through. That gives us the relationship between it. Also, we're defining the attributes for a particular sensor, in this case, the actual GPS location, whether we're moving, the direction we're on, and if this particular truck is out of the geofence. Finally, we've also defined other static values, device tags that are part of each sensor recording but it's information we can use to group and query our data. Most important of these right now is that this particular sensor is related to truck A155. That way, when I’m showing the detailed dashboard, I’m only seeing information for that particular truck. And then we can also do some additional information like this is a GPS versus a temperature location or tank volume. It's very easy to do this and by defining these device tags, it allows us to really zoom in on a particular truck when we need to. The next part of an application that we need to work with is the workflows of how we're going to process this information to either display it properly or to do some behind the scenes processing, whatever we need to do. In this case, I wanted to show you the workflow of how we're detecting if a truck is out of the geofence area and how we're processing that information. First of all, this is something we run on a regular schedule, in this case, every 10 seconds. What we do is we get both the truck information and the GPS for that truck. We retrieve it and bring it into memory. Then I use the geofence node to define the area that I want it to stay within. Now, I’m using a very simple geofence where I define a location. In that case, it's our headquarters in Cincinnati and I want to set up a radius of 3 kilometers to track each device. If a truck goes out of that, it's considered outside the geofence, within three kilometers, it's inside. That's what I’m doing here. It is like a conditional. We can define a path that if a vehicle is within the geofence or if it's without, outside of the geofence. In this case, what I’m doing is actually storing a value of... If in this case, it's within the geofence, I’m setting a value equal to 0, that it's good. However, if it's outside the geofence, I’m setting a value of 1. We can set those values and use it. That way, I can use a node to make sure that whenever I report an error, I only want to report it once. In that case, it's the latch node that's allowing me to control that. The latch node will check a condition and if that condition is true for the first time, it will then use the following nodes to set up what I wanted to do. If the condition is true but it is not the first time we've seen it, then it won't do those events. That way, myself as the manager, I’m not bombarded with text about the same event and also, we're not creating events over and over and over. We're only recording it once per incident. Now, the other part of the latch is telling it when to reset. That's why I stored this value as a 0. In this particular case, the first time we detect a truck going outside the geofence, we're going to process it by creating an event and sending a text. However, whenever that truck comes back, that it's back in the geofence, we reset the latch. That way if it goes back out, we're notified again. Now, if this... When the latch is set and this is the first time we're getting this incident, I’m actually doing two things. The first thing I’m doing is creating an event. That's what I showed you in that list on the first dashboard. That way, we can acknowledge it or mark it as resolved. In which case, I can set both a level for that particular warning. So, we can say this is critical or error. In this case, a warning is sufficient. And then both in the subject line and in the body, I can use these handlebars as a way of including values. In this case, it's the truck ID number that we're including in the event and in the message that comes to me. So, in this case, we're just sending out a text with the location. That is the application from my point of view as the operations manager for this fleet of trucks. I’m now going to turn things over to Brandon, who is going to show how we can use the same application and pull information for users from a different point of view. So, Brandon.
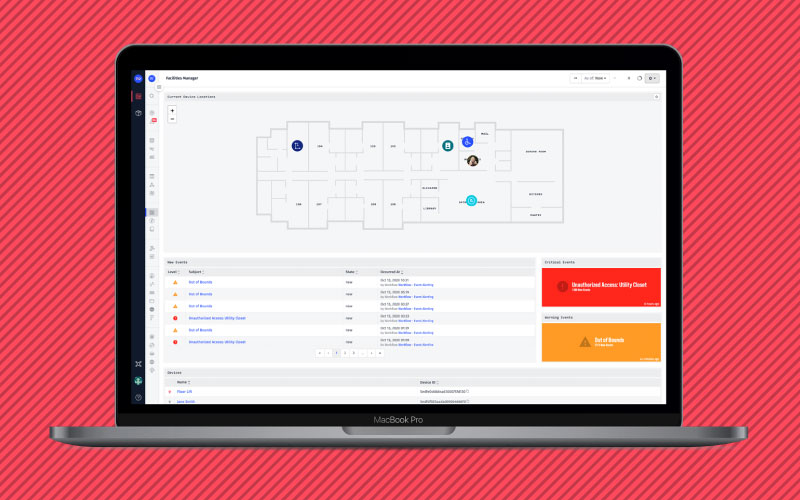
Brandon Cannaday: Yeah, thanks, Scott. Just to reiterate, what Scott has shown was a great view from a high level, an owner-operator, kind of that system view into a large environment. But especially in asset tracking and the actual problems being solved, there's often oftentimes maybe a driver view or an operator view into that same information or giving them some amount of control over that application. Think about your Uber driver or your food delivery driver or in the more industrial IoT space, it could be a service technician. Once they go out into the field, based on one of those events that Scott has shown, some sensor information could alert and create an event that a piece of equipment needs some maintenance applied to it. A service technician can go out and when they're there, they have a different window into it. They can view that historical information, help accelerate that maintenance effort. But what I wanted to create today and what I created to show today gets into some unique area that Losant provides and we call that the end-user experiences. Based on the feedback we've heard from the last few Deeper Dives, this is an area that we should spend a little bit of time on. I created an experience that allows the food truck driver to send a tweet, let their customers know where they stopped for lunch or dinner. It's a pretty common implementation in this industry. If you're interested in what that food truck provides as a customer, you're going to want to know where they are that day. In this case, you can follow them on Twitter. What I’ve created what's on my screen is kind of a mobile-friendly website created within Losant Experiences. Once someone logs in, they will have the ability to view some information about the device and then send that tweet. After I log in, the first thing you'll see is that list of trucks. This was all set up by Scott and the kind of system administrator. I’m going to choose the first one. And then we have some information here about this truck. We've got the real-time coordinates, the last GPS location that it reported. We've got its name. We've got a picture of that truck and then we also have a reverse lookup for the address of that truck. This shows how to get information from Losant into a custom experience and then the driver can see this tweet, edit it if needed and then tweet back. This will show an example of receiving user input from a customer experience back into Losant and operate on that. If we go ahead and click that tweet button, right now, it's just going to take me back to the list. But we do actually have this Twitter account, CincyFoodTrucks, @food_Cincy. You see that new tweet just came in. We put the name of the truck, the address that we looked up, whether or not there's a special for that day, and then it has a nice helpful Google link where our users can click that up and quickly get directions. What I’m going to focus on for the remainder of my time is this view. This shows receiving information on the top about that vehicle. All the information comes from the platform, the name, the image and the GPS locations, and the address, and then I’m going to dive into how to receive that input back from this interface into Losant to work on it. Let's start first, with receiving that information. It's really important to understand kind of how data flows through Losant's Experience engine. It can be complicated because there are a few pieces that have to work together in order to deliver an actual page with data on it but everything starts with an endpoint. Within Losant Experiences, we've got a concept of endpoints and that's the entry to every Experience request. In this case, what powers this view is the request of this endpoint up here, which is trucks and then you parse in the device ID. That's what you'll see here. I’m getting trucks and a deviceId. And this is a placeholder, so within Losant, you can define these placeholders and whatever the user provides, we will parse that automatically and put that on the variable. Endpoints most commonly trigger a workflow. Just like everything else, device state, timers, endpoint is just another type of trigger on a workflow and we will provide a lot of useful information about that request. Essentially, all the information we can provide will be available to you including these variables that have been replaced by actual values. In this case, in order to display information about the truck, really, all I need is the deviceId. The Losant workflow can then look up everything else that's required. I’m going to get that. We're going to parse that automatically for you. We're going to put it on data.params. — the variable name that you defined in the endpoint definition. Whatever they typed in, will be that value. Then that workflow is responsible for combining all of the data that's required in order to appropriately render that page. In this case, I need the truck, I need the actual device which is going to include a bunch of tags. Those tags include the image location, the friendly name if there's a special. So, a manager can actually go into the device and change the special for that day. We're going to get the location. Like Scott had shown, we have decoupled these devices. So, we have to grab the appropriate GPS sensor related to that truck and get its location information and then we're going to show a reverse lookup to convert that GPS location to an address. That's going to get combined together in what we call page data and then the workflow determines what page to render and then it parses that page data into it. And then we use standard, what we call or what's out there, is called Handlebar templates. That information can be rendered and all that is available on the page data variable. That name, the device information, location, address, you can render it out however you want. Every request goes through an endpoint, triggers a workflow, workflow determines what data to render and then the page will render that data and display it back to the user. If we go into the Experiences side, it's on the navigation under experience. If you click the edit, you'll see tabs for those three primary entry points into an Experience. You've got the endpoints, you've got the workflows and you've got the views. This is all the information required to show the application I just demoed there. Let's start with that endpoint. Like I said, the endpoint is the main entry point and here's how that's defined. I want to get trucks and then here's how you define a variable like that placeholder. So, whatever the user provides here, we will replace that and make that on the deviceId variable available to you in the workflow. If we keep scrolling down, we want a user to have to be logged in. I’m not going to demonstrate the login. If you create a new application in Losant and go through our bootstrap process, so we'll create a demo application for you. Essentially, this uses the exact same login flow that that creates for you. It kind of handles a lot of that user authentication, which means a user must be authenticated. They must be an Experience user before they're able to access this page. If they're not logged in, we simply redirect them. We just send them right back to login. It's a very easy way to provide that access control without you having to implement all that logic yourself. The reply type's very important. In this case, since I require a workflow to get that information, I’m saying I don't have a static reply. I need to use an Experience workflow in order to generate that reply. However, if you have a page that's just static information, it doesn't require anything dynamic, you can just directly render it. It's kind of a shortcut without requiring that workflow in the middle or you can simply redirect them somewhere else. But in this case, when this endpoint is requested, it will trigger a workflow. That's this workflow right here. Again, at the very top, we've got the endpoint trigger. You can see here, I’ve selected that appropriate endpoint. Now, we're going to look up that device. The actual device itself was parsed in. If you look here at the data payload, this data object, all of our triggers in Losant will put the starting information on the data object. So, then what we've got here is params that deviceId, you can see right underneath that the path that was actually requested. We parsed that deviceId out automatically and put it on that variable and it's very easy for you to access. Then when I do that get-device, I can then reference that deviceId variable, pull that out of the payload, get the Losant version of device and I put that back on the payload at working.truck. Working is just a standard that I’ve adopted, a lot of people in Losant have adopted as a place to put their working information as they're building workflows and adding and removing stuff from payloads. I like to keep that data object clean, always representing the original information that started the payload, started the workflow. And then anything I add, I put it under a working object. You can see here at the top, that truck information is right here inside that working object. That's just a standard I’ve adopted. You can really put it wherever you'd like. Then as Scott showed, the system, these trucks are made up of multiple different devices. What we have to do is get the appropriate GPS device that's linked to this truck. On every device, there is a truck tag that demonstrates or is defined with kind of the internal identifier of that truck. If I expand this truck object on the right, we'll see tags and then truck. That's the identifier. That's what I can use to link all these devices together. What I need to do is, well, give me the device that is linked to this truck but also is the GPS type. So, that's going to return me the correct GPS object. Then there's a relatively new feature that's really helpful in this case, which is requesting that I also get the composite state. In our world, the composite state is the most recently reported attribute or value of all attributes combined together. If you've got a device reporting attributes at different times, the composite state will take all those together, the last time each of them was reported and put them on one object and it will include the time that it was also reported. That's just a quick way to get the most recent GPS data without having to do another node to do that lookup. If I check out this object, working at GPS, we can see, if I expand that. This is the whole object or the device itself and then composite states right up here. I get those attributes and I expand on location and I get the value and the time, last time that location was reported. That's a really helpful hint if you are requesting devices and also want to know their most recent state information, definitely check out that composite state. Then we're using the address reverse lookup. This is actually a contributed node in our node catalog. This allows us to take a GPS coordinate, send it to Google Maps API and they will send us back an address. Custom nodes are usually down here at the bottom when they're imported. If you're unfamiliar with our node catalog, it's in GitHub. You can just kind of google Losant node catalog, you'll land here. It's got a lot of useful nodes that we didn't quite put in the core collection of nodes but it solves a lot of common problems. If you are a partner that has a connected solution out there and you want to get your service exposed to the Losant community, we would love you to contribute a node to this. You can actually build and contribute a node back to this. So, on your free time, go ahead and check this out and we'd love to get your node in this catalog. If we do look at that raw output from Google, you'll see we get the address but we also get the city and the state and zip and the country but we really don't need all of this extra. Our customers kind of know we're in Cincinnati, the name of our company is CincyFoodTrucks, so all we need is the first part here. So, these next two nodes are just cleaning it up. We're going to split it on the comma. We're going to go ahead and just take the first one. So, the actual address which is here just includes the first part of that. Then we're going to create a tweet. We're actually going to populate that tweet box from the cloud. This will allow Scott, as the owner and manager of this truck, fleet of trucks, to control, from a central location, the default tweet. We're going to go ahead and take the friendly name and the name of these devices themselves are kind of that internal name but we put a tag on them that is that friendlier name that we'd like to display. We're going to say that truck is at that address we just got. If they have a special, added, there's a nice little handlebar helpful for if. We're going to go ahead and say today's special is whatever was defined in there. A little message saying, "See you there," and then we're going to go ahead and put that Google Maps link and that's where we pull that composite state information. I’ve put all this information back on the payload at this working object and that's what we're going to go and send to the page in order to be rendered. The endpoint reply basically says, okay, I’ve received a request from a browser. What am I supposed to send back to them? In this case, we're sending back the page itself, an Experience page. We're going to send back the truck details page and then we're going to send back a payload path. We're going to send into that page that working object as a payload path. So, it can have a template that renders all the information available to it inside that object. Then if I go into the page itself, this is all the HTML that's required to essentially render this view. We got a name, a picture, coordinates, address, and a form to submit that tweet. So, zoom in a little bit on this, you can see that same information. We've got the friendly name. Again, because I sent it that working object that's available in templates on-page data. So, I got that truck, I got the tags, the friendly names there. There's an image tag on there which links back into our files’ functionality for where the picture of that truck is. We've got that composite state. So, I can put the GPS coordinates on the page and then we've got that reverse address lookup I can put the address on there. And then we've got the actual form itself which is down here. The first thing we do is set the text area. We go and pre-populate it with that tweet. The driver can change it if they want but when they hit that tweet button, this is what's going to happen. Again, this is standard HTML, CSS, and JavaScript. When they submit this form, it's going to do a post back to this endpoint/tweet. Let's go and check that one out real quick. This will start demonstrating how I receive user feedback from a custom experience back into Losant. Again, just like before, this is kind of the flow that's going to happen. The endpoint request comes in, we're going to post to a new route, new endpoint called tweet and then that's going to trigger a workflow. Again, since this is a post, we're going to include, we're going to receive information about that form. If we look at that form directly, you'll see this field has a name. We go ahead and automatically parse that for you and we're going to put that on the body. Any form element you have, we're going to parse that and provide all the values back to you. And then this doesn't end in a page because all we're going to do is just redirect. So, an endpoint reply doesn't have to render content back to user. We're going to redirect them back home back to that list of trucks. Again, let's start with the endpoint itself. Again, we're posting this time instead of getting, receiving that information on tweet. Again, allow any authenticated users. If they're not authenticated, send them back to login. Again, no static reply. We need a workflow to handle this information. Here is that workflow. Again, we just trigger on that endpoint, post tweet. You can see the data object over here that got fired with that. The body includes that tweet contents that was sent to us and now, we can use that in any way that we want. In this case, we're actually just tweeting it. We've got a tweet node and we're just going to send that tweet contents directly out through Twitter. But this is a really interesting spot depending on your use case. Think about some delivery drivers, once they arrive or a service tech or like a plumber or an electrician, once they arrive at a location, they can go in this interface and just click a button and your system will know on the other end, what customer they're doing some work for. It can maybe send them a text message that "Hey, your service person has just arrived. Go let them in your front door so they can get their work done." But in this case, we've just done the tweet. Just like that previous diagram showed, we're not replying with any data. We're just going to do a redirect and send them right back home and that kind of ends this whole flow. To reiterate, once again, this view displays information from the platform, accepts user input back, and then tweets it out. And then one little exciting piece of product announcement, since I’ve got your attention anyway. You might have seen it briefly if you're paying very close attention to Scott's screen when he went into the editor but today, we did release a new piece of functionality for our GPS maps to allow you to cluster points that are near each other. Look for that blog article with more details either today or tomorrow. If you've got thousands of devices on your map, seeing thousands of pins all over the place sometimes isn't very useful. This new functionality will just group pins that are close to each other, make that map a little bit more usable. With that, I’m going to hand this back to Craig for any questions.
Craig: Thank you, Brandon, I really appreciate it. Just give me one second, guys. I’m going to go ahead and share my screen on a couple resources that are available to you. I know Brandon and Scott both covered a lot of territory, there are a lot of technical details involved in what they did. We have some great resources for you to help as you're building your solution. First and foremost, I’m sure many of you are familiar but Losant docs are a fantastic place for referential information on the platform. Literally, every single feature as Brandon just showed, that new one that just went out, is well documented and has a ton of information to help you along your way. The Losant forums are a great place to see previous questions that have been asked before. Maybe something that you're struggling with has been a question someone else has had and it's been answered. If not, please go ahead and post your question there. Our community and our engineering team are monitoring the forums. So, it's a great place to get answers if you have any how-to questions. And then we also have Losant University. This is an evolving resource for us. It's video-based content, really to do a deeper dive on some of the components and how to accomplish what you want to do when you're building your application or solution. This will continue to grow and we think this will be a huge part of our education resources moving forward. And then we also have these things we call hands-on tutorials that are now available. If you go to this URL, you can check out some tutorials that provide resources around particular use cases. Before I take full questions, I wanted to highlight one more thing, since we're going a little bit past time, which is, we will be doing an inventory tracking webinar on April 16th. We would love to have you and then we will soon schedule a platform update webinar with some new features that are on the way. With all that, we're going to go to questions. The first question that we received from Brent which is, how is the geofence defined and is it visible on the map? How is the geofence data passed from the Edge device to the platform? Scott, maybe this is a good question for you. I know you were working with the geofences a little bit but maybe you can talk a little bit more about perhaps how to create the geofences and how to show those on your map.
Scott: Sure. Glad to. Right now, the geofence is a node in the workflow. It is not something that is viewable on the map itself right now. However, I think that is a great feature request that we might be able to add in the future.
Craig: Awesome. Thank you, Scott. There's another great question which is, multiple devices are grouped into a truck. Is that accomplished like explicitly via a device tag or by the peripheral designation within Losant's device management framework? Scott, do you want to talk a little bit about how you sort of set up your architecture when you are sort of grouping devices that were within a single truck?
Scott: Sure. It really can be done... It's depending upon your sensors and their ability to communicate or not. I did some research on the typical sensors that are available for moving vehicles and found that the sensors themselves don't have the ability to transmit directly to the internet. So, we had to use a gateway to accurately convey how that goes. Now, the grouping that we did, we did through device tags. That way, we could easily see all of the sensors or all the devices that we've defined for a particular area. Using the gateway was really just more for the actual communications from the sensors to the Losant platform.
Craig: Awesome. Thank you, Scott. We had a question earlier that was in regard to tracking mechanisms or a way to track. Obviously, GPS modules are a really common way on the device side and network side to get that information. Brandon, maybe you can share some other ways that we see sort of tracking applications used?
Brandon: Yeah, absolutely. In most cases, it's usually a trade-off between battery life and accuracy. An actual GPS module is going to be the most accurate but oftentimes, consumes the most battery. So, getting very active, kind of like real-time location on a battery-powered use case, you may not be able to do that with a GPS. It's one of those where you have to kind of wake it up every once in a while, do a reading, go back to sleep. On a thing like a truck, where you might be able to just plug directly into the truck's power, which is pretty common, you can run a GPS module all the time. On the other side, if you need to get into lower power things, we've seen some fair amount of success with cellular triangulation. A lot of the cellular companies themselves will offer this as a service. Actually, Google Maps, one of their APIs will do this. You'll give it kind of the codes when you do a cell scan, most cell modems have this built-in. You can pass that to Google and it will give you a GPS lookup on that. Again, your accuracy is going to go way down but your battery life can go way up. Then there is some of the kind of the LoRaWAN stuff. Sigfox is maybe the most widespread. It's big in Europe, a little less roll out in the US. However, they do have a location-based service. So, if your device comes online and sends some sensor information, you can ask Sigfox to triangulate that. If that sensor information was picked up by multiple Sigfox towers, it will triangulate as best it can and give you a location information from that. I would say GPS is going to be the most power-hungry. Cellular triangulation, kind of second-most and something like a Sigfox or maybe just LoRaWAN directly, if you've got multiple receivers, will be the third most.
Craig: Awesome. Thank you, Brandon. I think that leads really well into two questions I just saw that came up recently which is, it actually possible to use LoRaWAN infrastructure or communication with Losant? And if so, maybe at a high level, how would you go about that, Brandon?
Brandon: Yeah. There's definitely a couple ways. One, is your actual device could just have a GPS module on it and then use like a LoRaWAN to communicate that location information, you'll lose a little power or use a little power for the GPS module but you'll gain a little bit back because LoRaWAN is a very low power transmission protocol. And then if you've got like a large or huge campus or sometimes cities have full LoRaWAN coverage, there are some triangulation capabilities you can do there if you kind of tag each base station with its known location, you can do some pretty cool triangulation with that. But we do see a lot, especially even in kind of the Sigfox world, which is kind of a managed LoRa rollout on the high level, is the device can use a GPS module to grab the location and kind of transmit that location over something like LoRaWAN.
Craig: Awesome, thank you. We also are lucky enough to have Taron Foxworth on the call today. He leads Education and Evangelism at Losant. I think this next question might be good for him. It is, how does one add a note to a workflow note or I guess rather my workflow itself? Taron, you want to help with that one.
Taron Foxworth: Oh, yeah. 100%. If you actually go to the workflow engine itself and you look in the top bar, there, you will see a little square and a plus icon and that's how you add a note. We tried to keep it pretty simple. You kind of hover over and see "Add Note." But the notes are really useful. In this case, we use it to communicate what was going on in the workflow but we see it typically used for communicating across teams. So, when you make a change or when you want to explain what a workflow is doing, those are really helpful for that.
Craig: Awesome. Thank you, Taron. We had a question which was, is it possible to track assets inside of facilities? I think there's probably a couple different answers to this. Brandon, do you want to talk about maybe some out of the box ways that this could be done using Losant as a part of an overall architecture today, indoor asset tracking?
Brandon: Yeah, yeah. Indoor acid tracking is probably equally large surface area than outside. First and foremost, we've got a great partner, Aruba, which is a subsidiary of Hewlett Packard Enterprise. They have a product called Meridian, which is kind of a managed indoor asset tracking based on Bluetooth beacons. What's good about that one is if you're already using Aruba as your kind of wi-fi networking infrastructure, it's a competitor to Cisco, you can probably use Meridian with zero additional infrastructure costs outside the beacons. In that case, you just put a Bluetooth beacon on whatever you want to track and it will triangulate it based on the strength of a signal relative to each wi-fi access point you have. And then there are others. There's a company called like DecaWave, which is kind of a little more proprietary. What we see most common is the Bluetooth because the barrier to cost or barrier in terms of cost is a little bit lower. But it's a pretty exciting space and there's a lot of startups and a lot of companies getting in there and getting that precision and resolution a little bit lower and kind of where people would like it to be. But definitely check out Meridian and see if it works for your use case.
Craig: Awesome. Thank you, Brandon. We have a question that I think would be perfect, Taron. It talks about if our platform is device-agnostic or is there a list of compatible devices and sensors that maybe we have or maintained within the platform? Taron, you want to talk a little bit about how we think about devices and sensors and connecting those to Losant?
Taron: Yeah. I can truly touch on that. We think of Losant as a very horizontal platform. What we try to do is make sure that you can connect any types of devices or networks to us. To us, I like to think of Losant as a data up platform, so we kind of operate from the data layer up. Generally, how you can imagine or how you can think about if a device can connect to Losant is we support two main protocols, MQTT and HTTP. If your device can connect via MQTT, that mean that means via a Losant broker or even integration with a third-party broker, it can connect to Losant. Or if your device is able to send HTTP messages, it can connect directly to Losant. Or, and the third option is through a third party or an API because then you can use something like the workflow engine to call out to that service and then pull that data in. That's generally how we think about device support within Losant. So, if they can send a message to us over the internet and that might be even via a gateway or MQTT and HTTP, it will work with Losant.
Craig: Awesome. Thank you, Taron.
Taron: You're very welcome.
Craig: It looks like maybe we have one more question to cover which is, how can I build my own custom node like the address lookup node. Taron, actually, this might be another good one for you.
Taron: Yeah. I really like the custom nodes within the workflow engine because actually building a workflow is really simple. You just drag and drop. As long as you know your logic, building the workflow is really easy. Building a custom node is just as easy because custom nodes are actually comprised of nodes themselves. So, as you're working within Losant, if you would like to build a custom node, you can easily do so just out of some other nodes.
Craig: Awesome. Thank you, Taron. With that, I think we've answered all the questions. I saw a few that were a little bit more technical. We'll take those offline and follow up directly. Just wanted to say thank you again everyone for joining us on today's webinar. We hope you had a great time, you learned some things about Losant and asset tracking. If you have any questions, please follow up with us directly or at the site. Other than that, we hope you join us for our next webinar. Everyone, have a great day.