
The Problem: Losant's front door callbox simply forwards to one of our team members' phones; should he be unavailable, the rest of the team never finds out that a visitor (or more frequently, a delivery) is waiting to get in.
Thankfully, since we can't afford a receptionist are a cutting-edge technology company, we have built a solution that you too can implement.
In this post, we'll combine functionality from Twilio, Slack and Losant to build a digital receptionist. Our bot will answer our front door callbox, alert the team as to who is there and allow us to reply to our visitors – including remotely opening the door. And most importantly, the bot is 100% cloud-based; we'll do this all without touching a single wire.
The Solution
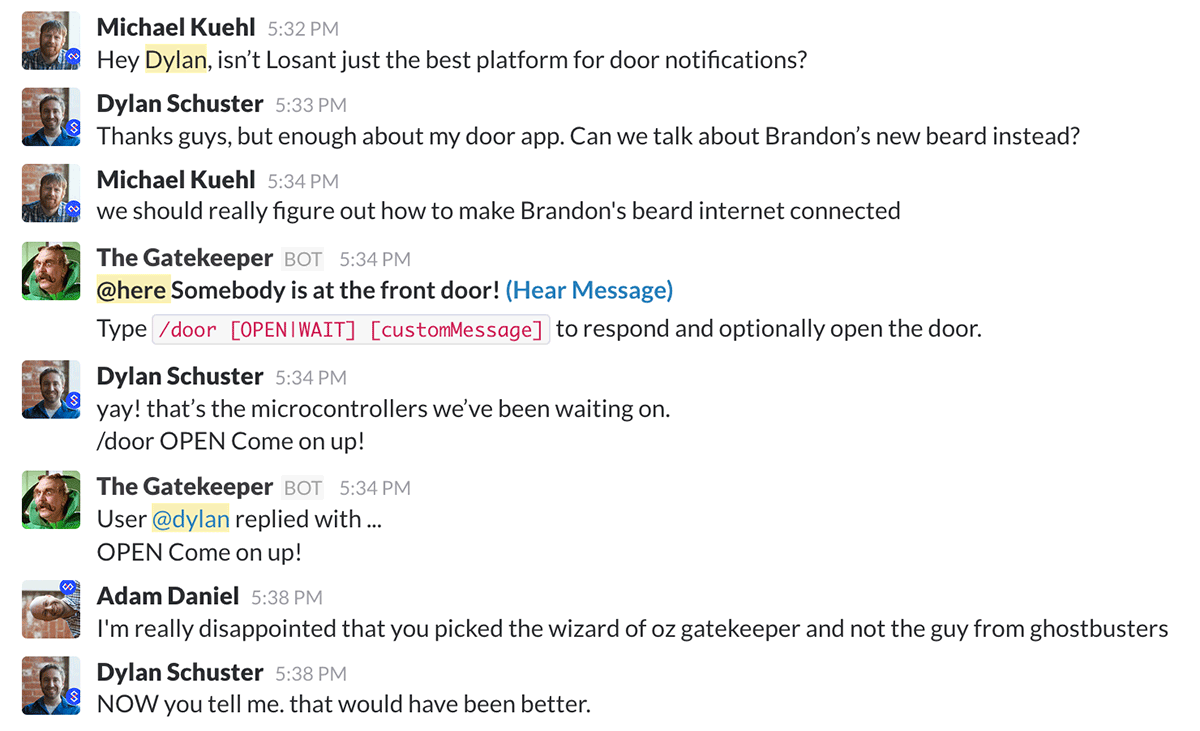
The whole callbox interaction goes as follows:
- A visitor calls the Losant office (a Twilio number) from our front door callbox.
- We issue an automated voice response telling the visitor to state their business.
- The visitor is asked to wait. Meanwhile, their recording is posted to a Losant Slack channel.
- From the Slack channel, any Losant team member can listen to the recording and issue a custom reply. Optionally, we may also open the door for the visitor.
- The visitor hears our reply through the callbox and either enters or waits to be let in. Or, if no reply is issued, the visitor is told that nobody is available and to try again later.
Everything we're doing here is possible because of Losant's Webhook Reply node, which allows us to issue custom responses to webhook requests based on existing device data and workflow runs. In this case, we're using a Losant workflow as a low-rent HTTP server. We're simply receiving requests through our webhooks and issuing responses to those requests – sometimes immediately, sometimes after receiving input from other webhook responses.
Losant Webhook Setup
First, let's create the webhooks in Losant as we'll need these URLs in subsequent steps.
- Log in to your Losant account. If you don't have one yet, you can create a new account for free.
- Create a new application. Name it anything you'd like. (I called mine "Front Door".)
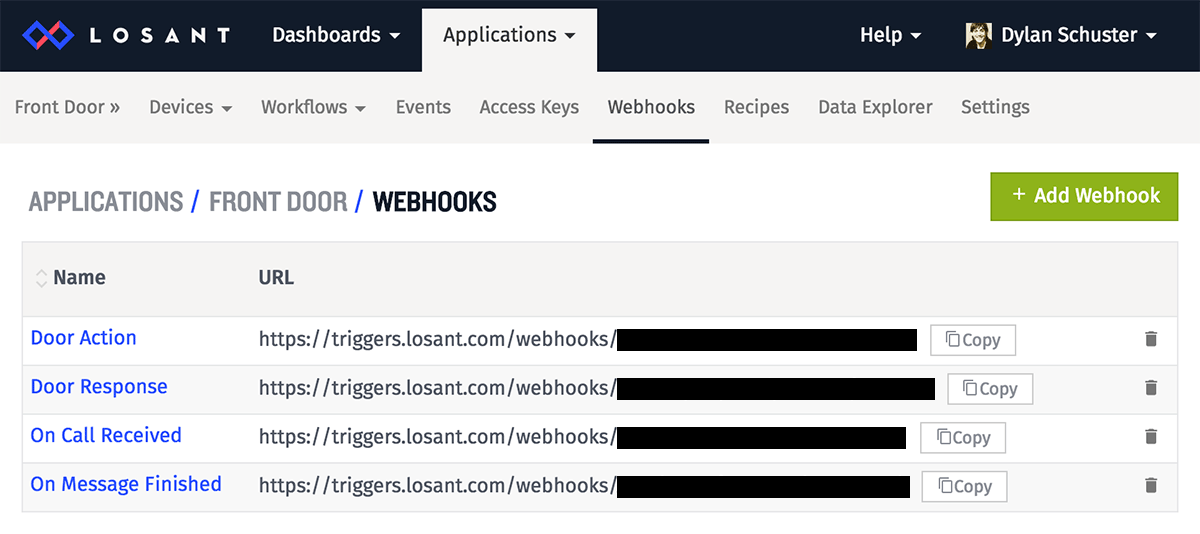
- Now, you'll need to create four separate webhooks. You can name the webhooks anything you'd like, but to keep things straight with the provided workflow, I recommend calling them ...
- "On Call Received"
- "On Message Finished"
- "Door Action"
- "Door Response"
Twilio Number Configuration
Now let's register a number for our callbox and configure the action to take when it receives a call.
- Create a Twilio account (it's free!) or sign in if you already have one.
- From your account console, click "#" (Phone Numbers) in the left column, and then add a new phone number to your account. This will be the number for your callbox, so make sure it has voice capabilities and that it is local to your area.
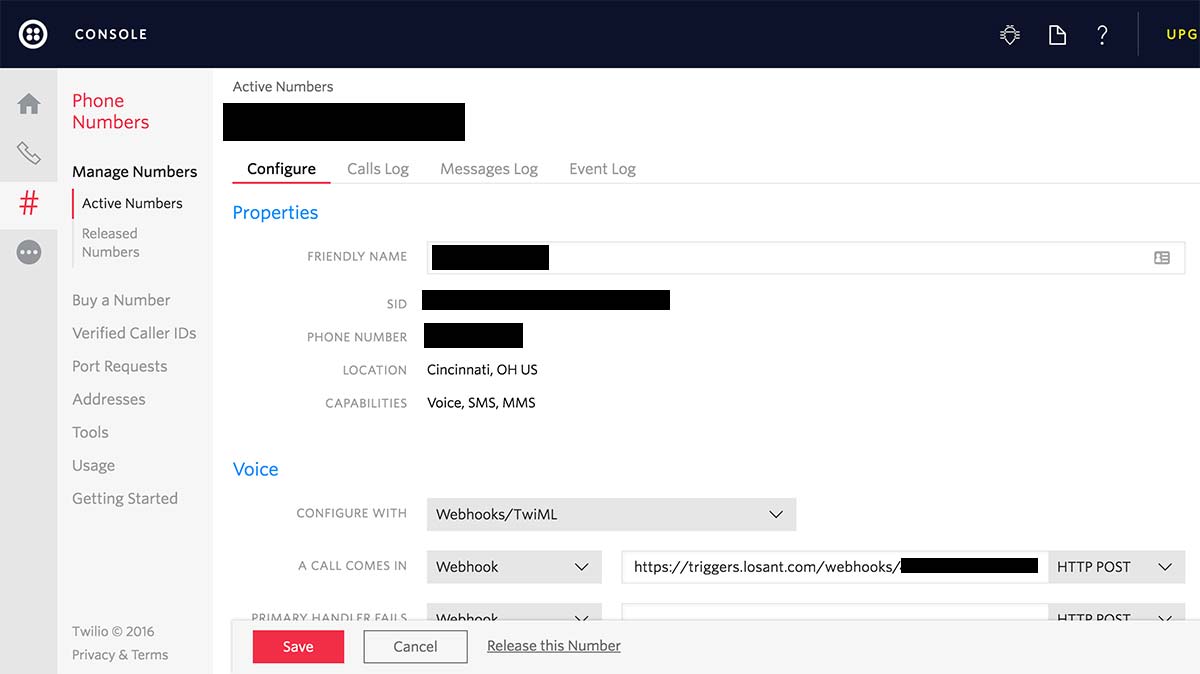
- From your number's Configuration tab, under the "Voice" section ...
- Set "Configure With" to "Webhooks/TwiML".
- For "A Call Comes In", set the dropdown to "Webhook".
- Paste in the URL to your Losant "Front Door Call Received" webhook.
- Set the method at the end of the URL to "HTTP POST".
Slack Webhook and Slash Command
Next, let's set up the proper integrations in Slack. From a web browser (not a Slack client), sign in to your Slack account. New to Slack? You can also create a new team for free.
Set Up the Webhook
Incoming Webhooks allow users to send channel messages to Slack at a distinct URL. That message is then printed within the chosen team channel.

- Add a new Incoming Webhook to your Slack team. From this screen, select the channel you'd like to use for your door notification, then click "Add Incoming WebHooks integration".
- You'll see the new Webhook URL near the top of the page. Copy this URL to a safe place, as we'll need it when configuring our Losant workflow.
- Optionally, you can set a name and icon for messages posted by this webhook. Scroll down to the "Integration Settings" section and set the name and icon. (I'm using The Gatekeeper from the Wizard of Oz.) Then, click "Save Settings".
 "Who rang that bell?!?"
Set Up the Slash Command
Slash Commands allow users to interact with third-party services directly through the Slack interface. Typically this sends data to a URL of your choosing, and that URL responds with a message of some kind.
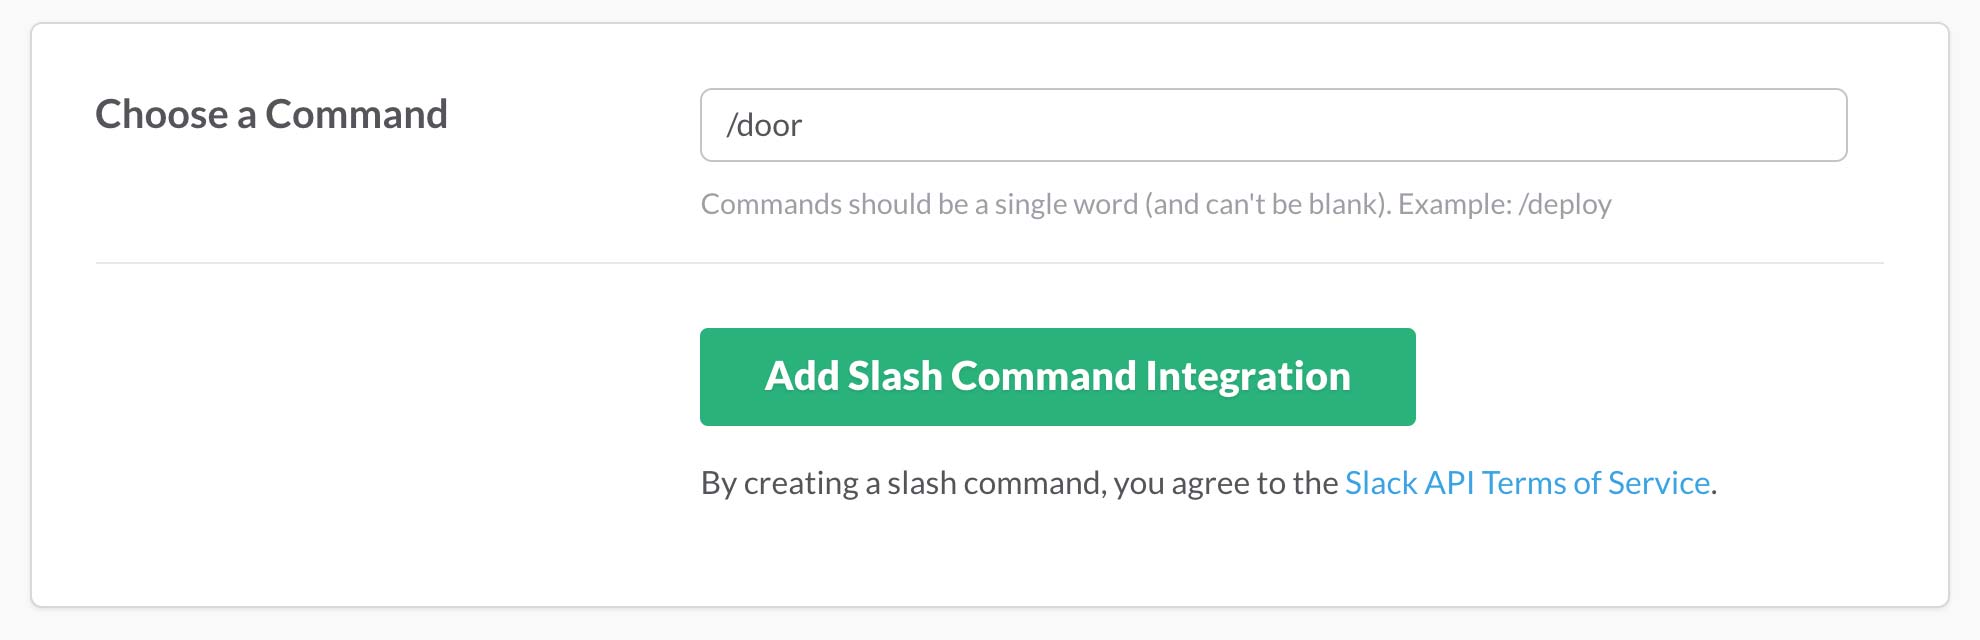
- Add a new Slash Command to your Slack team. This is what the Slack user will type to interact with your callbox; in my case I chose "/door". Then click "Add Slash Command Integration".
- On the next screen, in the "Integration Settings" section ...
- In the "URL" field, paste in your "Door Action" Losant webhook URL.
- Leave the "Method" as "POST".
- Copy the "Token" to a safe place, as we'll need this value when configuring our workflow.
- For the "Name" and "Icon", use the same values you used in your Slack webhook configuration (if you set them).
- Optionally, check the "Show this command in the autocomplete list" checkbox. I entered "Respond to the front door callbox" in the "Description" field and "[OPEN|WAIT] [customMessage]" in the "Usage Hint" field.
- Click "Save Integration" to complete the Slack setup.
Losant Workflow Setup
Finally, return to your Losant account and hook everything together.

- Create a new workflow within the application you created earlier. Name it anything you'd like (such as "Front Door").
- Download this workflow and then import it into the new workflow.
- You'll need to map your application's webhooks to each of the Webhook trigger nodes at the top of the workflow. Luckily, if you named your webhooks as advised above, each webhook's name will match the workflow node title. Simply select the corresponding webhook name in each node's configuration panel.
- Finally, you'll need to set some values in the workflow's Globals tab. Each of these should be of a "String" Data Type ...
- onMessageFinishedUrl: the URL of your Losant "On Message Finished" webhook
- doorResponseUrl: the URL of your Losant "Door Response" webhook
- openDoorCode: the touchtones that must be pressed to unlock your front door
- slackUrl: the URL of your Slack Incoming Webhook
- slackToken: the token assigned to your Slack Slash Command
What's Happening Here?
Each node contains a detailed description, but in summation, here's how information moves through the workflow:
- When somebody calls our Twilio number from the callbox, Twilio sends an HTTP request to our "On Call Received" Losant webhook. This webhook immediately replies with a TwiML file containing our greeting and a request for the visitor to record a message.
- The <Record> TwiML tag requires an action URL for handling the user's voice recording. In our case, we're making a request to our "On Message Finished" Losant webhook on completion.
- The "On Message Finished" request does three things:
- Thanks the visitor and asks them to wait.
- Forwards the Twilio call to our "Door Response" webhook.
- Sends a message to the Losant Slack team (via our Slack Incoming Webhook) alerting us that somebody is at the door. The message contains a link to the visitor's voice recording.
- The "Door Response" keeps the Twilio call alive while the Losant team responds to the visitor at the door.
- We store this webhook's "replyId" in Workflow Storage so that we can reply to it from a workflow branch other than the branch we're currently on.
- If nobody replies to the Slack alert, the "Door Response" webhook issues its own response telling the visitor that nobody is available right now.
- Issuing a slash command in Slack sends a request to our "Door Action" webhook.
- If there is a visitor at the door, the slash command text is parsed for how to handle the response. This data is sent as the response to the "Door Response" webhook request, which is spoken through the callbox and completes the Twilio call. And if the Slack user opted to open the door for the visitor, the touchtones necessary to trigger the door unlocking will play at the end of the message.
- As a response to the "Door Action" webhook, we generate a Slack message for everybody in the channel to see who replied to the visitor and what they had to say.
- If nobody is at the door at that time, the user is told as much in Slack via the "Door Action" webhook's reply node.
What's Next?
There's a lot more we can do here to expand our bot's functionality. For example:
- Have Twilio transcribe the user's message and then post the transcription to Slack.
- Add additional canned responses to the application.
- Forward the call to a designated Losant team member if nobody answers the visitor via Slack.
We'd love to hear how you're using Losant webhooks to integrate various cloud services, including on projects like this one. Please let us know in the comments!