
With onboard WiFi and Bluetooth, the Raspberry Pi 3 is the most exciting and capable board that the Raspberry Pi Foundation has released. This article provides step-by-step instructions to get your Raspberry Pi 3 up and running.
In order to get started, you'll need a few things that don't come with the Raspberry Pi out of the box. These include:
- USB keyboard and mouse
- HDMI capable monitor
- MicroSD card with at least 8GB of storage
Step 1: Install NOOBS on MicroSD Card
By default, the Raspberry Pi does not have any operating system installed. NOOBS (new out of the box software) is a utility developed by Raspberry Pi in order to make setting up and installing an operating system on a new board extremely easy.
The first thing we have to do is put NOOBS on the microSD card. We'll then boot the Raspberry Pi from the microSD card and use NOOBS to easily install the Raspbian OS.
First download NOOBS and extract the zip to somewhere on your computer. When downloading, choose the offline version, not NOOBS LITE.
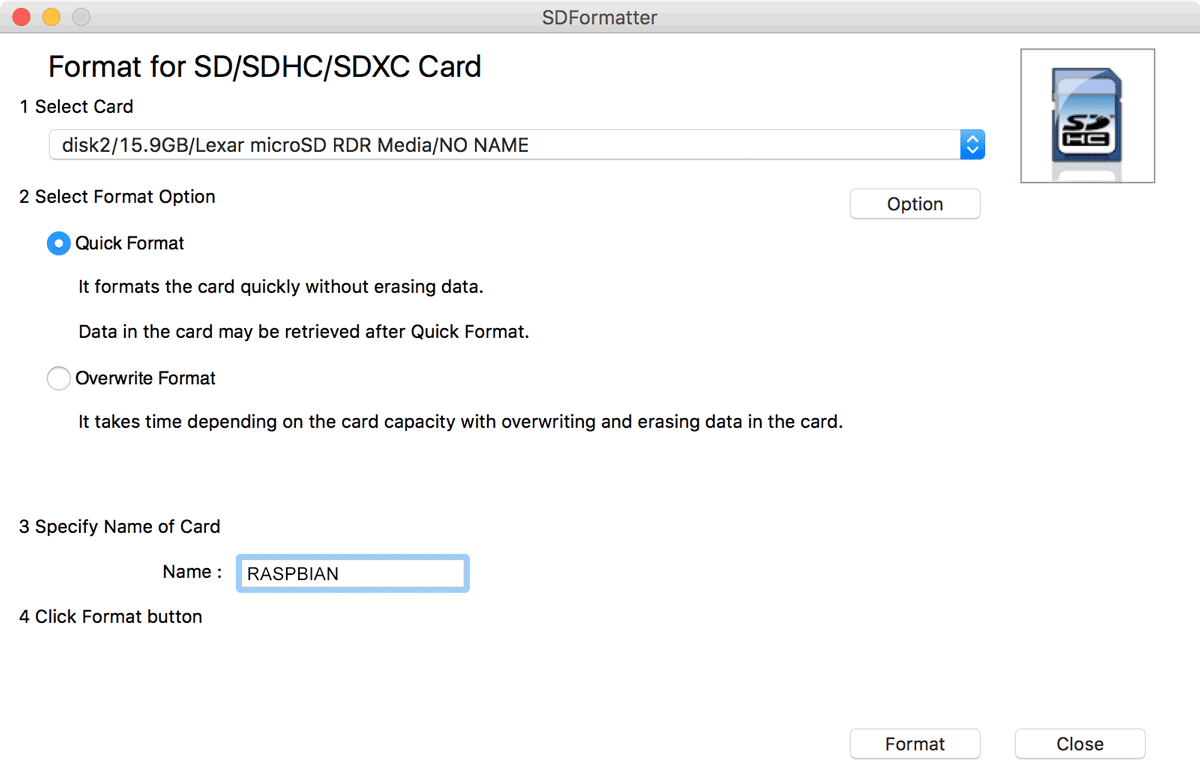
Next, format the microSD card using the SD Formatter application, which is available for both Windows and Mac. This simply erases anything already on the card before we copy NOOBS to it. I like to name my card RASPBIAN so I know what's on it.
Lastly, simply copy all the contents from the extracted NOOBS zip file onto the microSD card.
That completes the first step. NOOBS is now on the microSD card and ready to use.
Step 2: Install RaspBian
Insert the microSD card into the Raspberry Pi. The SD slot is on the bottom of the board. Next, plug in a keyboard, mouse, and monitor. Once those are connected, power it up using the micro USB port and the NOOBS installer should automatically boot up.
Some keyboards may not work very well with the Raspberry Pi, usually because they draw too much power. If your keyboard is acting weird or not working at all, try another one.
The first screen you'll see is NOOBS asking you what you'd like to install. There's likely only one option, which is Raspbian. Check the box next to its entry. Also make sure you set the language, which is at the very bottom of the screen. When ready, click the Install button. NOOBS will prompt you letting you know everything on the SD card will be overwritten. Select "Yes" to install Raspbian.
You'll see a progress bar for several minutes as it installs. Once done, your Raspberry Pi will reboot into Raspbian with a full desktop.
Step 3: Connect To WiFi
Since the Raspberry Pi 3 has built-in WiFi, connecting to your network is very simple. Click the network icon on the top-right, which looks like two monitors. It should drop down with a list of WiFi networks. Once you select your network, it should prompt you for a password. It will then connect and the icon will change to a typical WiFi icon to represent that it's connected.
Step 4: Install a Browser
Raspbian, by default, comes with the Epiphany web browser. While it does work, it's not the best browser in the world. I recommend installing Iceweasel, which is a fork of Firefox.
Open the terminal by clicking the terminal icon on the top-left. It looks like a monitor with a black screen.
Raspbian is a distribution of Debian, which means we can use Aptitude to install any number of applications. The first thing we need to do update the package list by running the following command:
sudo apt-get update
Once complete, install Iceweasel by running the following:
sudo apt-get install iceweasel
Once this is complete, you'll have an Iceweasel option under Menu -> Internet.
Step 5: Do Something Amazing
At this point you have a fully functional Raspberry Pi 3, connected to WiFi, with a good browser. Now it's up to you to turn this into something awesome. Since the Raspberry Pi is basically a Linux computer, you can pretty much do anything!