
There is a huge learning curve when it comes to building a small hardware project. To start, there are a lot of decisions that have to be made, from what hardware do I use to what library/framework to use to program the device. I do have great news: it is quickly getting better. As the community gets bigger and hardware gets cheaper, it will get easier create things in the physical world.
Ideally, one would wire up some hardware, plug it up to their machine, flash it with software (hopefully not written in C), and then it works. Realistically, we are not quite there yet. But, smart people are working on this perfect world. Andrew Chalkley, world leading JavaScript and Internet of Things researcher, is heading a group of talented developers creating a project called ThingsSDK. Their goal is to make it easier for professionals to build projects and products in the physical world. To make it even better, they are doing it with JavaScript ❤️.
In this tutorial, we are going to use JavaScript and the ThingsSDK toolkit to build a basic night light.
Materials:
- 7 Jumper Wires
- 2 Resistors
- LED
- Breadboard
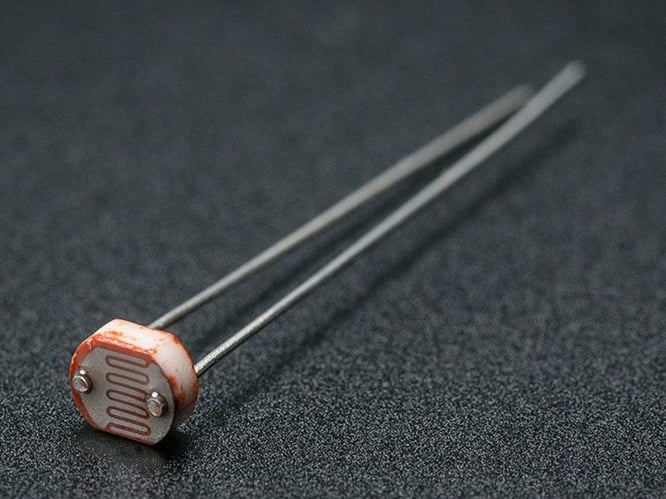
- Photocell (CdS photoresistor)
- NodeMCU
- Micro USB Cable
To measure light, we are going to use a low cost, low powered resistive sensor called a photocell. A resistive sensor will change its resistance based on what it is measuring.So in this case, the photocell resistance will change depending on how much light hits the surface of the cell. To measure light, we just need to gauge the resistance of the photocell.
Now, let's get started.
Get Your Environment Setup:
Install the USB Driver for the NodeMCU
See the installation instructions
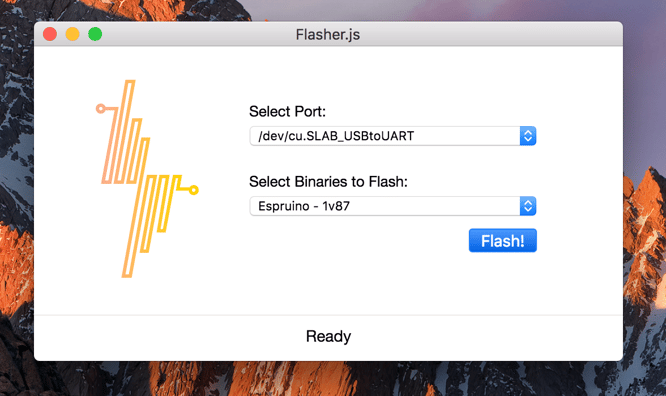
Download Flasher.js
Flasher.js allows us to flash the microcontroller with a JavaScript runtime. In this case, we are flashing a runtime called Espruino. Espruino is a low-powered JavaScript runtime built specifically for microcontrollers. Espruino is a little different from other hardware JavaScript frameworks you may have heard of, like Johnny-Five or Cylon.js. It runs JavaScript on the microcontroller itself and can function without being plugged into your computer.
Install the ThingsSDK CLI
The ThingsSDK CLI was created to help build, manage, and deploy JavaScript hardware projects to microcontrollers. The CLI is an npm package. So, If you don’t have node.js, you will need to install that first. Then, you can open up a terminal and just run:
$ npm install thingssdk/thingssdk-cli -g
Wire It Up:
Follow the Wiring Diagram Below
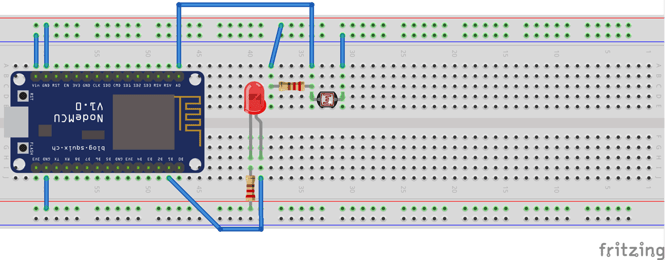
In this diagram, we are connecting the LED to D1, a GPIO pin, to turn the light on/off. Also, we need to use a pull-down resistor to read the resistance of the photocell. The analog input on the NodeMCU will measure the voltage of input. The change in voltage represents a shift in resistance.
Flashing the NodeMCU:
Open Up Flasher.js and Plug the USB Into the NodeMCU
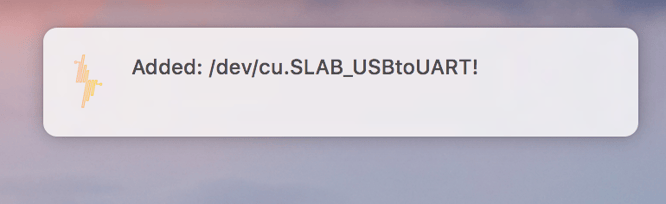
Once plugged in, you should get a notification confirming that Flasher.js found your NodeMCU. If not, make sure you have the drivers installed.
Now, let's flash our NodeMCU. Before flashing, make sure you select your device along with the latest version of Espruino.
Time To Write Some Code:
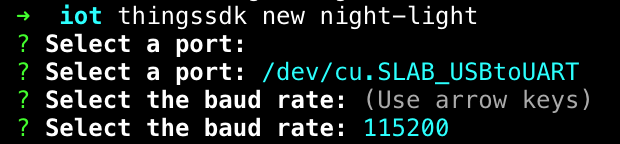
Use the CLI Tool to Scaffold a Project
We can create a new project by using the new command and giving it a project name.
$ thingssdk new night-light
The new command asks for two things: a port and a baud rate. The port you select will be the same one you selected in Flasher.js. The baud rate will always be 115200 while using the NodeMCU.
We also need to go into that directory and install our npm modules:
$ cd night-light && npm i
Update main.js
In main.js, copy/paste this code:
In the code, using setInterval, we read the resistance from the photocell every second. We use a threshold to determine if the light is detected. Photocells are best to determine the presence of light, not to measure it. A configurable threshold is needed because these photocells are very inaccurate. As mentioned in the Adafruit docs:
They are very low cost, easy to get in many sizes and specifications, but are very inaccurate. Each photocell sensor will act a little differently than the other, even if they are from the same batch. The variations can be really large, 50% or higher! For this reason, they shouldn't be used to try to determine precise light levels in lux or millicandela. Instead, you can expect to only be able to determine basic light changes.
Adafruit
Now that we have the light level, we can turn the light on/off based on the presence of light.
Side Note: You may notice that, in the code, we are writing to pin D5. It's not a mistake. If we look at the schematics for the NodeMCU, D1 is GPIO 5. Here is why we use D5 ( GPIO 5)in the code, but we plug the jumper wire into D1.
Deploy Code to NodeMCU
Now it's time to deploy our code to the Node MCU.
$ npm run push
When you generated code with the new command, it also came with a bunch of helpful scripts that are nicely packaged in npm run push. You can take a look at exactly what that script does in the package.json. If everything worked properly, you would see a REPL start with the light level being logged.
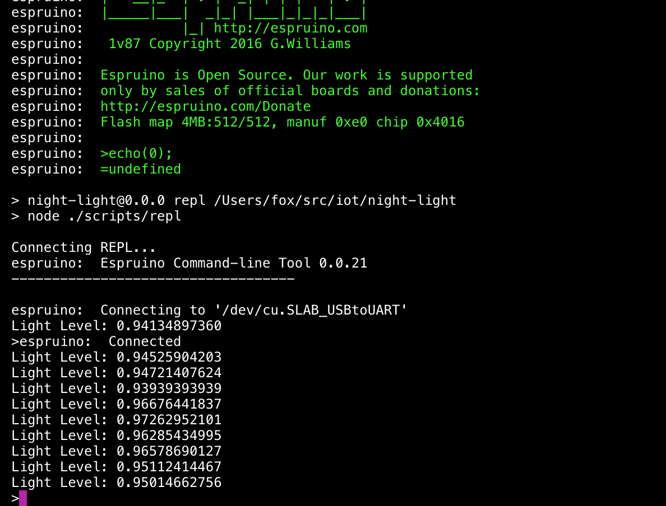
Now, if you turn off the lights, or cover the photocell with your finger, the LED should turn on.
That's A Wrap!
You now know how to use the ThingsSDK toolkit to program a microcontroller in JavaScript. The ThingsSDK project is still very new and in active development. So, now would be an excellent time to contribute. There is even a JavaScript IoT Slack!
To create and learn more, Losant has compiled a list of great tutorials and projects you can use for inspiration for more projects.
Any Feedback? Drop a comment below!