
Electric Imp and Losant share the same goals; we want to make building end-to-end IoT solutions easier, faster, more efficient, and more secure. Electric Imp provides a fully integrated edge-to-enterprise IoT connectivity platform that addresses the challenges of IoT device security, connectivity, and management at scale.
Once your devices are connected to the cloud with Electric Imp, the next step is to build an application that your users are going to interact with. Losant is an application enablement platform. We provide you the components and tools necessary to build end-user IoT applications. With Losant you can create dashboards, APIs, web pages, and full-blown user experiences directly from within the platform.
Together, Electric Imp and Losant is everything you need, from hardware to cloud, to create scalable, secure IoT applications. In this blog post, I am going to walk through how to connect an Electric Imp device to Losant and build a dashboard to visualize its sensor data.
Materials
To begin, you are going to need Electric Imp hardware. I used the Electric Imp impExplorer™ Kit.
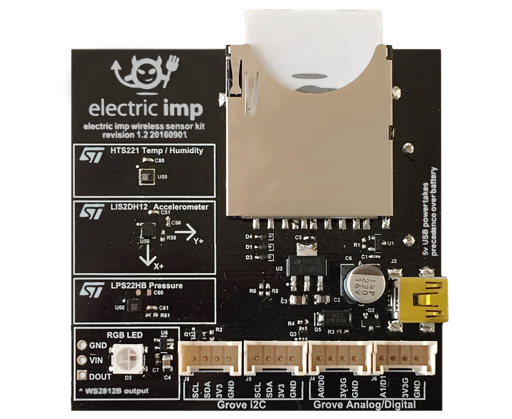
It contains three environment sensors, an LED, and four Grove expansion headers. It's an easy-to-use kit designed to test out the Electric Imp Platform.
Connecting the Hardware to the Electric Imp Cloud
To start, you will need to get your kit connected to the Electric Imp Cloud. Electric Imp has a great getting started article you can use to get your kit connected:
https://developer.electricimp.com/gettingstarted
Before diving into the rest of the article, I recommend getting familiar with the following Electric Imp concepts:
Once you're familiar with Electric Imp, we can program our device to connect to Losant.
Programming the Device
The Imp Dev Kit has a temperature, humidity, and pressure sensor. We can read those values and send the data to Losant. The Electric Imp device code reads the sensor data and periodically sends that data to the Imp Agent. The Imp Agent will then trigger a webhook to Losant every time it gets data from the device.
Losant and Electric Imp support bidirectional communication. So, our Imp Agent can also expose a simple web service to allow Losant to toggle the LED on the Imp Dev Kit from a workflow.
Now that you have a high-level understanding of how all the pieces fit, let’s build it.
Create a Losant Device
If you haven't already, sign up for a Losant account and create an application. Next, add a device to your Losant application for this project.
When you create the device, give it three attributes:
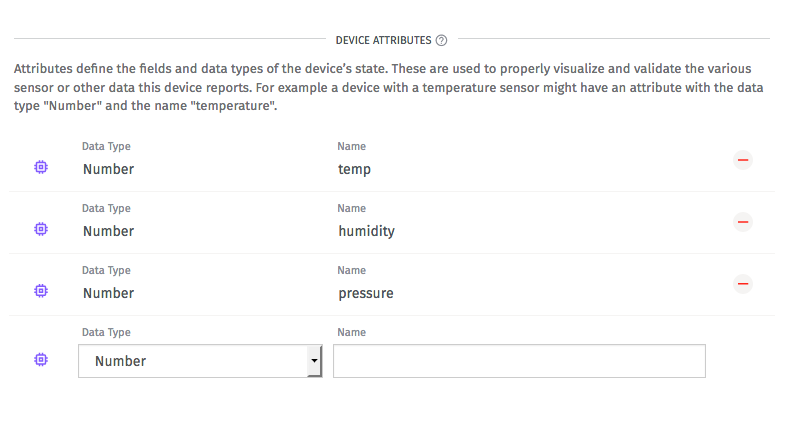
Attributes tell Losant what data your device is collecting. Next, we need to create a webhook.
Create Webhook
Using webhooks, the Imp agent can send data to Losant via a POST HTTP request. To create a webhook, go to “Webhooks” in the main application menu and select “Add Webhook”.
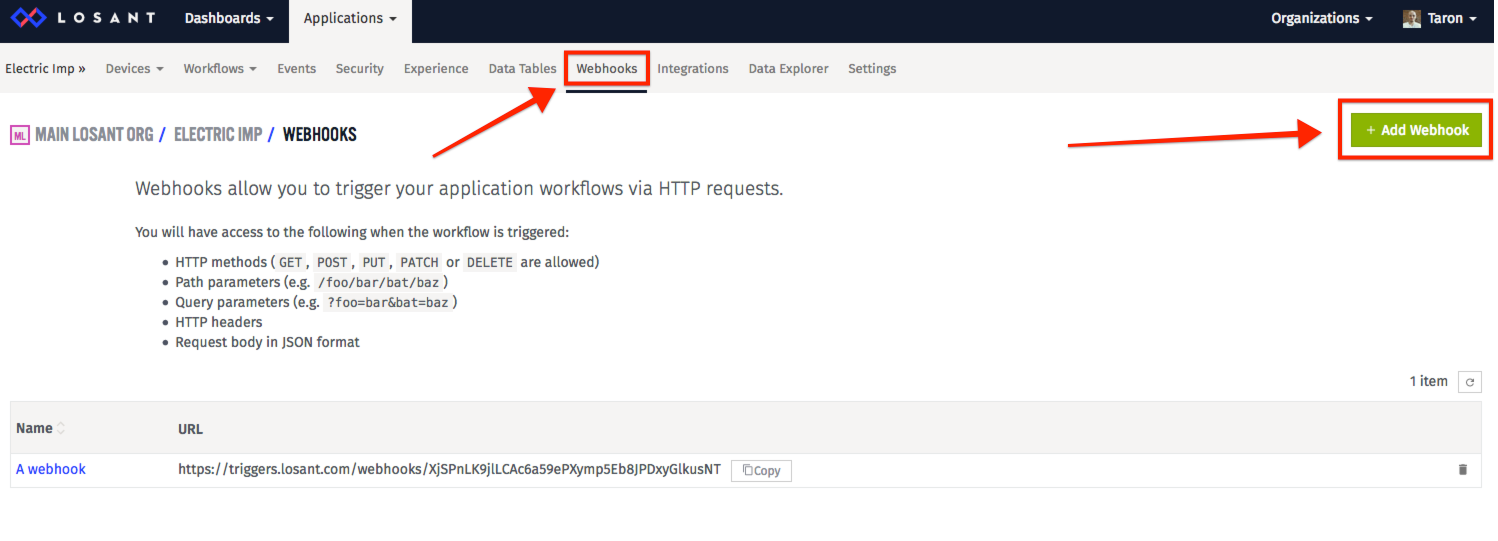
Then, once you give it a name and save, you will be able to see your webhook URL:
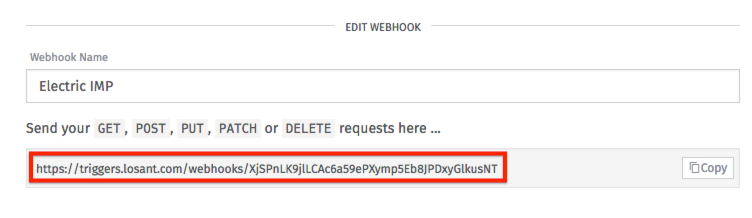
You will need this URL for the next step. Now, we have everything we need to program the Imp Dev Kit.
Imp Device Code
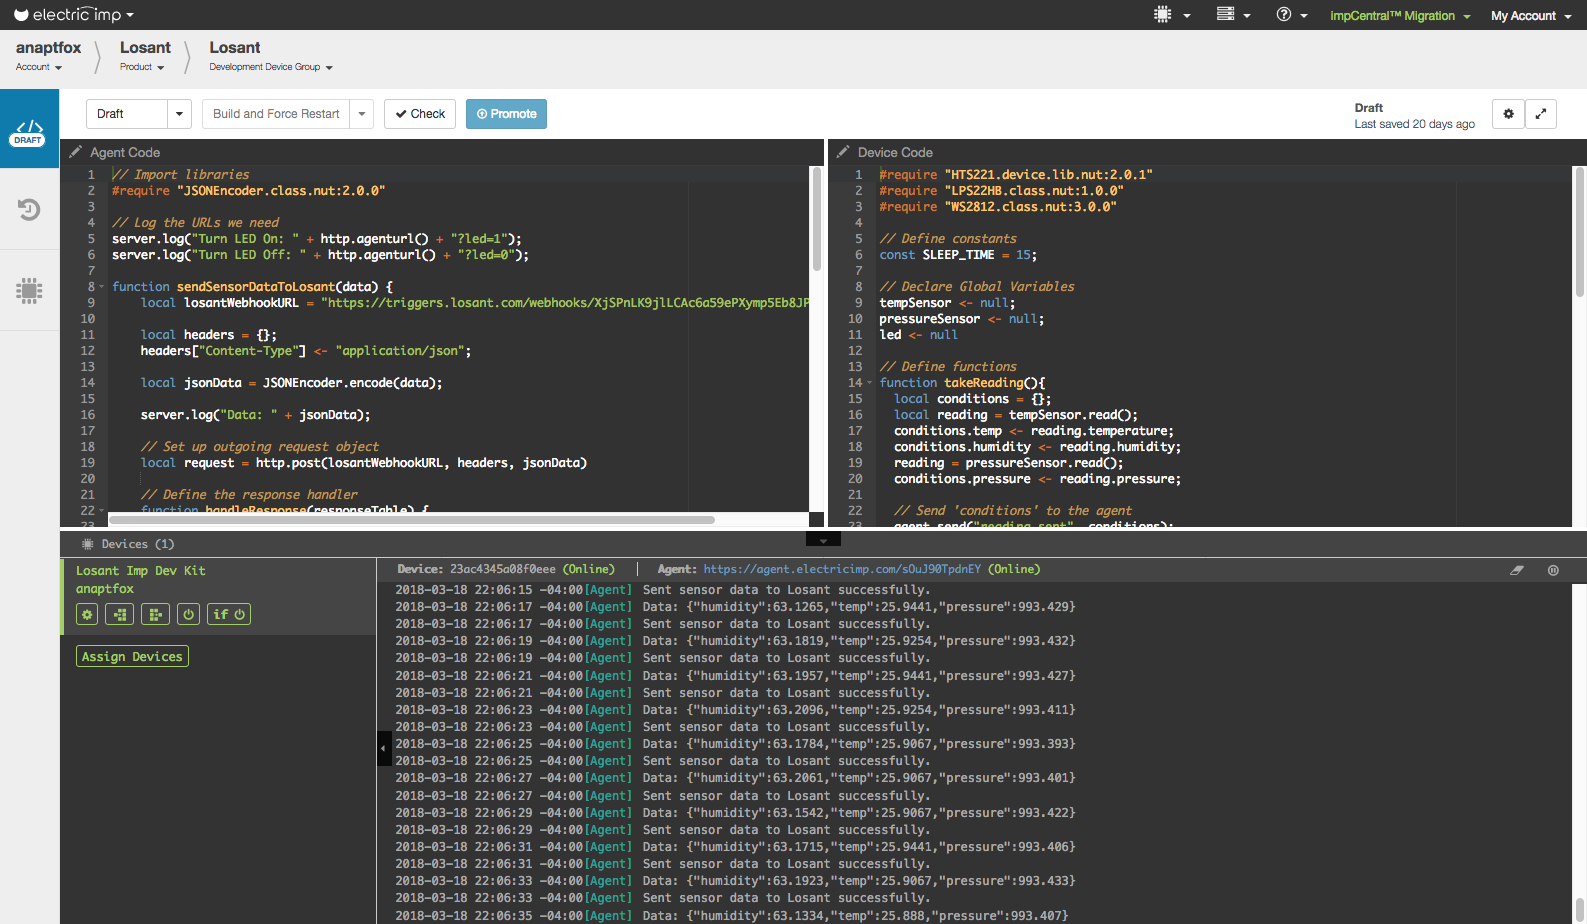
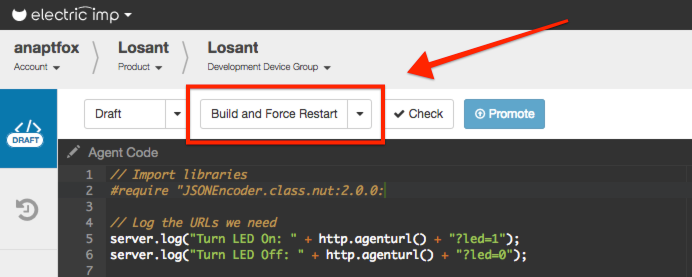
First we are going to write the device code. All the code for this project is available on GitHub. To begin programming your device, open up the Imp Central IDE:

In the top-right panel, we can copy/paste our device code:
If you went through the Electric Imp getting started guide, this code should look very familiar. It’s simply reading the temperature, humidity, and pressure, and then sending that to the Imp Agent every second. The “sending” happens on this line:
agent.send("reading.sent", conditions);On the last line, we also register a handler that will listen for messages from the Imp Agent. When the Imp Agent sends a message, it calls the setLedState, which will control our LED.
Agent Code
Next, we can program the Imp agent. In the top-left panel, we can copy/paste our device code:
First, update the LOSANT_WEBHOOK_URL with your webhook URL from Losant that you obtained earlier.
The agent code has two primary functions. First, it’s listening to the device code:
device.on("reading.sent", sendSensorDataToLosant);
Then, it sends the data to Losant via an HTTP Post request with the sendSensorDataToLosant function.
Simultaneously, the agent code is listening for HTTP requests:
http.onrequest(requestHandler);
When the agent receives a request, we look for a query parameter in the URL. Then, we can send that along to the device to toggle the LED:
device.send("set.led", ledState);
Deploy Agent and Device Code
Now that we have our agent and device code set up, we can push it to our Dev Kit:
Then, given that everything worked properly, you should be able to see successful logs reading and sending data:
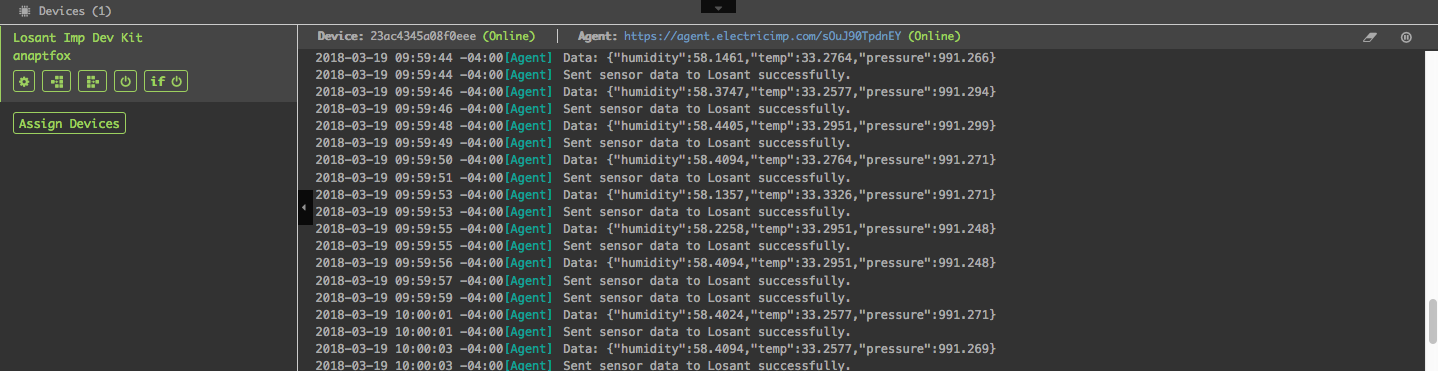
You are now successfully sending data to Losant. Let’s build a simple Losant workflow.
From Electric Imp To Losant
Since we are sending the data to Losant with a webhook, we can use this to trigger a workflow. This workflow can associate the sensor data to the Losant device we created earlier. We can easily do this with a Webhook Trigger Node and a Device State Node.
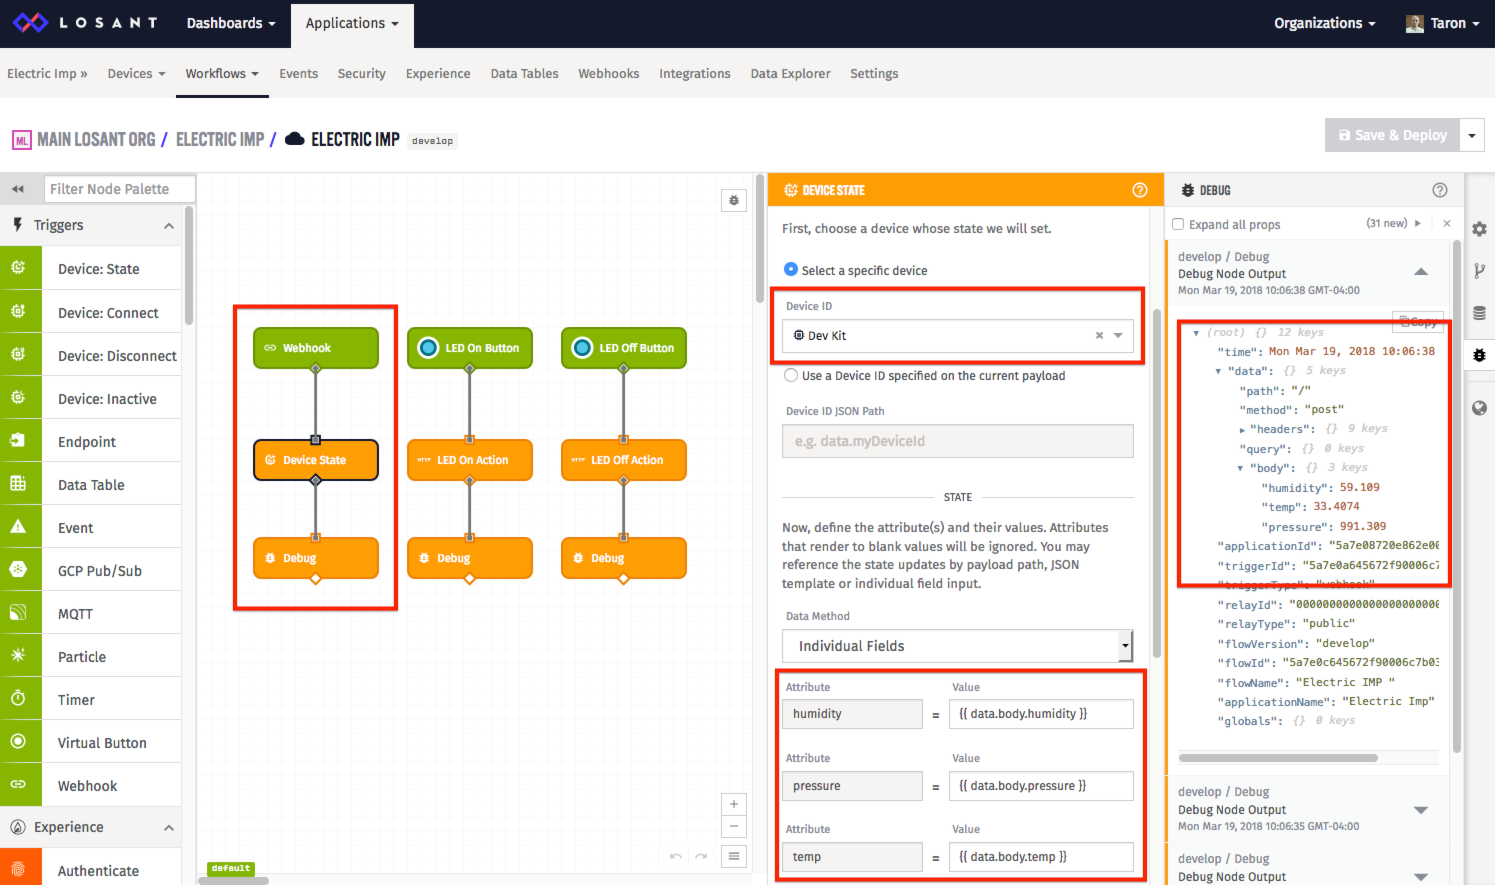
In the Webhook Node, make sure to choose the webhook you used in the Imp Agent code (LOSANT_WEBHOOK_URL).
For the Device State Node, be sure to choose the device you created earlier in Losant. We also need to define what data we should use for our attributes. Since our workflow was triggered by a webhook, our data can be found in data.body on the workflow’s payload.
If you add a Debug Node to the end of your workflow, you can see the payload of this workflow to the right in the debug panel.
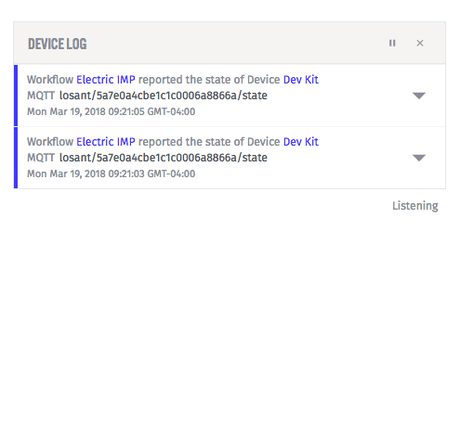
To see everything working, you can go to your device page and look at your device logs. There you will see your device’s state being updated by the workflow:
From Losant to Electric Imp
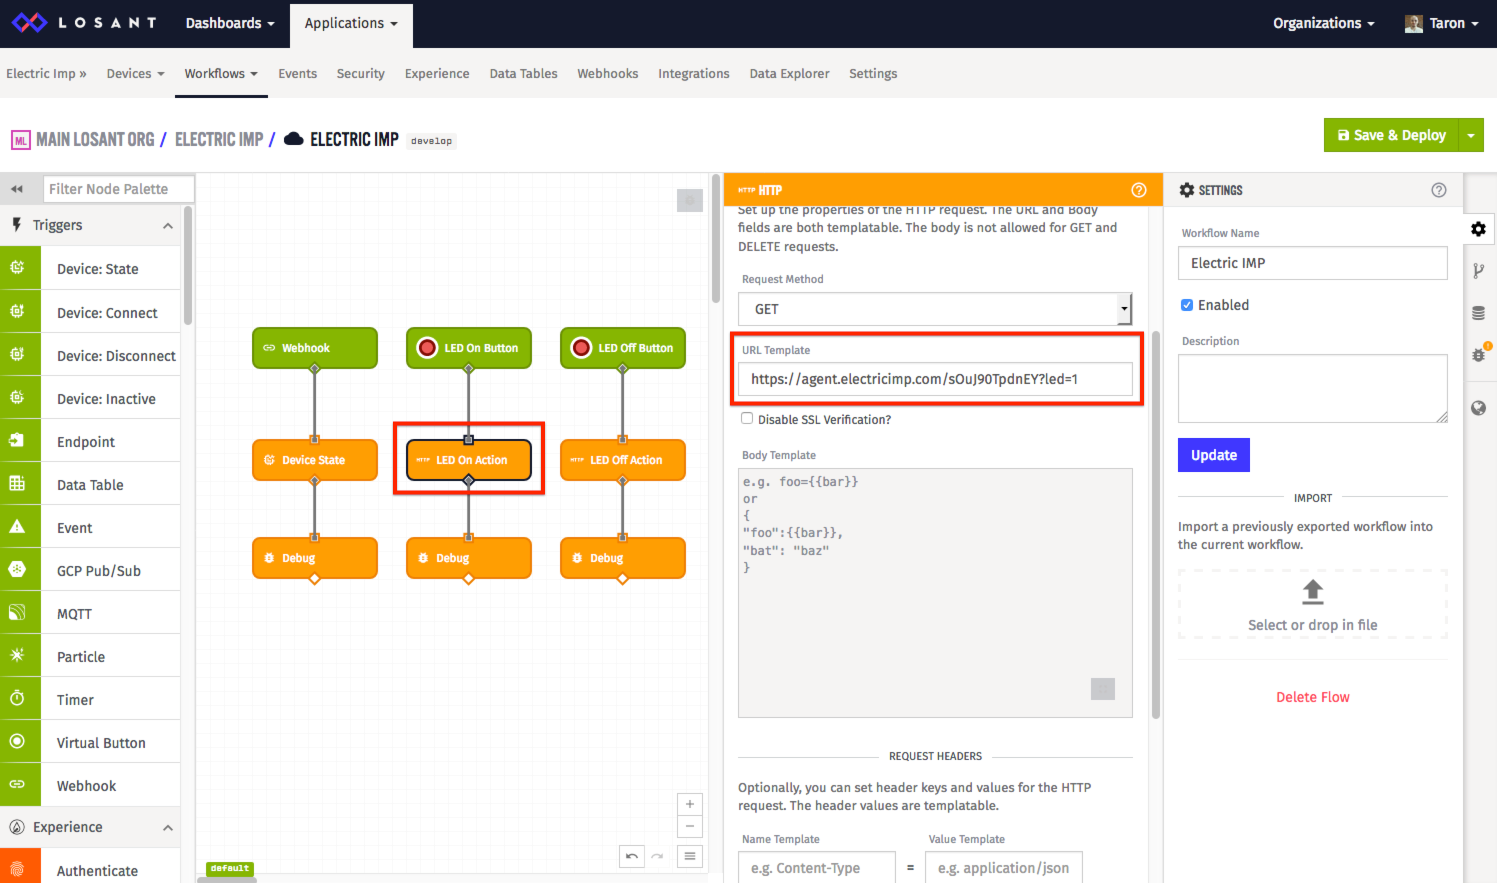
The first part of our workflow handled data coming from the Imp Agent. Now, let’s send a request to the Imp Agent using the Workflow engine. We can easily make this happen using a Virtual Button Node, and an HTTP Node.
What’s Next?
Let’s recap. Our Electric Imp Dev Kit is reading environmental sensors and sending that data to the Imp Agent. Then, the Imp Agent is sending that data to the Losant Platform. Once in the Losant Platform, we are saving that data for future use. We are also sending messages from Losant to the Imp Agent/Device. Now, what’s next?
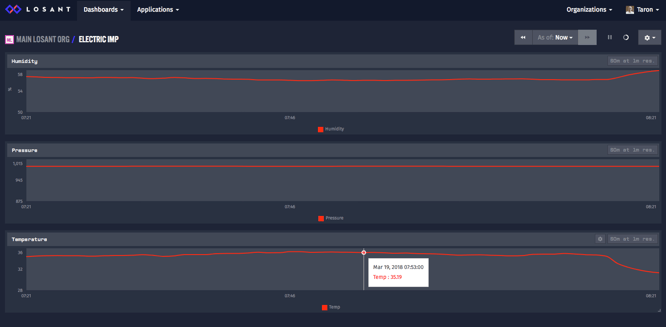
First, since you have all of the environmental data within Losant, you can visualize the data within a dashboard.
You can also expand the workflow we create to add more logic to your application, send a notification if one of the sensors goes out of range, or even send the data to your data warehouse.
Lastly, using Losant Experiences, you can create a user interface or API for your application complete with user authentication and roles, all from within Losant.
If you've got questions about combining Electric Imp and Losant, feel free to ask those below or in our forums.