
To make a long story short, our garage door faces an alley and away from the house. I have implemented this project using a Raspberry Pi and a $10 sensor: https://github.com/rllynch/pi_garage_alert. Be sure to check out Rich’s blog too for more information!

Here’s a picture of the door closed with the silver sensor mounted to the door header, and a magnet sitting on top of the door. The wires for the sensor run up to wall-mount CAT5 network jack, and then a (tightly stretched) network cable runs into the house.
I have added a few features to that project since Rich initially started it (including Pushbullet and Google Cloud Messaging support). The Google Cloud Messaging support sends pushes to an Android app I wrote that my wife and I have on our phones (complete with notifications and homescreen widget).
I digress. The latest feature that I haven’t quite opened a pull request for is sending the garage door status to Redis.
You can register for a free 30MB Redis database at https://redislabs.com which is what I did because I’m cheap and because I wanted a quick and easy externally-hosted way to save the state of the garage. The state stored is either “open” or “closed”. Simple enough.
I’m working on making a dashboard/calendar/Magic Mirror using another Raspberry Pi that will hang in our dining room. I want to display the garage door status in a simple widget and have it change colors based on the status. Enter Losant.
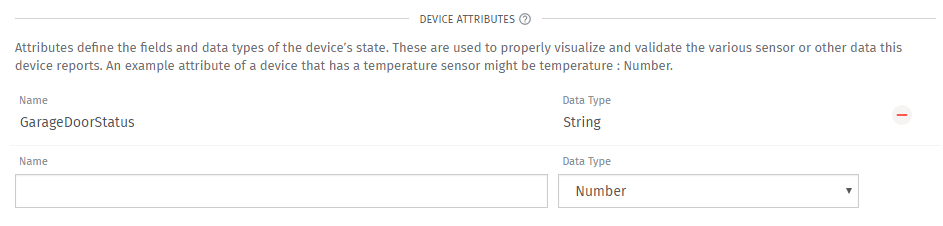
I went to Losant and created a new application. I called it “Garage Door”. Then, I created a new device named “Garage Door” (I know, I’m super creative). The device is a “Standalone” device with one device attribute: “GarageDoorStatus” (set as a string data type).
Next, I created a workflow called “Garage Door Status”. Here’s where the magic happens.
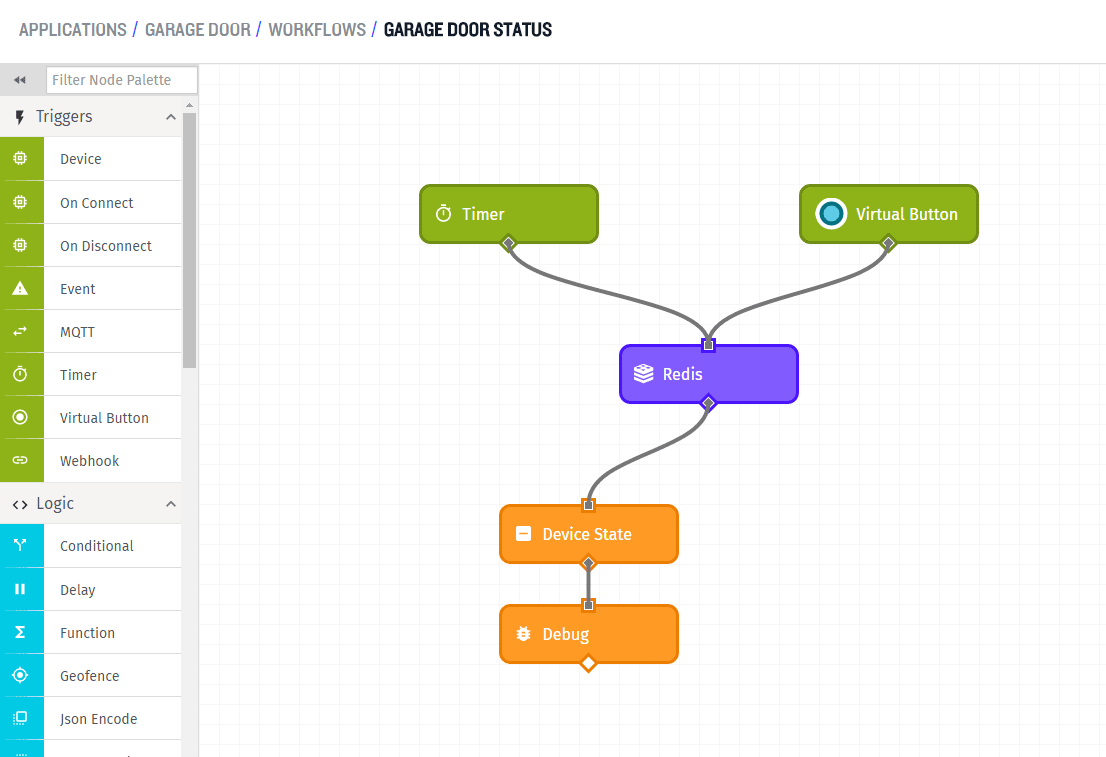
I set up a Timer Trigger that runs every minute. I also hooked up a Virtual Button Trigger so that I could test the workflow.
The next node I called “Redis” and configured it as so (using settings from RedisLabs):

The Redis command I wanted to execute was a GET and the Raspberry Pi feature I just added to the garage door software writes the value to “garage_door_n” where n is the garage door index the software is currently alerting about. I only have one door, so n is just 0 for me.
Here’s the configuration for the Redis GET command:

The next node in the workflow is the Device State Output (that I went ahead and tacked a Debug Output onto so I could test the return value). Here’s the Device State config:

I selected the Garage Door Device we had previously configured and told its “GarageDoorStatus” value to be the return value from the Redis GET query response. Boom!
The only thing left to do is create the block for the dashboard. I went to a previously created dashboard and clicked the “Add Block” button in the top-right corner. I then added a new Indicator block because I want the widget to be green when the door is closed and red when it’s open.
I then configured the indicator block as follows:
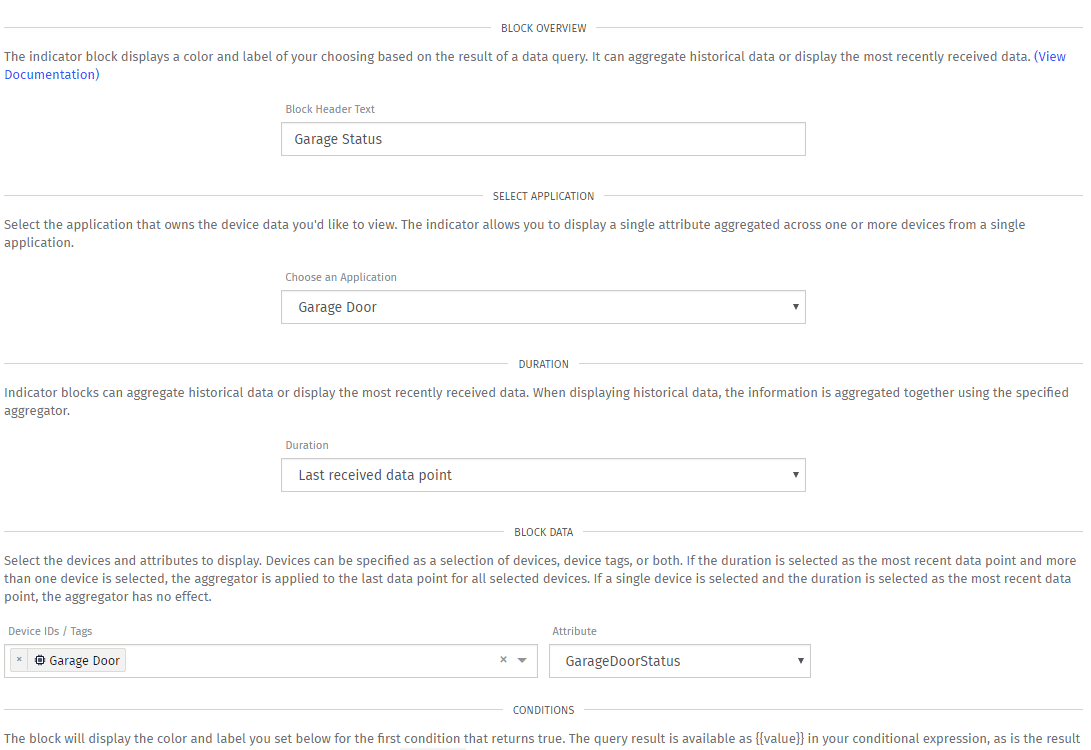
Here I set the header text to something generic, selected the Garage Door Application, and set the Duration to “Last received data point”.
For the block data I picked the Garage Door device and its “GarageDoorStatus” attribute as that’s what I want to use to change the look of the block.
The last and most important step is configure the conditions for the block.
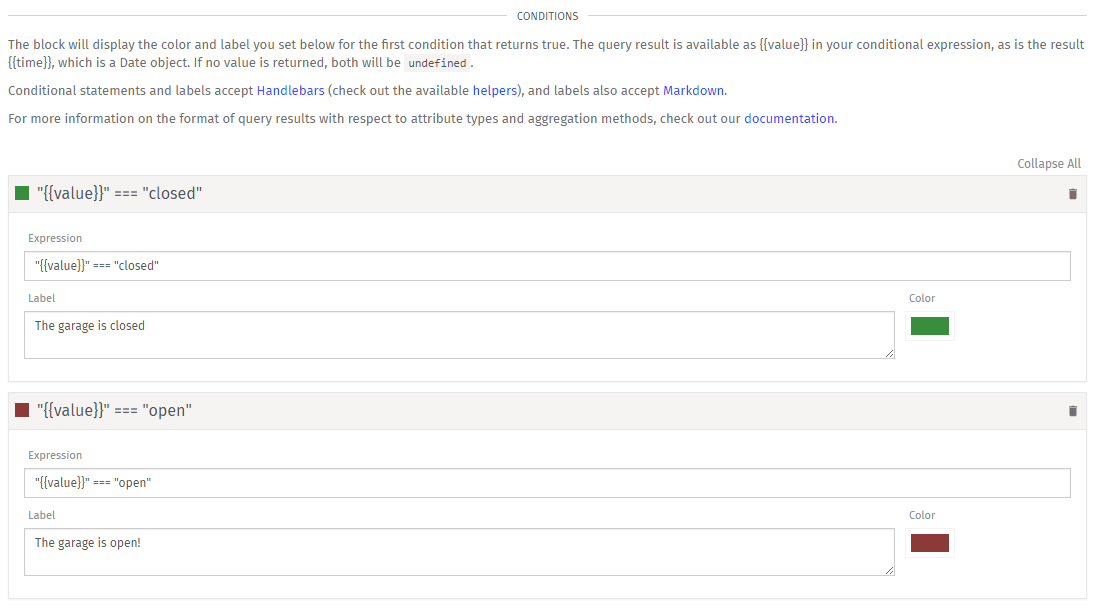
Here I have 2 conditions:
1 - when the value from the Device is “closed”, make the background color green and set the label to be “The garage is closed”.
2 - when the value from the Device is “open”, set the label and colors appropriately.
Now I have a dashboard and indicator block that refreshes from Redis every minute to let me know what state my garage door is in. The only thing left to do is finish building the display for the dining room!