
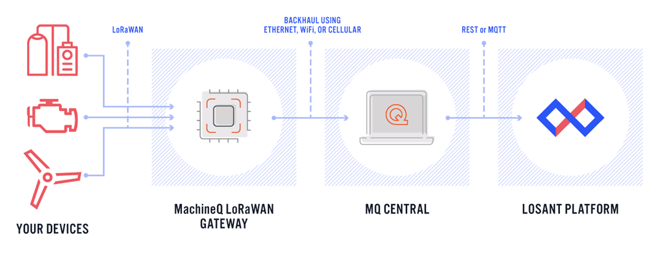
Comcast’s MachineQ provides integrated, enterprise-grade hardware and software for low-power IoT solutions. MachineQ makes it easy to connect devices that are spread across distances and helps push this data to the cloud, making the product ideal for smart campus or smart environment IoT applications. MachineQ and Losant Partner, Radio Bridge recently demonstrated the ability to connect sensors up to 22 miles away using a MachineQ LoRaWAN gateway in this case study.
MachineQ’s technology relies on LoRaWAN which is built into their indoor and outdoor gateways as well as their low-power sensors. MachineQ’s low-power sensors connect to their gateways using LoRaWAN which then backhauls its sensors’ data through WiFi, Ethernet, or cellular to their cloud IoT solution called MQcentral.
Combining MachineQ’s technology with the Losant Enterprise IoT Platform can help companies build impressive and connected IoT solutions. Losant enables companies to quickly and easily bring together many different data sources to build one end-user experience using Losant’s Visual Workflow Engine, Dashboard, and Experiences.
This article will walk through how to connect sensor data from MQcentral to Losant.
Getting Started With MachineQ
For this article, we are using the MachineQ Starter Kit and we chose the Spark variant of the starter kit. You will need to sign up for an account at MachineQ before buying the MachineQ Starter Kit.
Once you have your starter kit, then follow the MQspark Dev Kit Tutorial which will walk you through setting up your gateway, setting up your device with a temperature sensor, and show you how to send and view this data in MQcentral. The last section in the MQspark Dev Kit Tutorial briefly discusses MQcentral Output Profiles which you can skip since we will walk through the steps to set up an Output Profile later in this article. If you would like to learn more about the MQcentral Output Profiles you can read this tutorial, Setting Up Output Profiles in MQcentral.
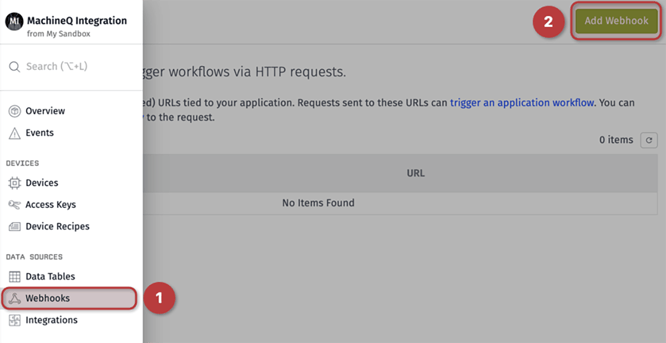
Creating a Losant Webhook To Be Used With a MachineQ Output Profile
We are now going to create a Losant Webhook that will be used in a MachineQ Output Profile.
Within your Losant Application, navigate to Webhooks and then click the Add Webhook button as shown below.
Give your webhook a name and then click the Create Webhook button.
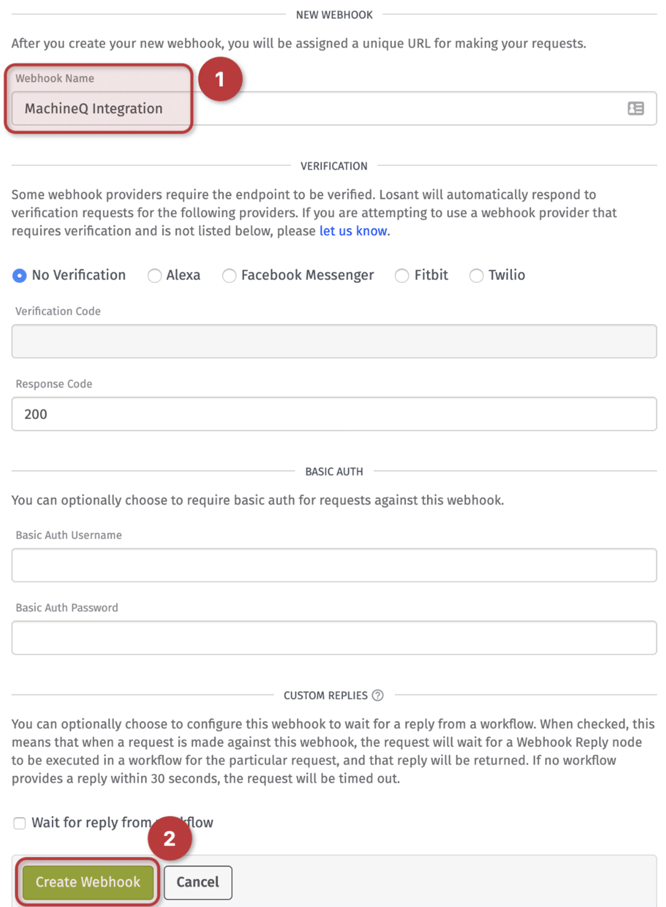
Once the webhook is created, the webhook URL will be displayed at the top of the page. Click on the copy button to copy the URL.

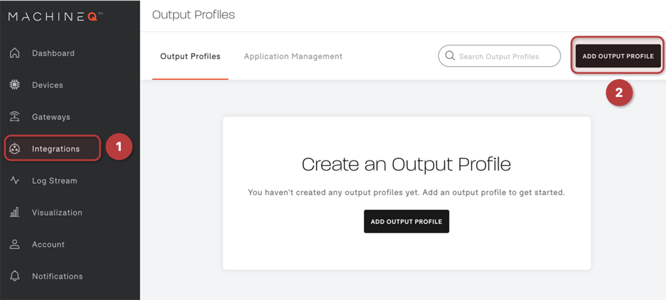
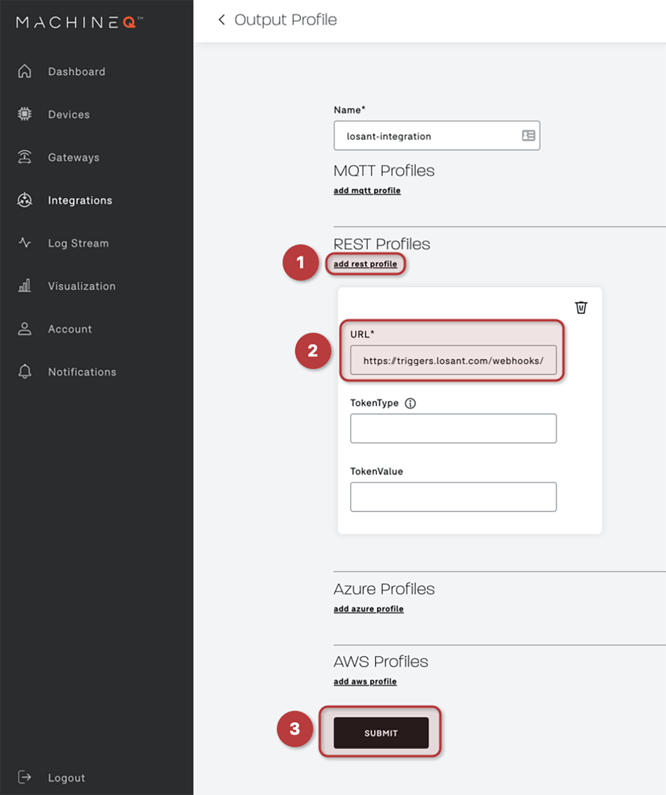
Create a MachineQ Output Profile With the Losant Webhook
Log into MQcentral and then click on Integrations and then on the Add Output Profile button.
Give this Output Profile a name, click add rest profile, paste in the Losant Webhook in the URL field, and then click the Submit button.
Link the MQcentral Output Profile With Your Devices in MQcentral
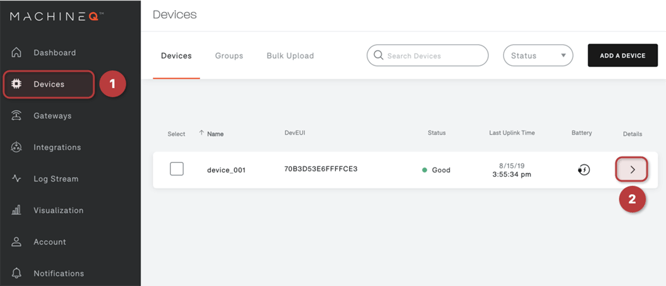
We now need to link the MQcentral devices we want to send data to Losant with to the Output Profile that we just created. Click on Devices and then click the arrow to go to the details page for the first device that you want to integrate with Losant.
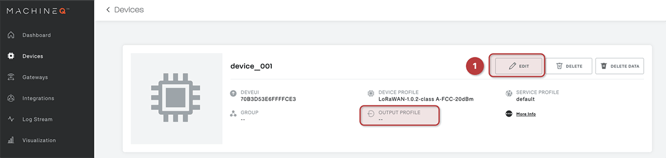
As shown below, you can see that this device is currently not associated with any Output Profile. Click the Edit button to associate this device to an Output Profile.
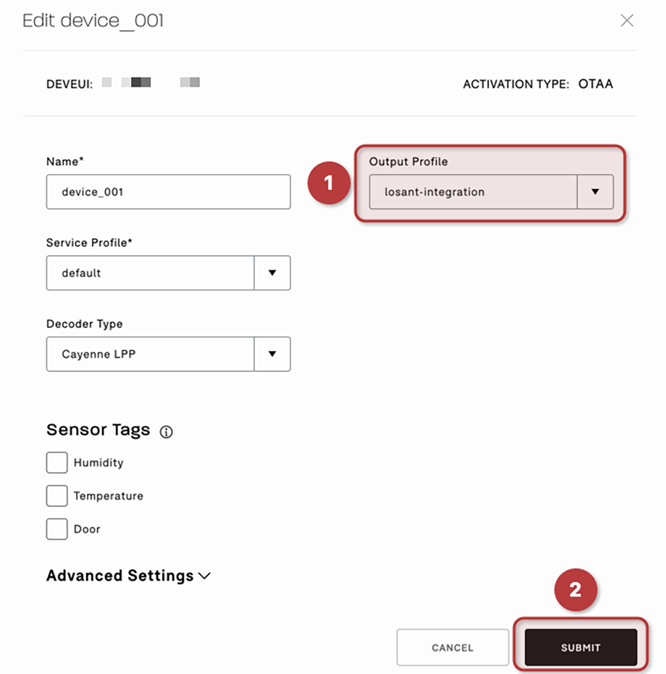
Select the Output Profile name that you created, in this example it is losant-integration, and then press the Submit button.
This device is now set to send live data to the Losant Webhook as new data comes into MQcentral. This process can be repeated to add multiple MachineQ devices to the same Output Profile which would be to the same Losant Webhook. You could also set up multiple Output Profiles using different Losant Webhooks. Now let’s create a workflow in Losant to accept this sensor data being sent to the webhook.
Create an Application Workflow in Losant
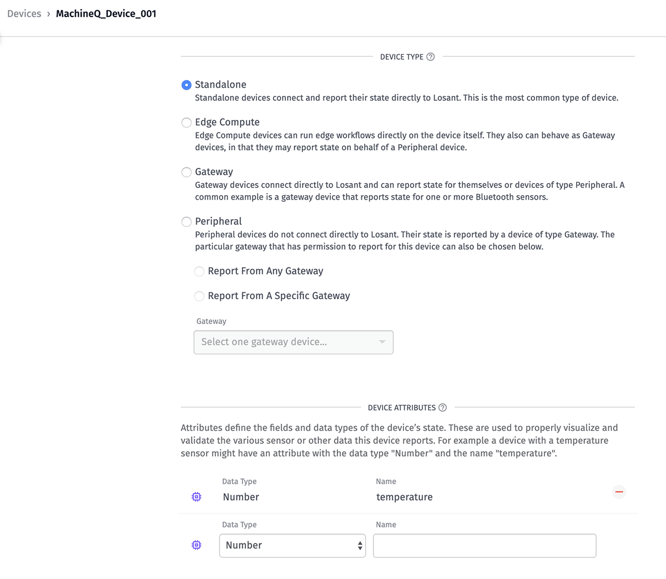
The first step is to create a Standalone device in Losant with one attribute to accept temperature as a number. In this example, the device name is MachineQ_Device_001.
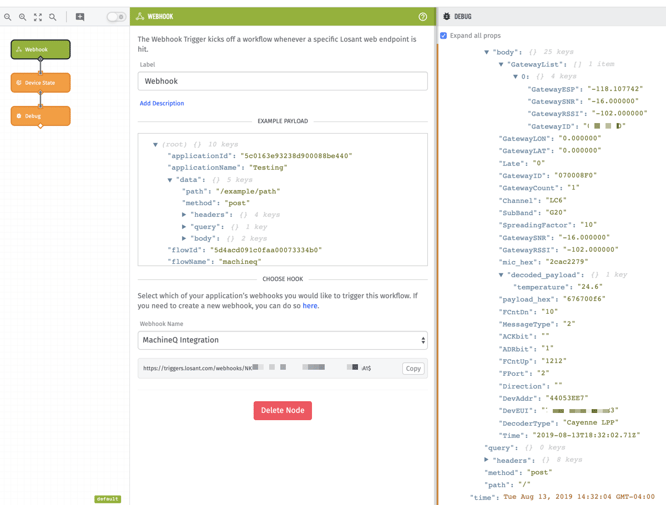
Once this device is created, then create the following workflow. The Webhook Trigger Node should be configured with the webhook that was created previously, named MachineQ Integration. Every time this webhook is called from MQcentral, it will trigger and run this workflow.
Below are the details for configuring the Device State Node to capture the data from the webhook.
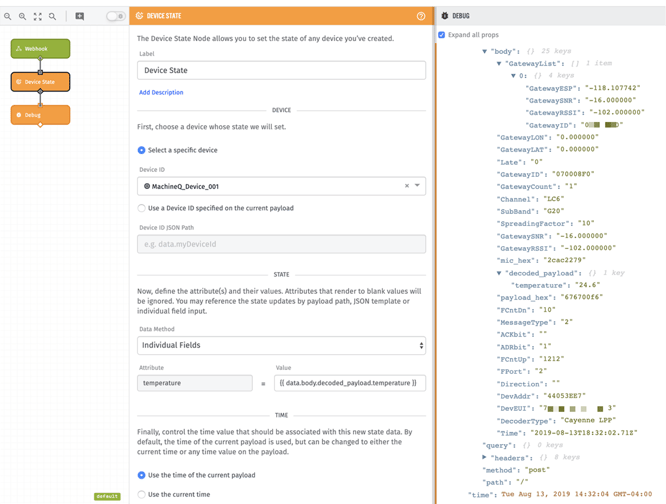
In the two screenshots above, you can see the debug panel from this workflow running. This output shows the data coming from MQcentral from the webhook. Included in this data is the decoded payload which shows the temperature and also includes a lot of other data including the ‘payload_hex’ data which is the initial payload that was sent from the device to the gateway and then to MQcentral.
At this point, you have successfully integrated Comcast MachineQ with Losant. There's a lot of additional functionality in Losant, including Experiences, that can be used to wrap a powerful solution around MachineQ’s device management and telemetry. If you've built something interesting with the combination of MachineQ and Losant, we'd love to hear about it. Please let us know in the Losant Forums.