
Microsoft Azure IoT allows you to connect and facilitate bidirectional communication between devices, and deploy complex IoT solutions. Azure IoT Hub, paired with Losant's workflows, visualization tools, and application builder, gives you a full end-to-end solution for IoT applications.
Make sure you check out the Developer Guide to Azure IoT; it’s a great resource.
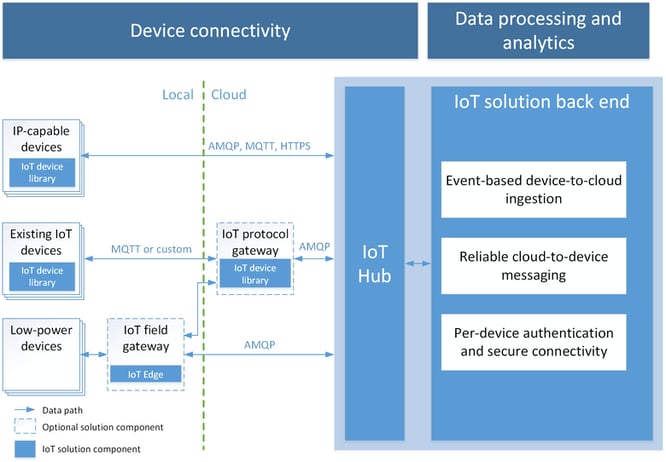
In this tutorial, we are going to illustrate how to integrate Azure IoT and Losant. This two-way integration includes sending and receiving data from Azure.
Set Up Azure IoT
In Azure, we need to create a device. This device will represent Losant. Creating a device for Losant will allow us to send messages to the Azure cloud, and also receive messages.
Log in to the Azure Platform and make your way to the IoT Hub. Then, select "Create IoT Hub".
You'll be presented with a form to complete the deatils about your new IoT hub.
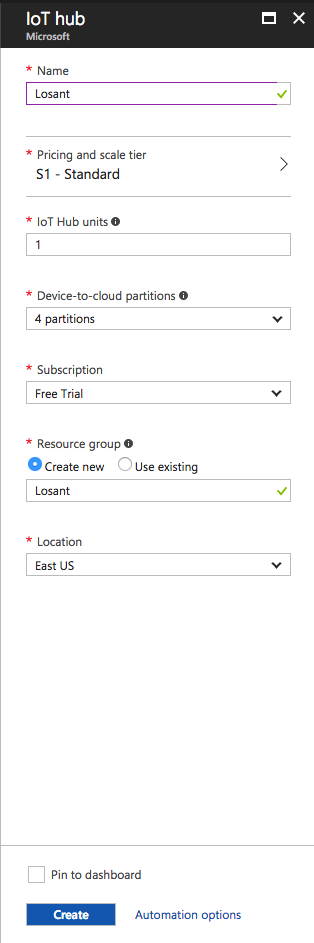
Obviously, make changes where needed. But for tutorial sake, here are the fields I used:
- Name: Losant
- Resource Group (Create new): Losant
- Location: East US
If you use a different name or group, note that some of your later steps may look a bit different.
Next, click the Create button.
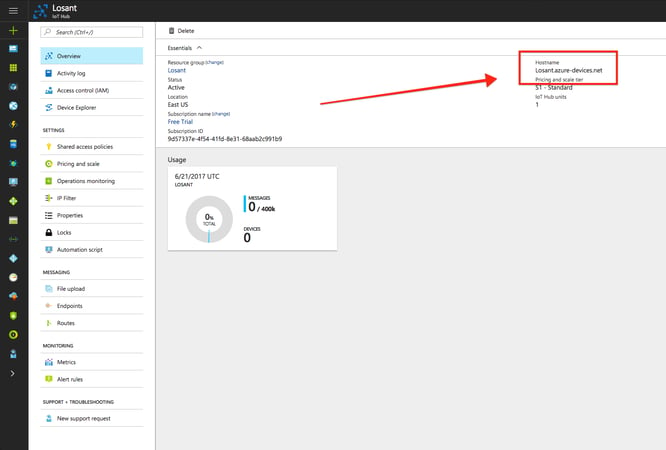
It'll take a couple of minutes to create your IoT environment. You'll have enough time to grab a cup of coffee ☕️. Once done, you'll see an IoT Hub overview dashboard.
On this dashboard, you'll see a "Hostname". Take note of this; you'll need it later.
In Azure, each IoT Hub has its own set of security policies. Each security policy has its own connection settings. To authenticate the device from Losant, we need to save the Connection String for our security policy, which was automatically created for you.
Find this by going to:
Shared access polices > iothubowner > Connection string - primary key
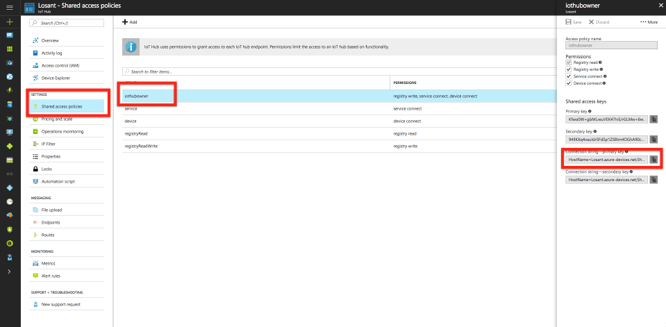
Save it in a note; we'll need it later. Now, create a new device in Azure for Losant. Navigate to:
Device Explorer > Add
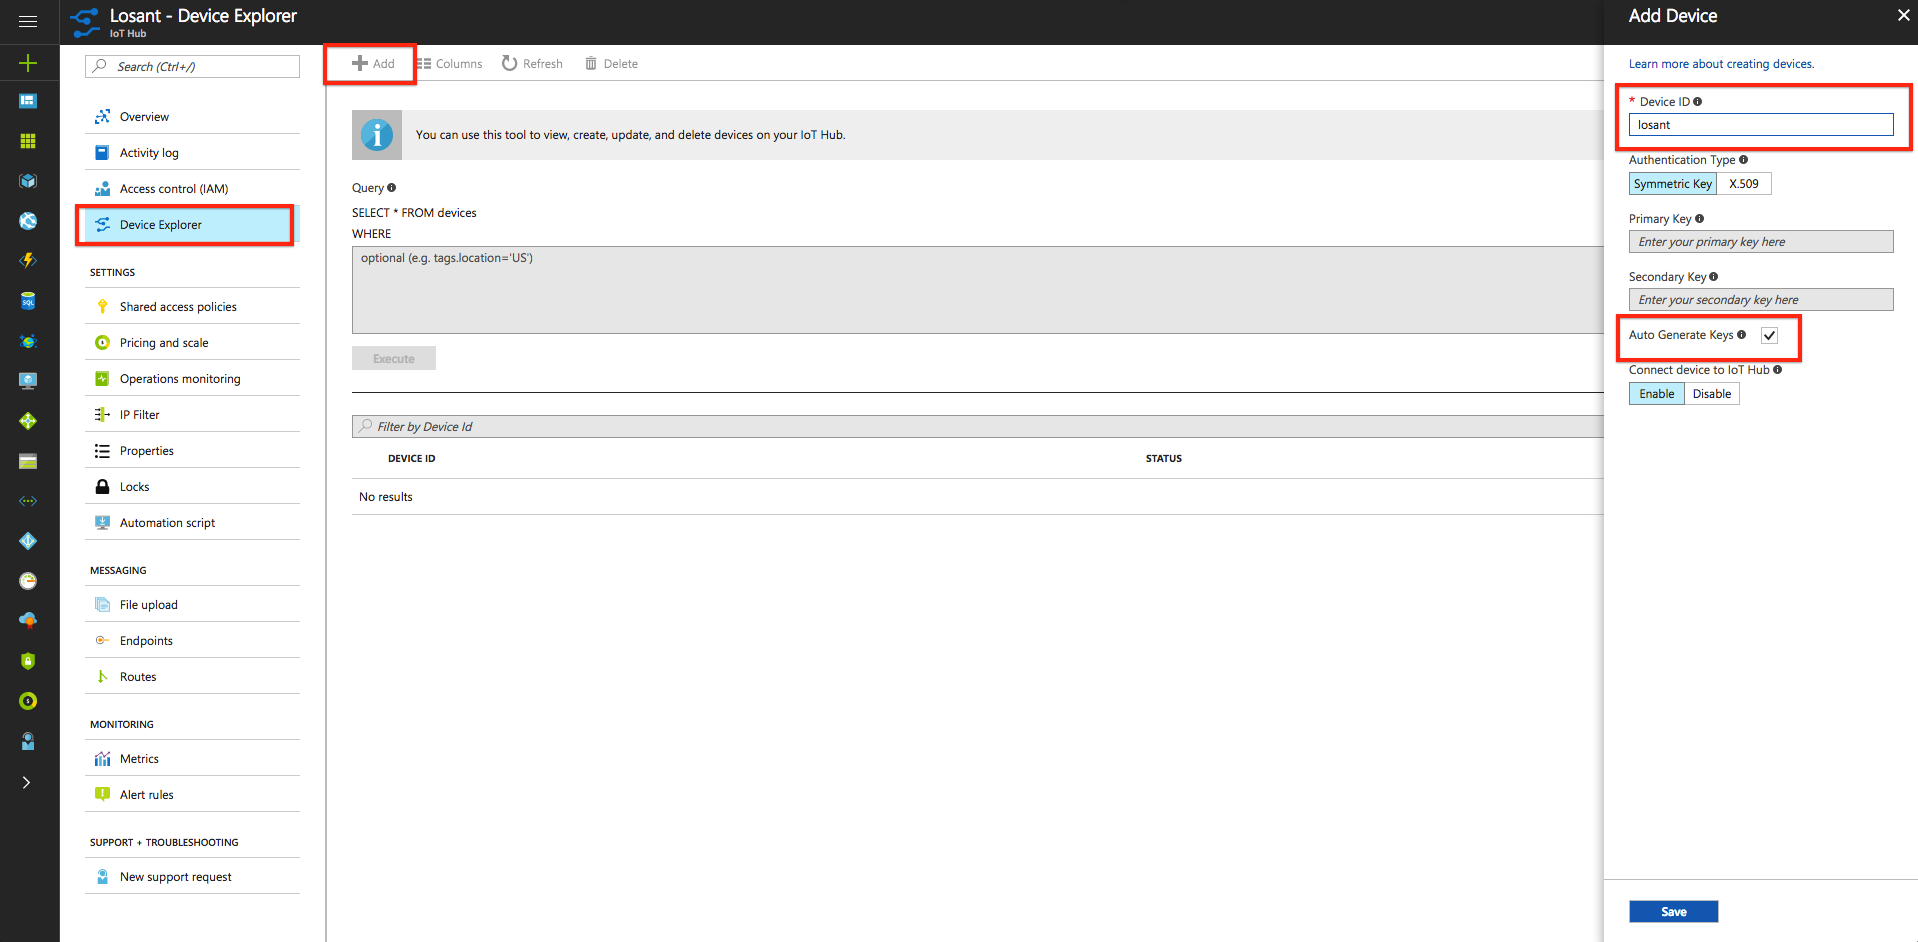
You'll need to give your device an ID. In the screenshot above, I decided to use "losant" as the ID. Also, make sure "Auto Generate Keys" is selected.
Now, we have all we need to create the Integration in Losant.
Set Up Losant
Now that we have Azure setup and a device created, let's configure Losant.
If you haven't already, sign up for a Losant account and create an application. Once in your Losant application, go to Integrations. Integrations are connections to external MQTT brokers, Pub/Sub messaging suppliers or other third-party web services.
.png)
Create a new Integration with a type of "MQTT". Here is an example of a configured MQTT Azure Integration:
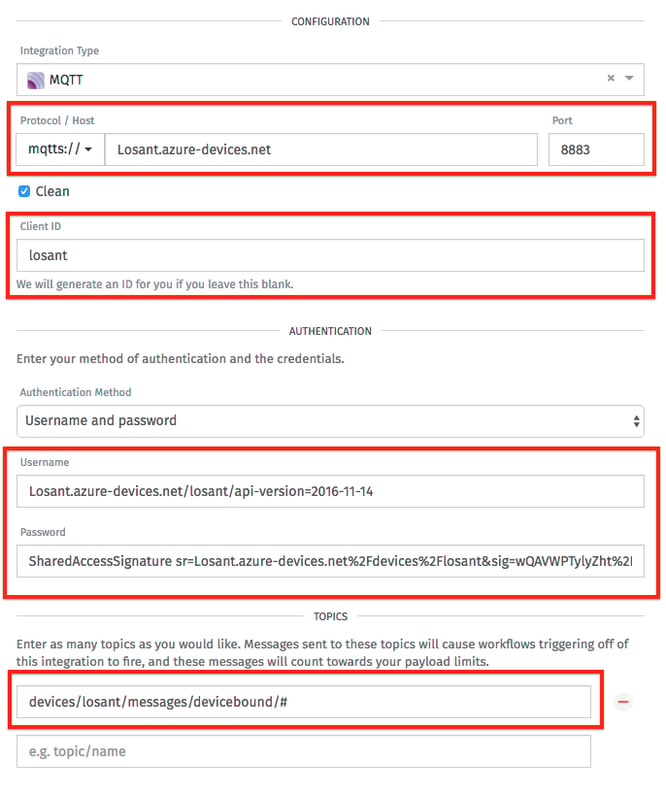
Let's go through each of the fields:
- Insert the Hostname you obtained from Azure as the Protocol / Host in Losant.
- Use the Device ID you configured in Azure while creating a device.
- The MQTT Username is always:
{Azure Hostname}/{Azure Device ID}/api-version=2016-11-14 - We are going to obtain the password in the next step.
- We need to subscribe to one topic:
devices/{Azure Device ID}/messages/devicebound/#
All the documentation for connection to Azure with MQTT can be found here.
The topic that's subscribed to here is the topic to which all cloud-to-device messages are sent. Azure IoT Hub isn't a full MQTT broker. They provide standards on top of MQTT. So, you must subscribe to this topic.
The password for MQTT is an SAS Token. The easiest way to obtain an SAS Token for your device is by using their npm client library. For this example, I am going to use their npm module called iothub-explorer. To download, you will need Node.js installed. Once installed, run:
npm install -g iothub-explorer
Now, we can log in:
iothub-explorer login "{Azure Connection String}"
To obtain an SAS token:
iothub-explorer sas-token losant
Here is what it looks like from a terminal view:
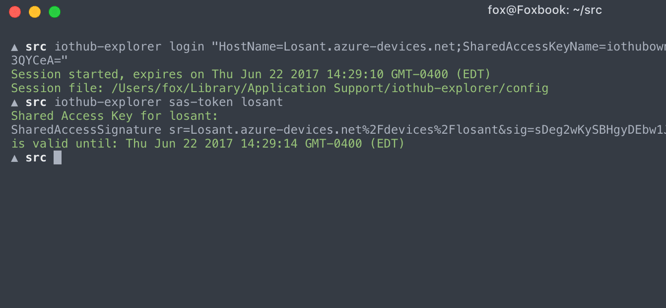
Now, copy/paste the entire Shared Access Key. This is your SAS token and MQTT password for the Losant integration.
If you save the Integration in Losant, you'll see a successfull connection status.

If you don't, it would be helpful to double check you have the right credentials.
Create A Workflow
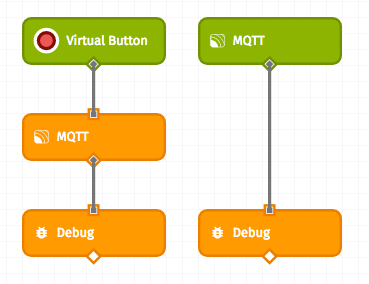
The ultimate test of this integration is to create a workflow that can send and receive messages from Azure. Here is the workflow we will use to test:
Sending A Message to Azure
First, let's send a message to Azure. Using a Virtual Button and the MQTT Output Node, we can trigger a simple message to be sent to Azure.
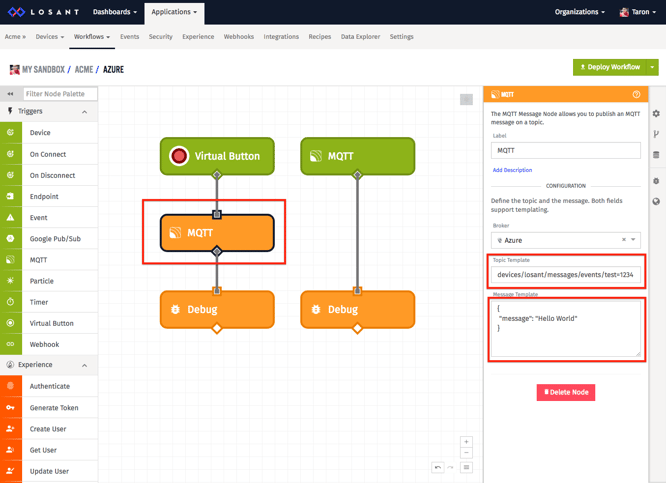
With Azure, you must publish to specific topics. They all follow this standard:
devices/losant/messages/events/{property bag}
A property bag is an URL encoded string. Here is the topic I used:
devices/losant/messages/events/test=123
You can also provide a message.
{
  "message": "Hello World"
}
You can configure this topic and message in the MQTT Ouput Node.
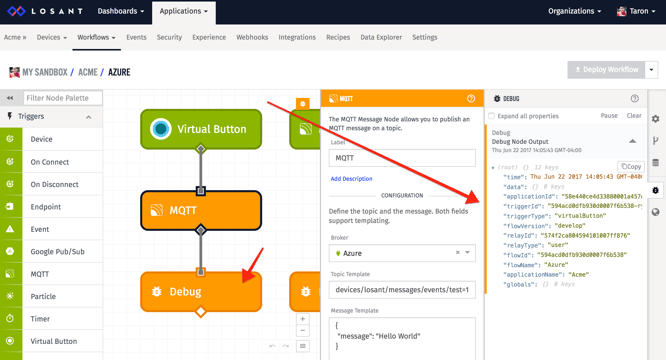
Testing Sending
To send a message to Azure IoT, we can set up a Virtual Button and a MQTT Ouput Node. If you press the Virtual Button you'll see a debug message.
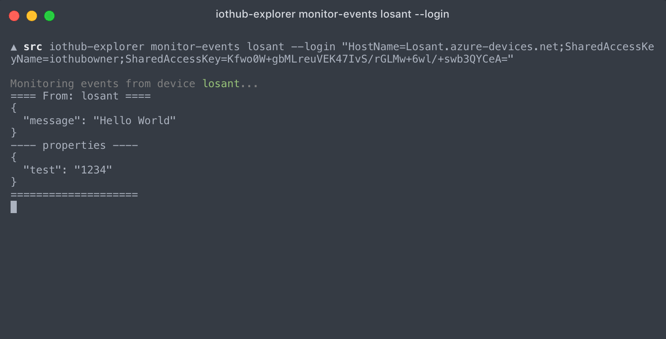
Using the iothub-explorer, we an also listen for message coming in to the Azure cloud. To do so, run:
iothub-explorer monitor-events losant --login "Azure Connection String"
Once you press the Virtual Button agian, a message appear in your termianl.
Receiving a Message From Azure
Now, let's configure the other end. Using the MQTT Trigger Node, we can listen for messages from the Azure Cloud. In this case, we are just outputting the contents to the Debug panel.
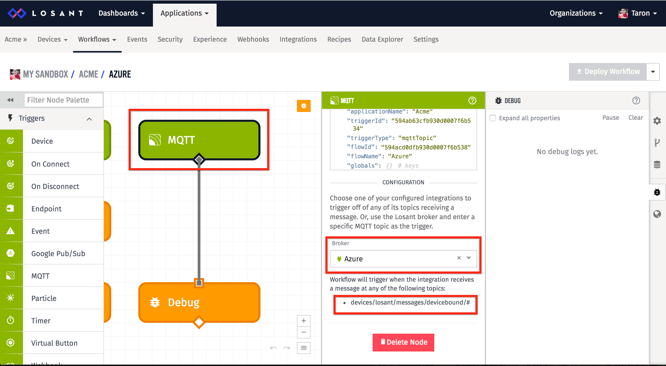
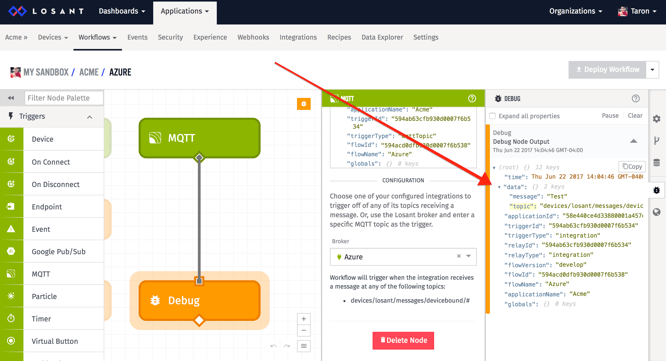
Testing Receiving
To send, run this command in your terminal:
iothub-explorer send losant "Test"
Be sure to replace "losant" with whatever your Azure device ID is.
Once you send a message in the terminal, you'll see a message appear in the Debug panel in Losant.
The end!
What's Next
With the ability to send messages back and forth between Losant and Azure, you can easily create complex logic and processes using the different Losant nodes.
Check out these resources: