
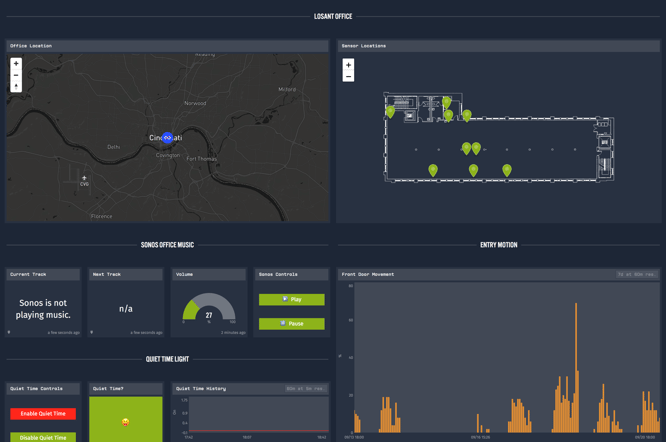
Here at Losant HQ, we are building out our smart office. One of the problems I am working on is conference room indicators. In the office, we would like an open, visual indication if a room is occupied or booked.
This article is first of three demonstrating how to build conference room indicators using Losant.
While doing some research on smart lights, I found the LIFX Tiles:

The LIFX Tiles are beautiful, controllable lights that work perfectly for this use case. What’s even better is that LIFX has a remote API to control the lights.
In this blog post, we are going to walk through controlling a LIFX light using a Losant Workflow.
Why Losant?
With services like IFTTT that make it super easy to control the lights, I want to talk about why I’m controlling the lights with Losant. Overall, the plan is to interface with the smart office by viewing a dashboard, triggering a Slack bot, or a smart office web application.
Building apps like this on top of IFTTT would be unbelievably difficult, but this is what Losant was built to do. With Losant, I can connect different devices and services together and build applications on top of this information using Losant tools.
Calling LIFX Remote API
Let’s talk about how the LIFX Remote API works. To set the state of the light, we simply make a PUT request to this URL:
https://api.lifx.com/v1/lights/:selector/state
In the URL, we replace :selector with a LIFX selector, which is essentially an identifier for the light(s). The most broad selector is all. We can make a request like this to control all of the lights:
https://api.lifx.com/v1/lights/all/state
Then, in the body of the request, we specify what we want the lights to do. In this case, If I wanted to turn the lights on, set the color to purple with full brightness, and animate this action for a duration of five seconds, here is an example body:
{
 "power": "on",
 "color": "purple",
 "brightness": 1,
 "duration": 5
}
Lastly, authentication is done using a Bearer Token. You can generate an access token in your LIFX account settings. Be sure to protect this token.
Building A Workflow
To begin, you’ll need to sign into Losant. If you don't already have a Losant account, sign up for a free Developer Sandbox, which has very generous limits for most applications. Once there, go to an application or create a new one. Then, create a workflow.
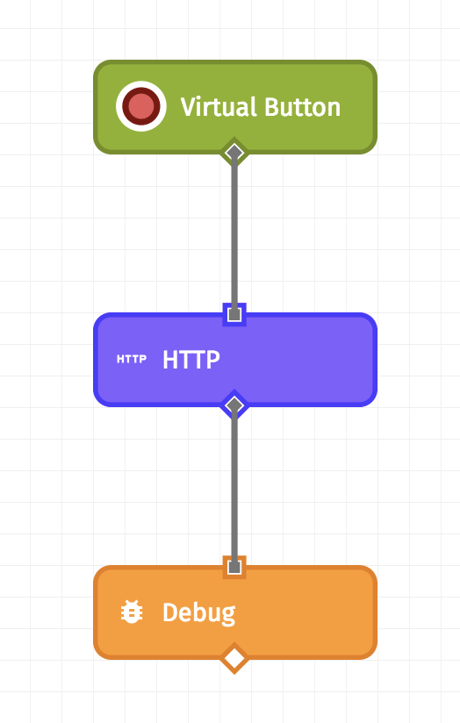
Drag, drop, and connect three nodes:
You can think of workflows as visual programming. All workflows start with a trigger, and that trigger includes a payload. The purpose of the workflow is to make decisions based on this payload, modify the data if needed, and eventually result in some kind of output. So, we can trigger lights based on a virtual button, timer, HTTP, and a whole lot more.
.png?width=666&name=image_preview%20(1).png)
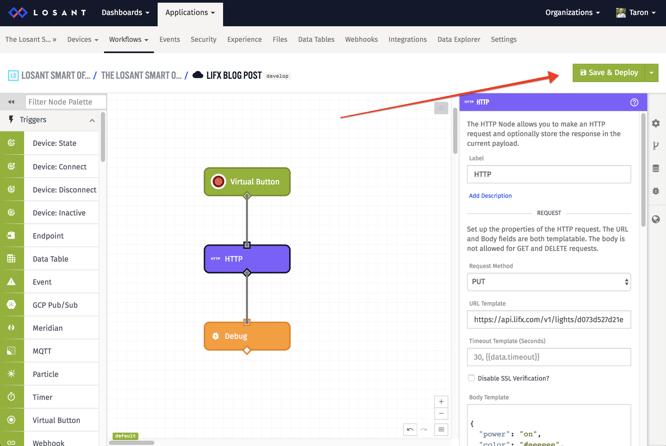
To keep things simple, we can use the Virtual Button Trigger Node. Since we need to send the message to LIFX via HTTP, we can use the HTTP Node to do exactly that.
First, we configure the request:
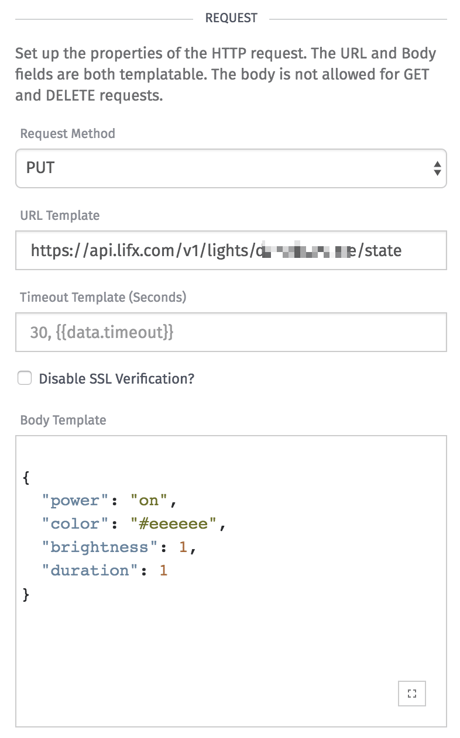
Here is what we need to configure:
- Set the “Request Method” to PUT.
- Add the URL https://api.lifx.com/v1/lights/:selector/state with the correct selector.
- Update the body with the appropriate action.
Next, we need to configure the authorization headers:
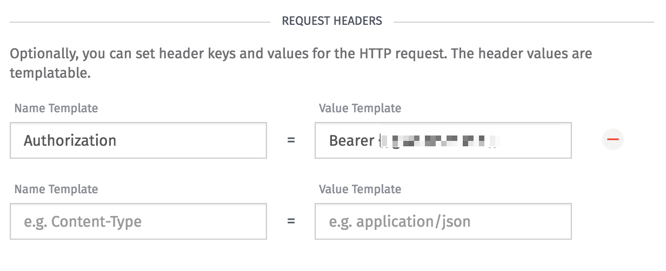
We need to add one header:
- Name:
Authorization - Valve:
Bearer APITOKEN
Important: Be sure to update your token with the token you retrieved from your app settings.
The last node is a Debug Node, it allows us to take a look at the workflow payload. Now that we are done building our workflow, we click “Save & Deploy”.
Now, our Virtual Button is available to press and trigger our action to LIFX. Here is a working demo:
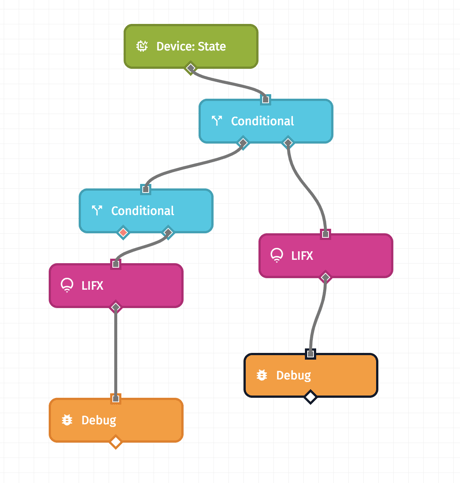
Now, I can build more complex workflows to control the lights. For example, when a motion sensor in the conference room is triggered, I can update the Smart Office Dashboard, update the status of the conference indicator light (LIFX Tile), and post a message in our Smart Office Slack channel all within a workflow.
What’s Next?
In this blog post, we took a look at controlling a LIFX light using a HTTP Node in a Losant Workflow. But this opened up a slight issue, if another team member wanted to control the LIFX lights, they would have to go and learn how the API works. Instead, here is what I really want:
A LIFX Custom Node allows all the interactions to LIFX to be abscrated in a node. This allows other team members and I to easily build complex interactions and logic that communicate with my lights. In the next blog post, we are going to walk through building a LIFX Custom Node.