
Mosquitto is a popular and open-source MQTT broker written in Python. It's very easy to install and configure and runs well on small compute modules like the Raspberry Pi or Intel Edison. One of its more powerful features is the ability to form bridge connections between the local broker and a remote broker. In this tutorial, we're going to cover how to bridge a local Mosquitto broker to Losant's cloud broker.
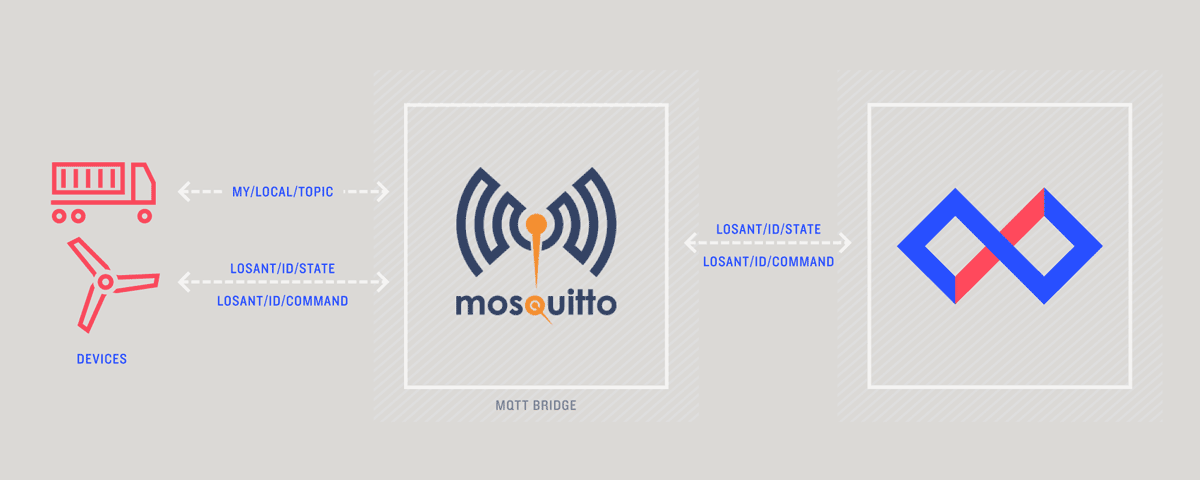
For this example, if a device publishes to a Losant-specific topic on the local broker, Mosquitto will bridge that publish to the Losant broker. All other communication will stay local.
Download and Install Mosquitto
You can download Mosquitto from its website. They have installers for most major platforms. Once downloaded, you can follow their configuration instructions for the basic MQTT broker setup. We won't be covering these steps, since there are many useful tutorials that already exist. This article will only focus on the bridge configuration.
Configure Devices
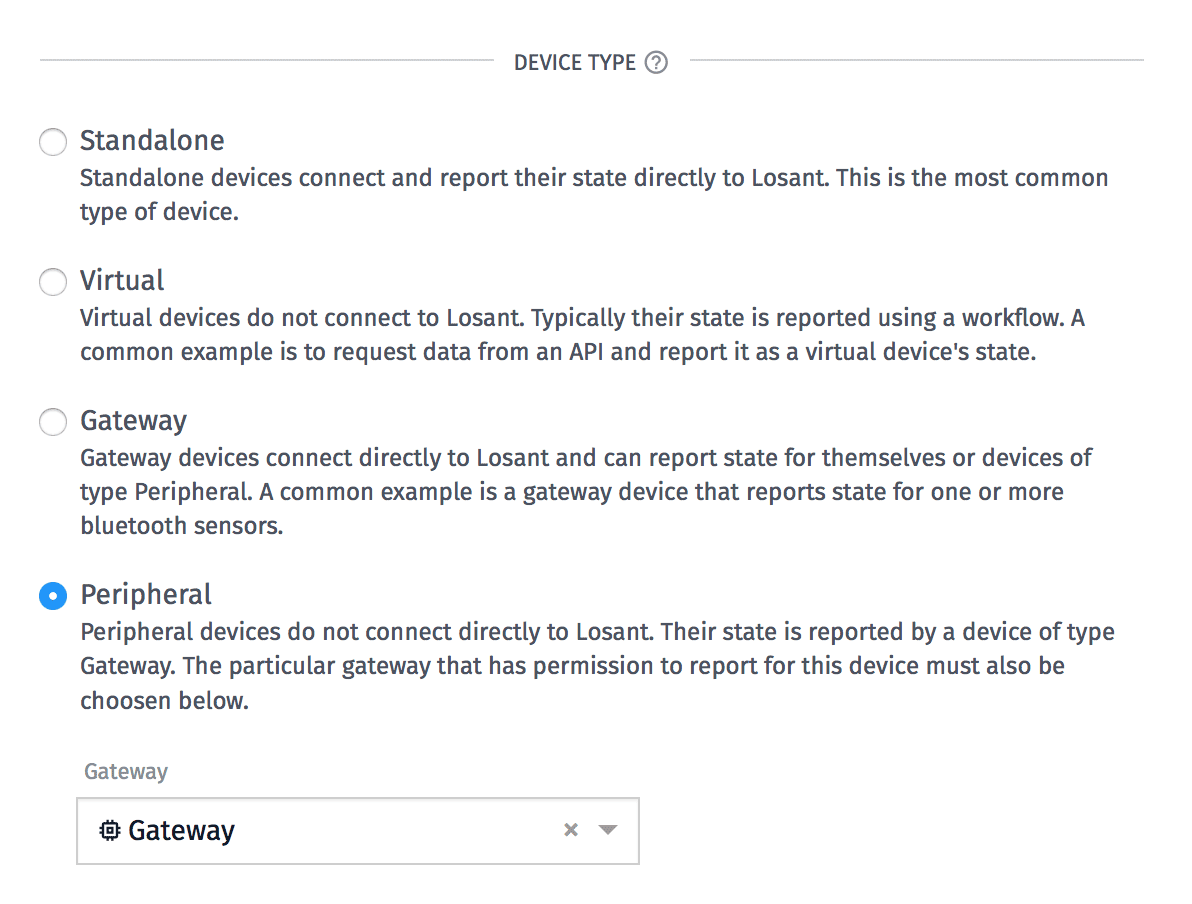
In order to use Mosquitto as a bridge, you will need to create a gateway device and one or more peripheral devices in Losant. Mosquitto will connect to Losant as the gateway and use its connection to send peripheral state and receive peripheral commands.
When creating a device, you will have the ability to set its type. When choosing peripheral, you must also select the previously created gateway that will have permission to report on its behalf.
The gateway may or may not have any device attributes. The peripherals should be configured with the attributes you'll be reporting. For example, if this is a bluetooth peripheral, like a LightBlueBean, you may have attributes for temperature and acceleration.
Once the devices are successfully created, we'll use their IDs in the following section to configure the Mosquitto bridge.
Configuring Mosquitto Bridge
I'll start by posting the entire configuration and I'll go through each line after.
- connection bridge-to-losant
This line starts a bridge connection section in the config. You can name it anything you want. The name will show up in the log and is helpful for debugging. - address broker.losant.com:8883
This is the address and port of the Losant broker. 8883 is the port for TLS encrypted endpoint (recommended) and 1883 is the unencrypted port. - bridge_cafile /path/to/losant/LosantRootCA.crt
This is the path to Losant CA file. This is required in order to form an encrypted connection to the broker. You can download the file from GitHub. - cleansession true
Mosquitto defaults cleansession to false, which is not supported by the Losant broker. This needs set to true. - try_private false
When set to true, Mosquitto will attempt to tell the Losant broker that this is a bridge. This is not currently supported and must be disabled. - bridge_attempt_unsubscribe false
This prevents Mosquitto from attempting to unsubscribe from remote topics when they are configured for the out direction, which will be explained later. - notifications false
This prevents Mosquitto from publishing on protected topics that aren't permitted by the Losant broker. Typically these are disconnect and connect messages. - remote_clientid my-device-id
This is the client id that Mosquitto uses when forming the bridge connection to Losant. This should be set the device ID that you received when you added the gatway device to Losant. - remote_username my-access-key
This is the username that Mosquitto uses when forming the bridge connection to Losant. This must be set to a Losant access key. - remote_password my-access-secret
This is the password that Mosquitto uses when forming the bridge connection to Losant. This must be set to a Losant access secret. - topic losant/my-peripheral-device-id/state out 0
This tells Mosquitto which topics should be bridged to Losant when a local devices publishes to them. This topic is used when publishing device state to Losant. The second parameter, out, instructions Mosquitto to bridge publishes to this topic out to Losant. The last parameter, 0, is the QoS setting. Losant only supports QoS of 0. - topic losant/my-peripheral-device-id/command in 0
This tells Mosquitto to bridge incoming subscriptions from Losant to a local topic. This topic will be published to by Losant when sending device commands.
The last two lines will have to be repeated for each unique peripheral device you have connected to the local Mosquitto broker.
Now when you start Mosquitto it will open a bridge connection to Losant and subscribe to each of the losant/id/command topics you have configured. Whenever Losant publishes a command, Mosquitto will forward it to the local device. Whenever a local device publishes to /losant/id/state Mosquitto will forward it to Losant.
This is a basic bridge setup. Mosquitto's topic configuration can be quite powerful and will allow you to bridge existing topics to Losant-specific topics if needed. Check out the bridge configuration documentation for more details.
That's all there is to it. If you have any questions, please leave them below or in our forums.