
The Intel Edison is a very capable computer in a tiny form factor. By itself it's no larger than a postage stamp. The Edison specs are a dual-core 500 MHz Intel Atom processor, 1GB of memory, wifi, bluetooth, usb, and a bunch of GPIO. It's basically an entire computer without a display port. What's most exciting is that unlike most common IoT hardware today, the Edison runs on the x86 architecture, which is likely the same type of processor in your laptop. This opens up a world of possibilities in terms of what software the Edison can run.

The best way to get started is to purchase the Arduino Kit for Edison. This board exposes all of the I/O in a much more useful way. I would also recommend grabbing a Grove Starter Kit to easily get access to some simple sensors, although this may not be required depending on your specific use-case. Attaching the Edison to the Arduino Kit is extremely easy. Simply push the compute module into the connector and screw it down using the provided nuts.

How To Flash the Intel Edison
The Edison will come from the factory with Yocto Linux pre-installed. Since the Edison is new and development is rapid, it's probably a good idea to flash it with the latest image.
1. Download and Install the Flash Utility
If you're on Windows, the first thing you'll have to do it install the correct drivers. You'll then need to install the flash utility following the instructions for Windows, Mac, or Linux.
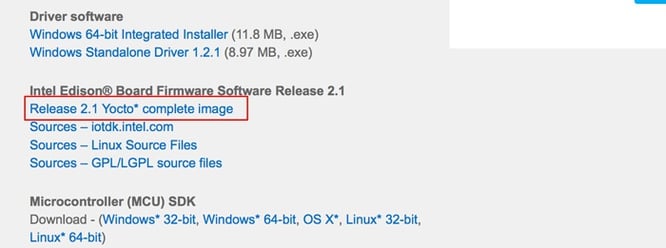
2. Download the Edison Firmware
The next step is to download the firmware to your computer. You'll want to download the latest version of the complete Yocto image. At the time of this writing, it was 2.1.
3. Flash the Edison
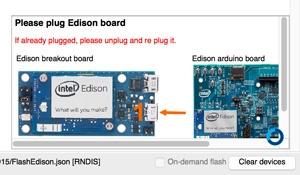
If you've already plugged in the Edison, unplug it now. Open the flash utility tool and browse to the extracted firmware. Inside the extracted contents there will be a file named FlashEdison.json. This is what you want.

Keep the Edison unplugged and click the "Start to Flash" button.

Immediately after you click "Start to Flash", the interface will tell you to plug in the Edison.
The Edison has two USB ports. The correct port for flashing is the one closest to the power input, labeled J16. The other port is for serial communication, which we'll discuss later in this guide.

If you’re using the smaller breakout board kit, the correct port is the one closest to the bottom, which is also labeled J16.

Once you plug in the Edison, the utility will start displaying progress.

We've had a few issues with this utility working on Windows 10 and OS X El Capitan. It works well on OS X Yosemite. I assume Intel will rev the tools soon to address this.
How To Connect Using Serial to the Edison
The next thing you’ll need to do is get access to a shell to use and configure the Edison. This is where the 2nd USB port comes in. When you connect it to your computer, it exposes a USB-serial device that we can communicate over.

In the above picture, the red USB cable is plugged into the Edison’s USB serial port.
How To Connect to Edison Serial Using Mac
When you connect the serial port to your Mac it will mount itself as a device in /dev. To find the correct device, I typically use the terminal to search the /dev folder to find a usb serial device. On the Mac I sometimes have trouble with the device showing up, so I have to swap the USB ports and unplug/replug until it works.
$ ls /dev | grep serial
Once the device shows up, you can use the built-in “screen” utility to connect to it using serial.
$ screen /dev/cu.usbserial-AJ035DP0 115200The above command uses screen to connect to the serial device at /dev/cu.usbserial-AJ035DP0 with bitrate 115200.

When you first connect you’ll see a blank screen. Hit enter once for output to start displaying. At this point I’m sometimes presented with a password prompt. Simply hit enter again to bring up a login prompt. The default login user for the Edison is “root”. Type that and hit enter. By default, there's no password so you’ll be immediately dropped into a prompt. You now have shell access to your Intel Edison.
How To Connect to Edison Serial Using Windows
When you connect the Edison to a Windows computer it will mount itself as a USB serial device. To find the device, open Device Manager and expand the “Ports (COM and LPT)” section. The device and its COM port will be listed.
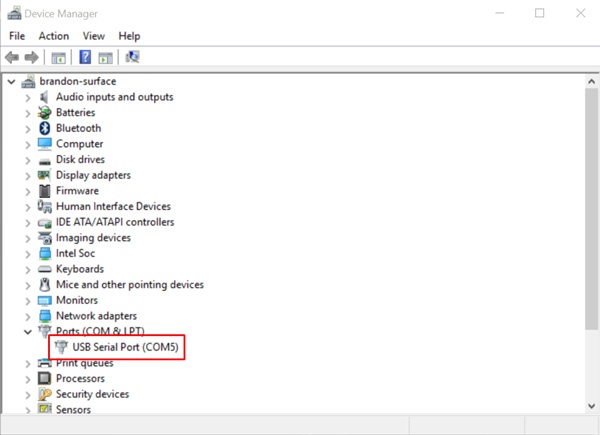
On my Windows machine, the Edison mounted itself as COM5. This number will change almost every time you plug in the device, so you’ll have to check each time.
On Windows you’ll have to download an external tool to connect to serial devices. The best tool for the job is Putty, which comes as a stand-alone executable. Simply download and launch it.
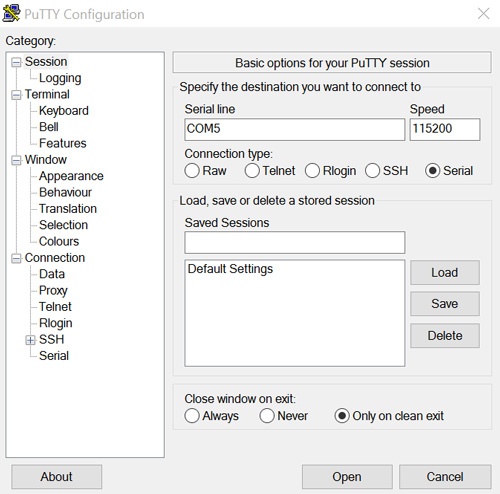
After you launch Putty select the “Serial” radio button, enter the COM number you found in the Device Manager, and set the speed to 115200. After the details are entered, click “Open”. You may be presented with a blank screen, hit enter once to begin seeing output.
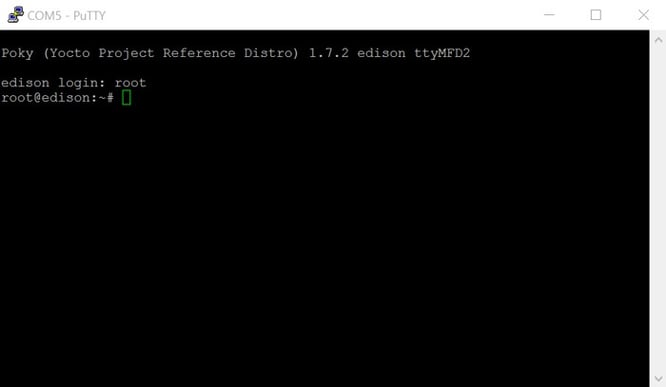
When you first connect you’ll see a blank screen. Hit enter once for output to start displaying. At this point I’m sometimes presented with a password prompt. Simply hit enter again to bring up a login prompt. The default login user for the Edison is “root”. Type that and hit enter. By default, there is no password so you’ll be immediately dropped into a prompt. You now have shell access to your Intel Edison.
How To Connect the Edison to Wifi
After you’ve successfully connected to the Edison using serial, you can now launch the built-in configuration tool to set a user password and add the Edison to your wifi network.
$ configure_edison --setupThis will launch a command line tool that will walk you through various setup steps. The questions are straightforward and the configuration is easy to follow.
After you’ve completed the wifi setup step, it will show you the Edison’s IP address. You can request this with your computer’s browser to see if the Edison is setup correctly.


If you need to setup just the wifi without going through the entire configuration tool, you can launch it with the --wifi option.
$ configure_edison --wifiHow to SSH Into Edison
By default, the Edison comes with SSH disabled. Once you’ve gone through the configuration process described above and setup a password for the root account, it will automatically enable SSH for you.
$ ssh root@192.168.1.129
The above example is showing how to SSH into the Edison using the Mac. The IP address is displayed by the Edison at the end of the wifi configuration step. The password you enter is the same password you supplied the Edison during configuration. If you skipped setting a password, SSH will still be disabled.
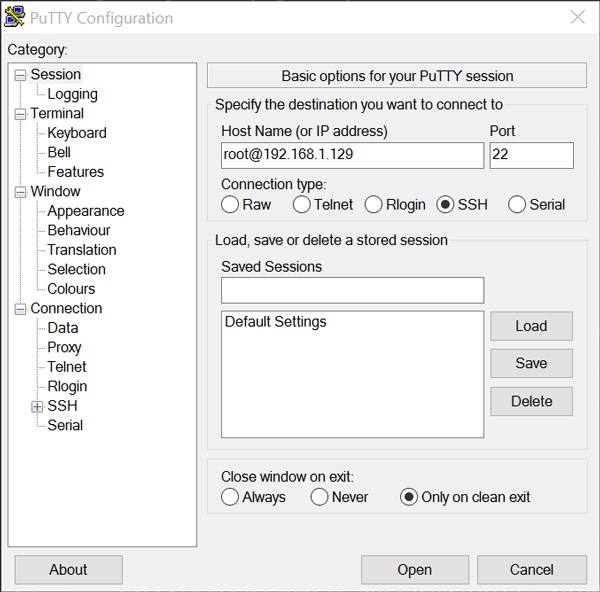
If you’re using Windows, then I’d recommend using Putty to SSH into the Edison.
Build Something Amazing
At this point you now have a properly configured and fairly capable Linux computer. I'll dive into how to program the Edison using Node.js and Intel's IDE in the next article, however Linux alone and the number of tools and services available provide a ton of power and options. If you've built something amazing, or have any questions or comments, please share them below.