Google Assistant is a powerful way to interact with the wide breadth of Google's services. Google Assistant runs in the browser, on almost every Android phone, and on the Google Home device. What really makes this service compelling, however, is that it can be extended to allow your customers to interact with your own product and data.
This two-part tutorial describes how the Losant Enterprise IoT Platform can be used to build a custom interactive Google Assistant Action without writing a single line of code. Part 1 covers how to setup the Google services and register the custom action. Part 2 covers how Losant is used to fulfill questions asked by your users.
The Action we're going to build today is called "Airplane Tracker", which lets users ask how many airplanes are near a specific city. The location data for these airplanes comes from The OpenSky Network, and we originally created this demo as part of our partnership with Google Cloud IoT Core.

The above Losant dashboard is visualizing the real-time location of every flight where the United States is the origin country. At any given time, this represents about 4,000 planes.
Here's a video that shows how to use our custom Google Action.
I'm not going to cover how the location data is received by Losant, since that could make an entire tutorial by itself. We're just using the location data for this example. You can use any other kind of data from Losant or from other third-party sources. The lessons learned in this article will apply to many different use cases.
Create the Google Assistant Action
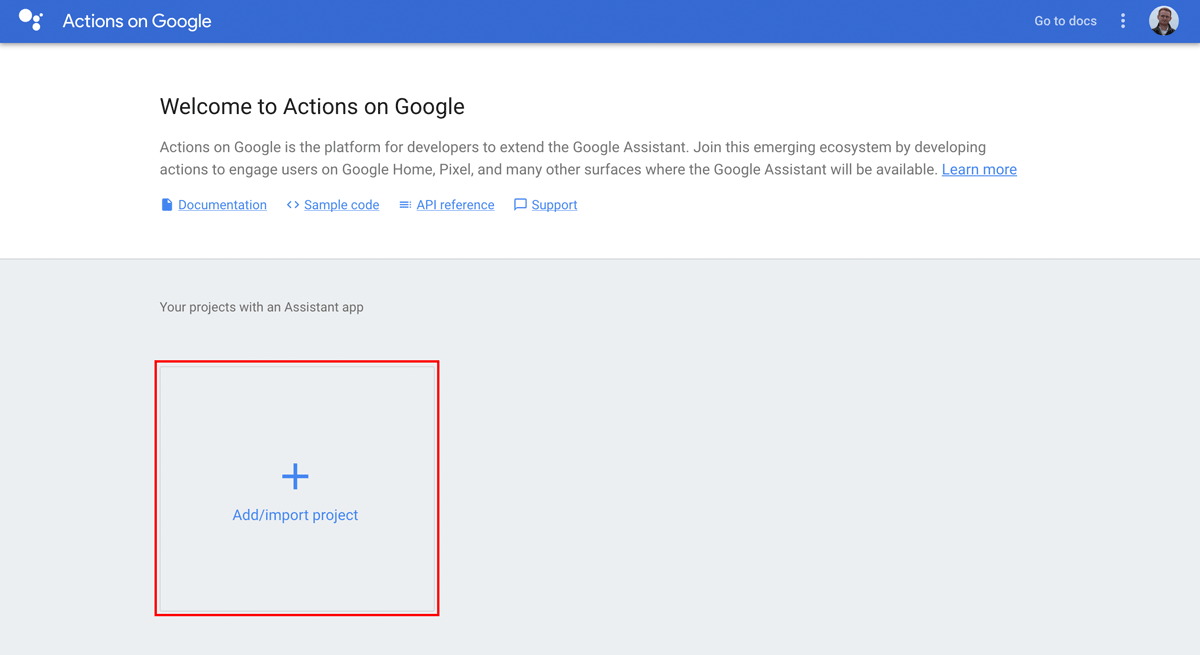
When you log in to the Actions Console, you'll be presented with a blank landing page. Click the large "Add/import project" button to start a new project.
After clicking that button you'll receive a popup to name the project. You can name yours anything you'd like. The name you pick here does not impact how someone will interact with your custom action. For this example, I named the action "Airplane Tracker".
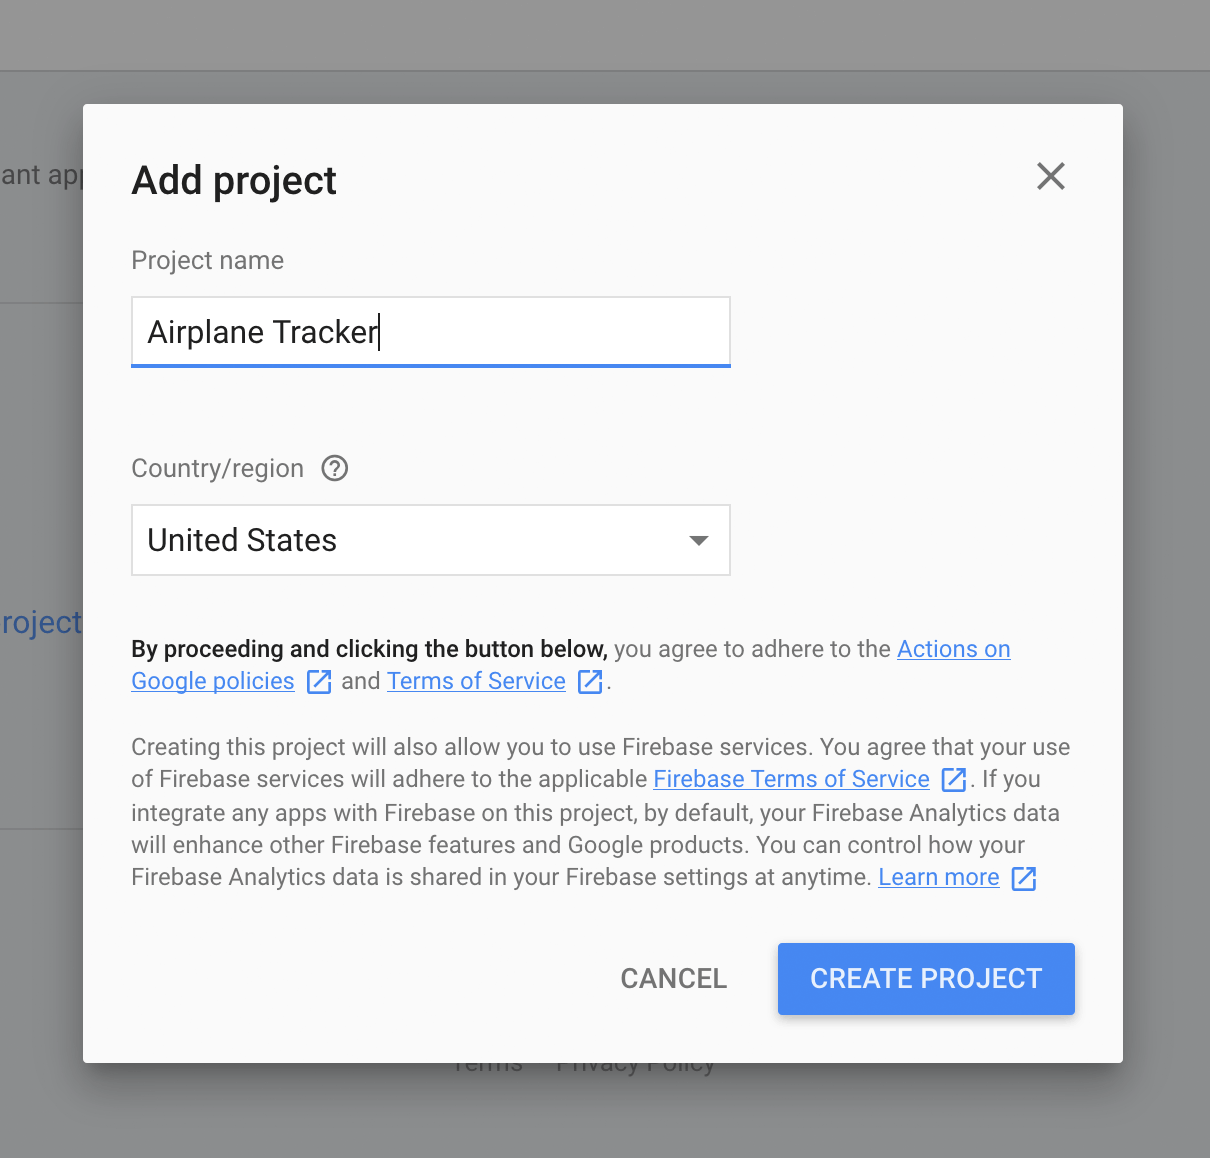
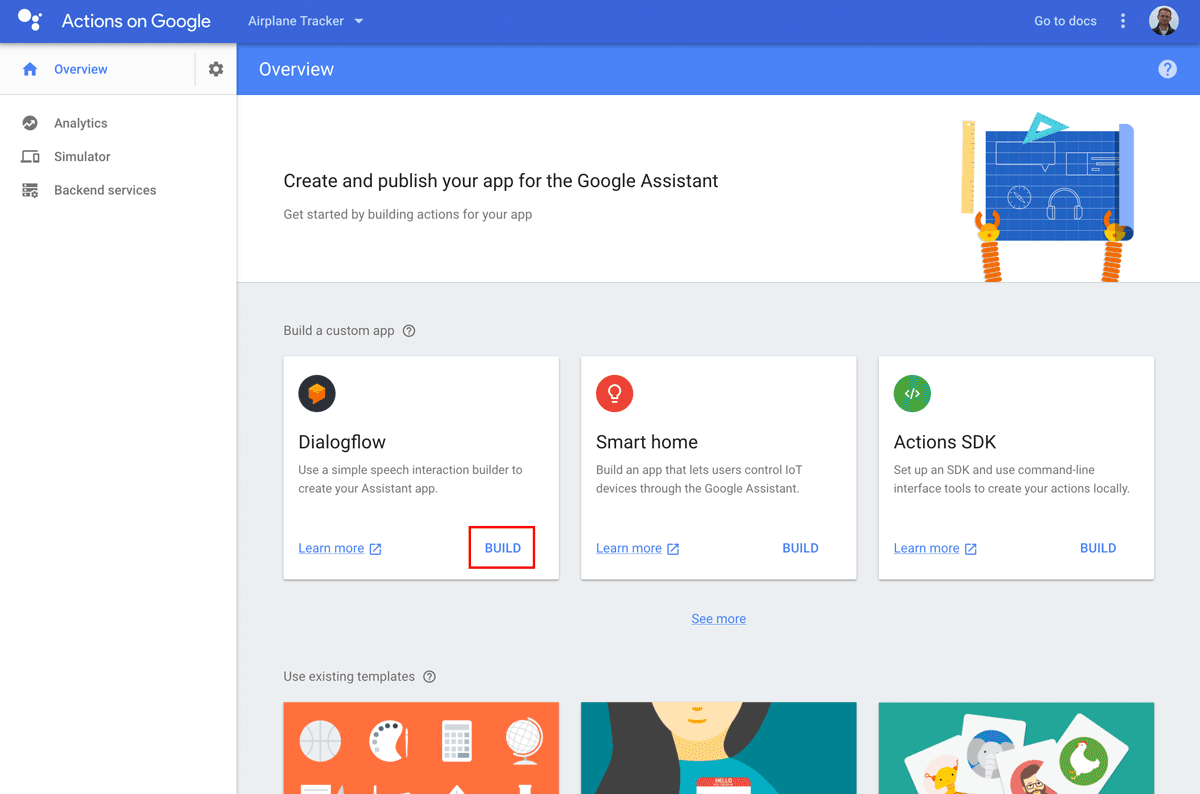
Once you've named this project, click the "Create Project" button. You'll now be presented with a welcome screen. This screen shows some of the ways you can build custom actions, including the one we'll walk through in this article, Dialogflow. Click the "Build" link in the Dialogflow section to begin building your custom action.
Dialogflow is a separate tool that integrates with the Actions Console, so you'll be redirected and prompted for security access. Once that's done, you'll be presented with a new Dialogflow agent with some fields already populated.
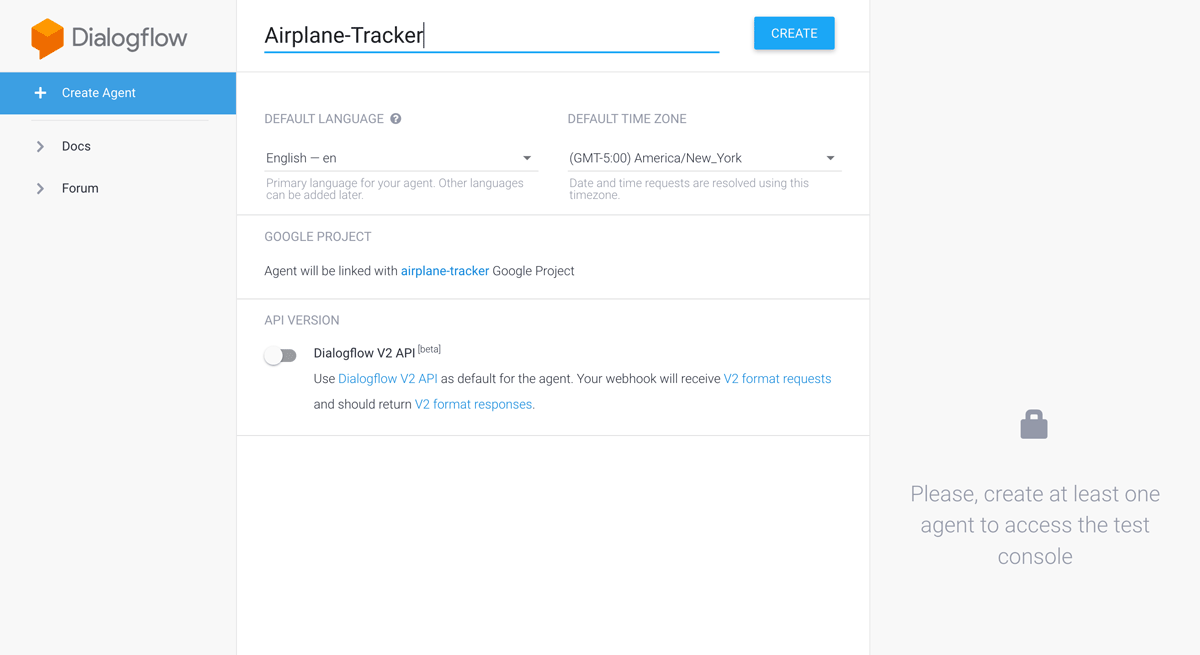
Dialogflow is a tool that makes it easy to describe how users will interact with your custom action. Within Dialogflow, each action requires an "Agent", which is responsible for parsing questions and compiling responses. As you can see in the screenshot above, Dialogflow already imported the Agent name as "Airplane-Tracker" and is already linked with the project we created in the Actions Console.
No changes are required on this page. Click the "Create" button to continue. At this point you'll be presented with an Agent that's ready to customize.
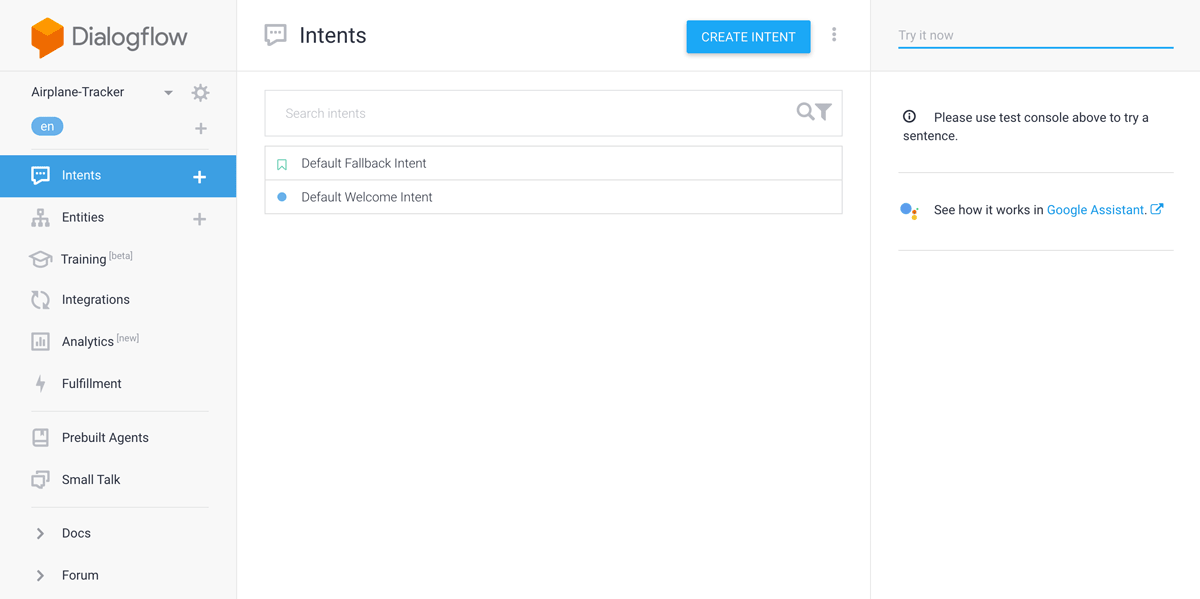
Custom actions are composed of two primary components: Intents and Entities. Intents define what the user is asking for. In other words, what is their intent? Entities are variable pieces of information within those intents. For example, if the user said "what is the weather in Cincinnati?", the Intent is to know the weather and the Entity is Cincinnati.
In this example, the Intent is to know the number of airplanes near a city and the Entity will be the specific city. If the user asked, "How many airplanes are near Chicago?", the Entity is Chicago.
Intents provide a way to consolidate multiple ways a user might ask the same question. For example, the user could want to know the number of airplanes by asking in two different ways:
- "How many airplanes are near Chicago?"
- "Number of airplanes near Chicago?"
In both cases, the user has the same Intent, which is to know the number of airplanes near a city.
Intents and Entities are interconnected and I often prefer to define Entities first. Click on the "Entities" menu item on the left and then click "Create Entity" on the top of the page.
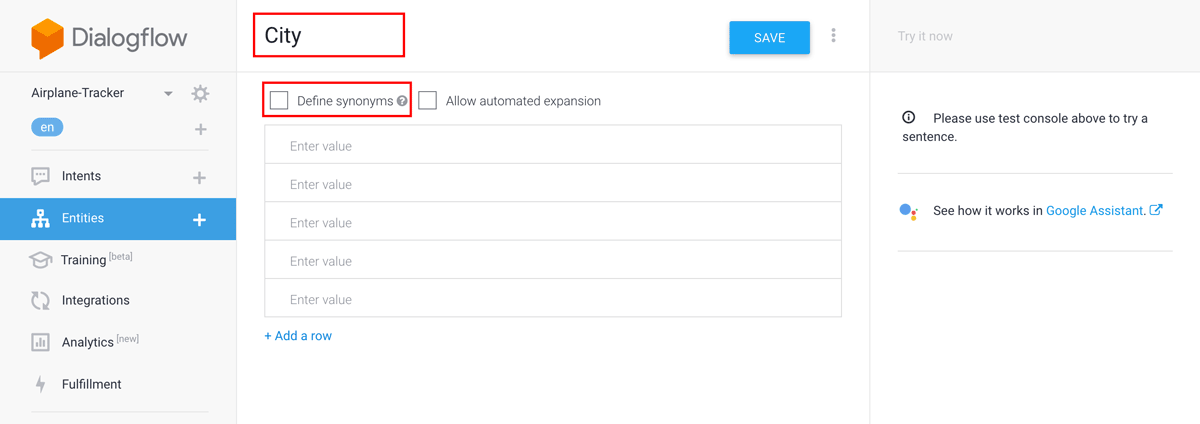
Since the Entities for this example are cities, I named this Entity "City". You will reference Entities by name when defining Intents, so short names are recommended. I also unchecked "Define synonyms" since those won't be needed for this example. Synonyms allow you to map multiple words to the same Entity. For example I could add "the windy city" as a synonym to "Chicago". This would allow users to ask about either and they'd both refer to the same city.
The next thing to do is enter your supported Entities.

This example supports four cities: Chicago, Cincinnati, New York, and San Francisco. Each one is added on a separate row. I recommend entering Entity values in all lowercase. This is because Google will keep the capitalization provided by the user, if they entered it in a chat window. We can then lowercase the incoming value to make comparisons easier.
This is the only Entity required for this example. Click the "Save" button at the top to save this Entity.
It's now time to create the Intent that will reference our newly created Entity. Click the "Intents" menu on the left and then click "Create Intent" at the top of the page.
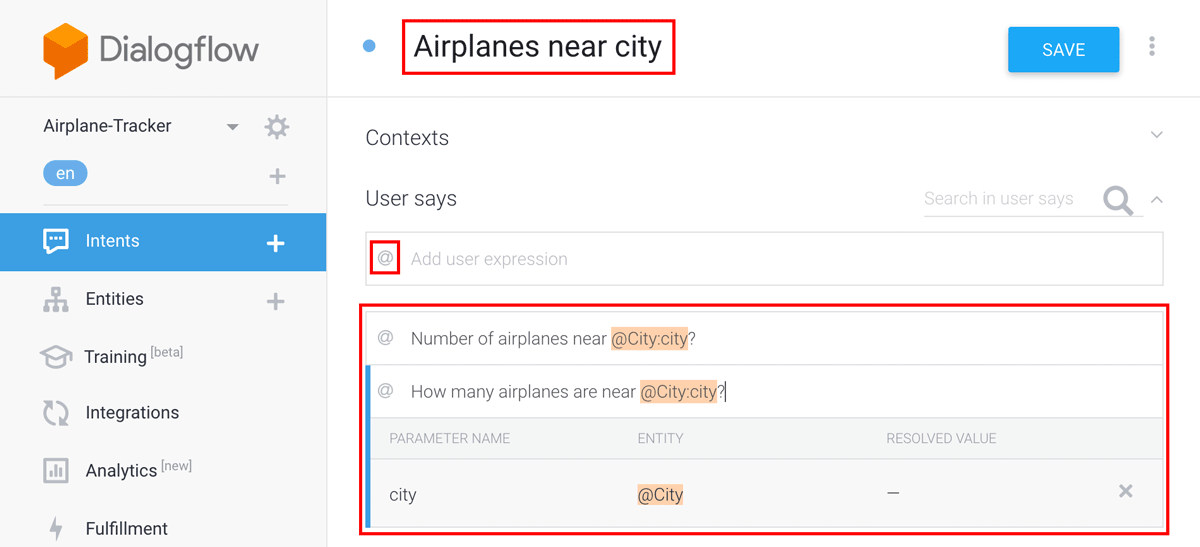
The first thing to do is name the Intent. The name doesn't impact how a user will interact with your action, so you can name it anything you'd like. In this example, I named it "Airplanes near city".
The next thing to do is define the User Says expressions. These are the various ways a user could ask the same thing for this Intent. As you can see in the screenshot, each expression references our previously defined Entity. There are two ways to reference an Entity: "example" or "template" mode. I prefer "template" mode, which can be used by clicking the small icon to the left of the user expression text field. If the icon is a double quote ("), it's in example mode. If the icon is an ampersand (@), it's in template mode. Example mode allows you to enter an expression using one of the Entity values. Template mode references the Entity directly in the expression. I prefer to see the reference because it's more clear where the Entities are. The two expressions for this example are:
- Number of airplanes near @City:city?
- How many airplanes are near @City:city?
The syntax for referencing an Entity is @Entity_Name:Parameter_Name. The Entity name should match what you named the Entity previously. In this example, it was named "City". The parameter name is what Google will name this field when it's sent to Losant to answer this question. For example, if the user asked about "Chicago", and I named this parameter "city", I will receive the following object from Google.
{ "city" : "Chicago" }
Now that we have our expressions defined and our parameters set, we can use the Actions section to mark the "city" parameter as required. We can also add an automatic prompt if the user didn't provide the required parameter.

The Actions table will automatically populate with any parameters added in the "User Says" section. In this example, we've only got the one "city" parameter. First, click the "Required" checkbox. A "Prompts" column will then appear on the right with a link to add a prompt if that parameter was not provided.
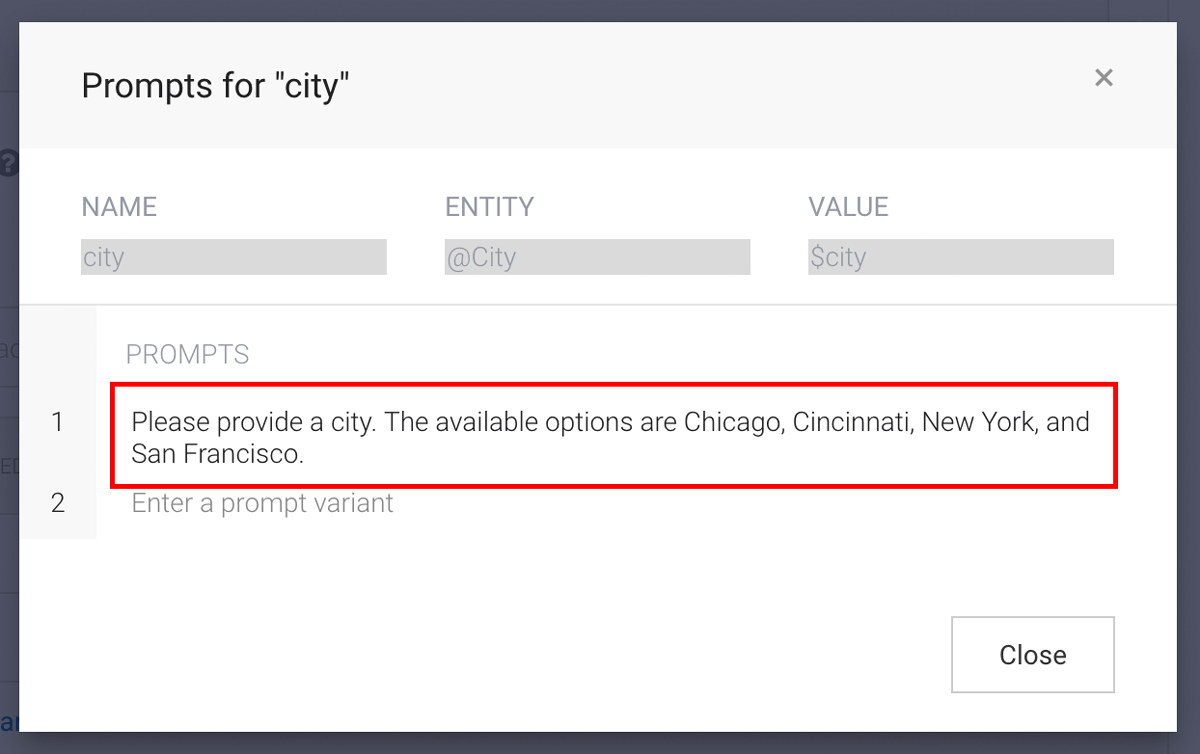
For this example, the prompt is asking the user to provide a city. It also gives them the available options. With this prompt in place, Google will automatically reply to the user without the message having to go to Losant and back.
At this point, the Google Assistant Action is pretty much defined. We'll have to return later and define the "Fulfillment" section, but we first have to create the Losant application that will fulfill these requests.
Continue to Part 2 to learn how to build Losant workflows to fulfill your custom Google Assistant Action requests without writing a single line of code. If you have any questions, or have build something amazing, please let us know on the forums.
