
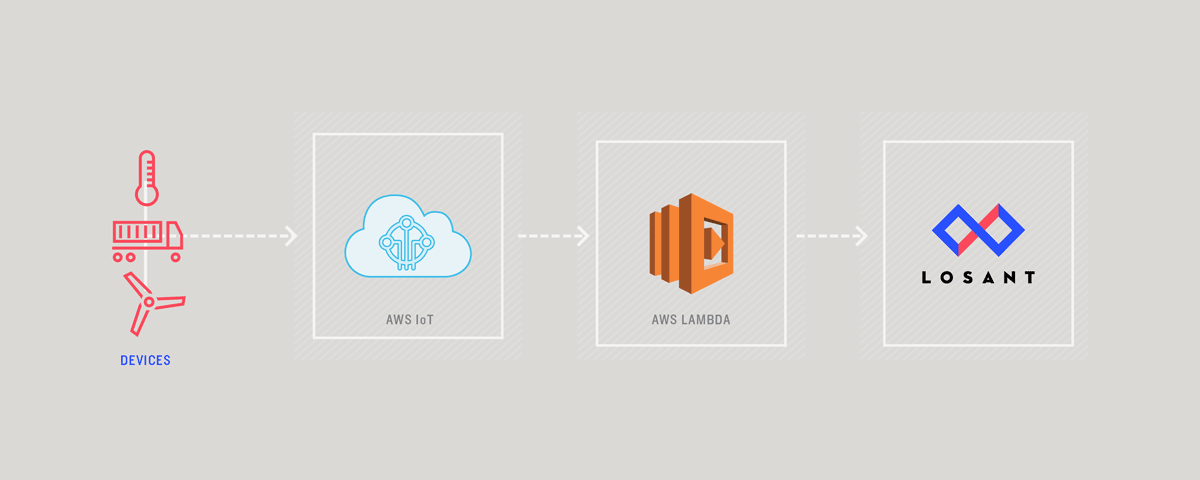
A while ago we announced direct support for Lambda invocation from within Losant workflows, which provides an easy way to send Losant device data into the AWS ecosystem. This article will demonstrate the other way around: sending data from AWS IoT into Losant.
At the heart of AWS IoT is an MQTT broker and a rules engine. The rules engine is what we use to tell AWS IoT what to do with the data once it's received by the broker. Rules are made up of a query and one or more actions. Queries, which look like SQL, control the data that's sent to the rule's actions. AWS IoT has many built-in actions. The most powerful, and the one we'll be focusing on in this guide, is invoking a Lambda function. Once the data is inside Lambda, we can do pretty much anything, including sending the data to Losant.
This guide will assume you're already familiar with getting devices connected to your AWS IoT instance. If you're new to AWS IoT, I recommend following their Getting Started Guide before continuing with this article.
Create the Lambda Function
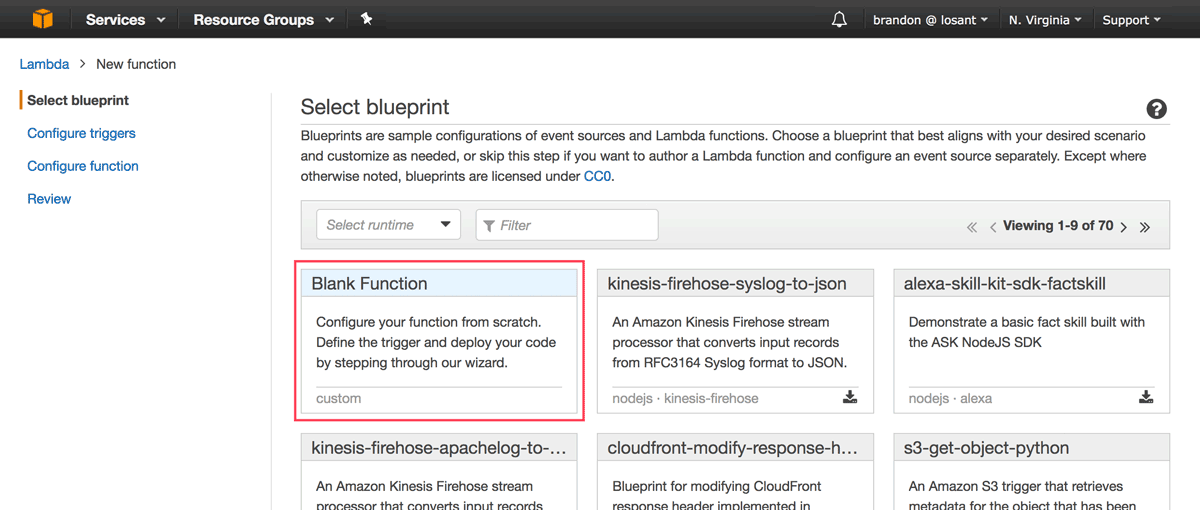
In order for our rule to invoke a Lambda function, it must first exist. For now we'll simply create an empty function. We'll return to it later and fill in the details.
Within the AWS Lambda portal, create a new blank function.
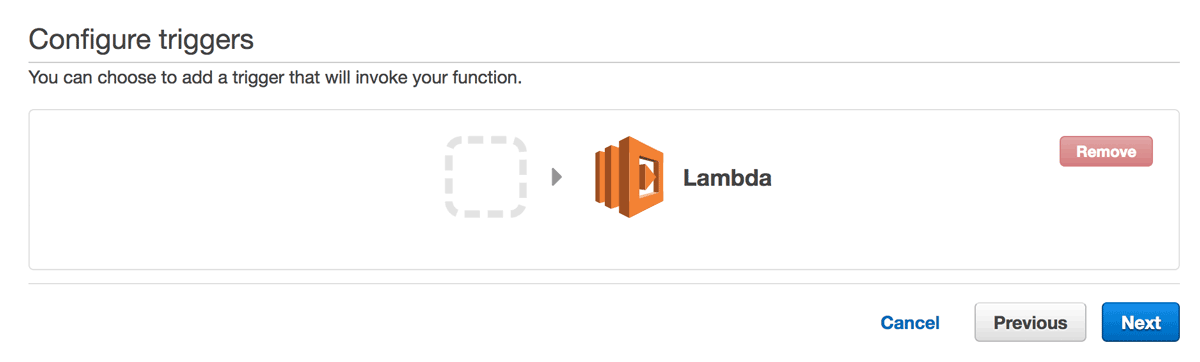
On the next screen, leave the trigger blank. AWS IoT will automatically configure the trigger for us when we assign this Lambda function as an action on our rule.
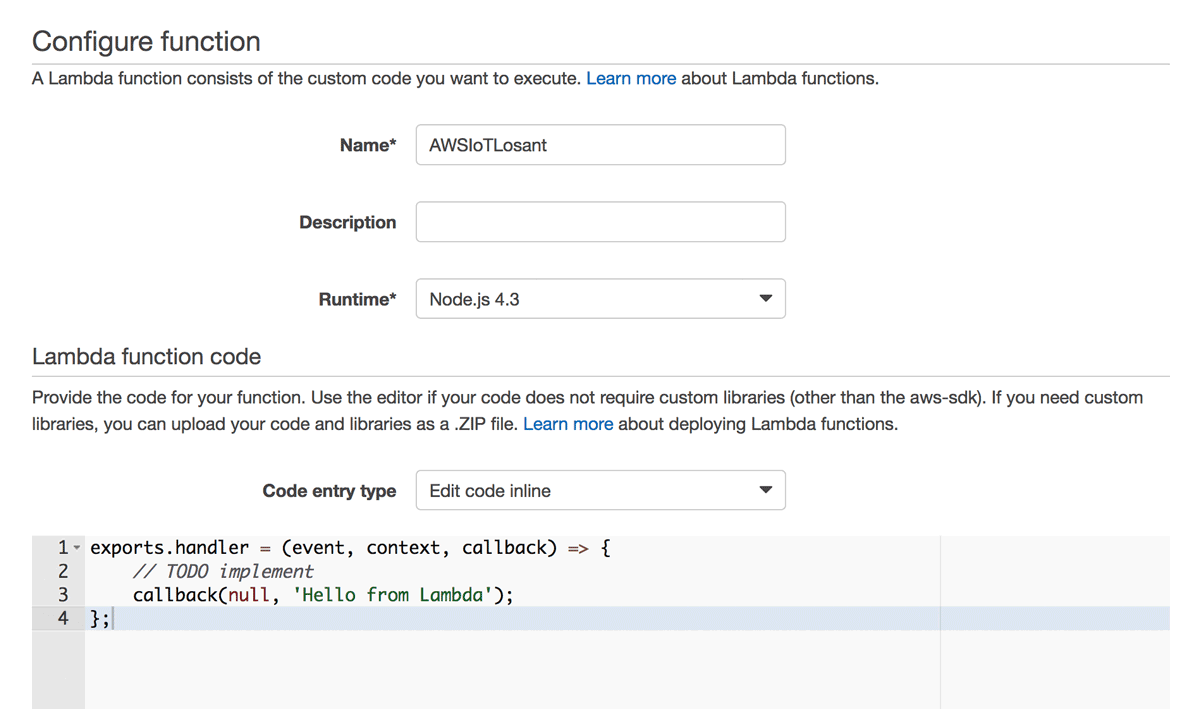
The last screen is your actual function. You can name it anything you'd like and 128MB of memory is plenty. Many of the other settings will be specific to your AWS environment, however there's nothing special required for this function. Refer to the Lambda Getting Started Guide for more details.
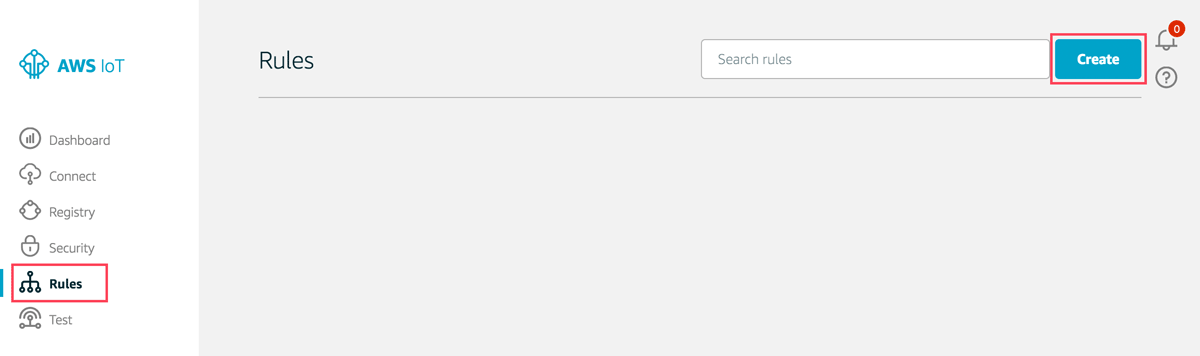
Create the Rule
Losant is very well suited to store, visualize, and react on time-series sensor data. This maps well to the AWS IoT concept of a device shadow's reported property. Therefore, the rule we create will send data into Lambda whenever a device shadow is updated.
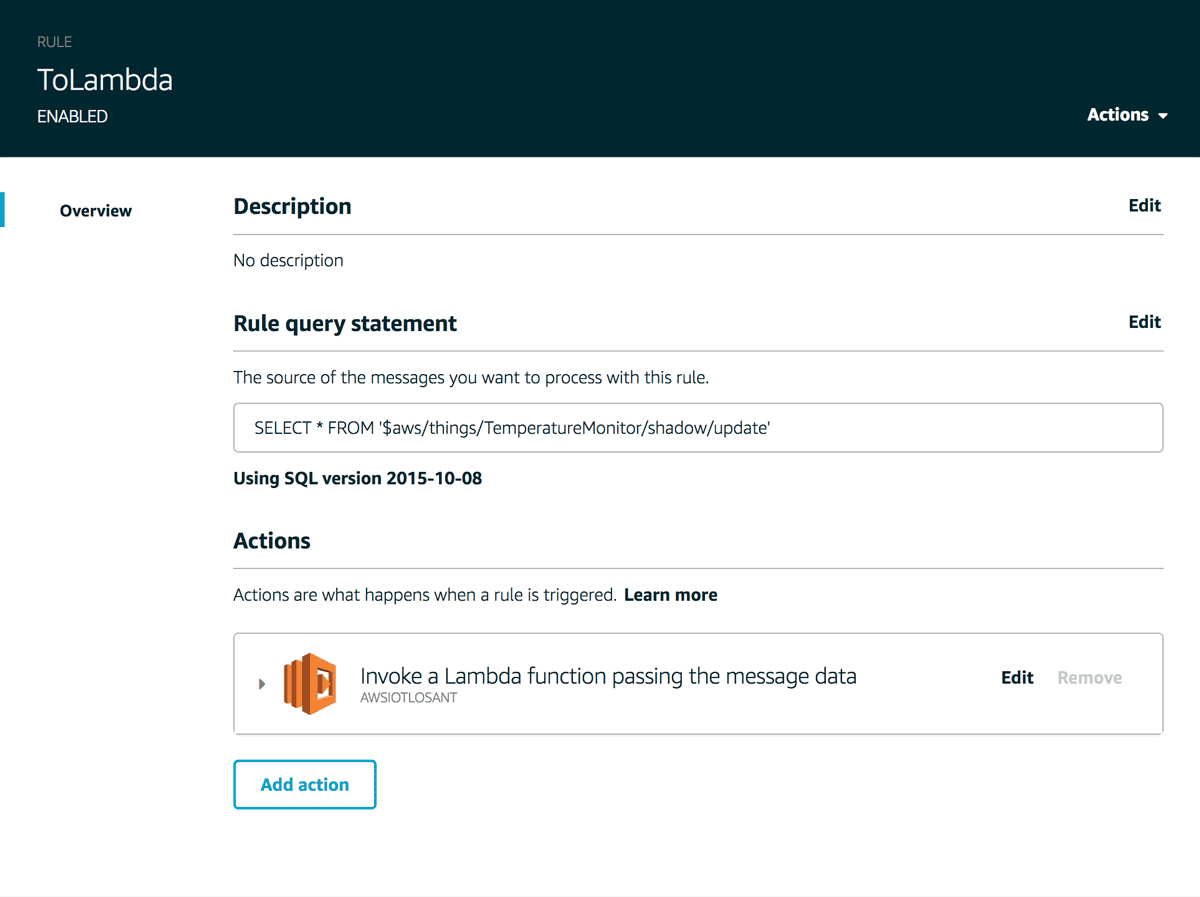
Within AWS IoT, navigate to the Rules section and create a new rule.
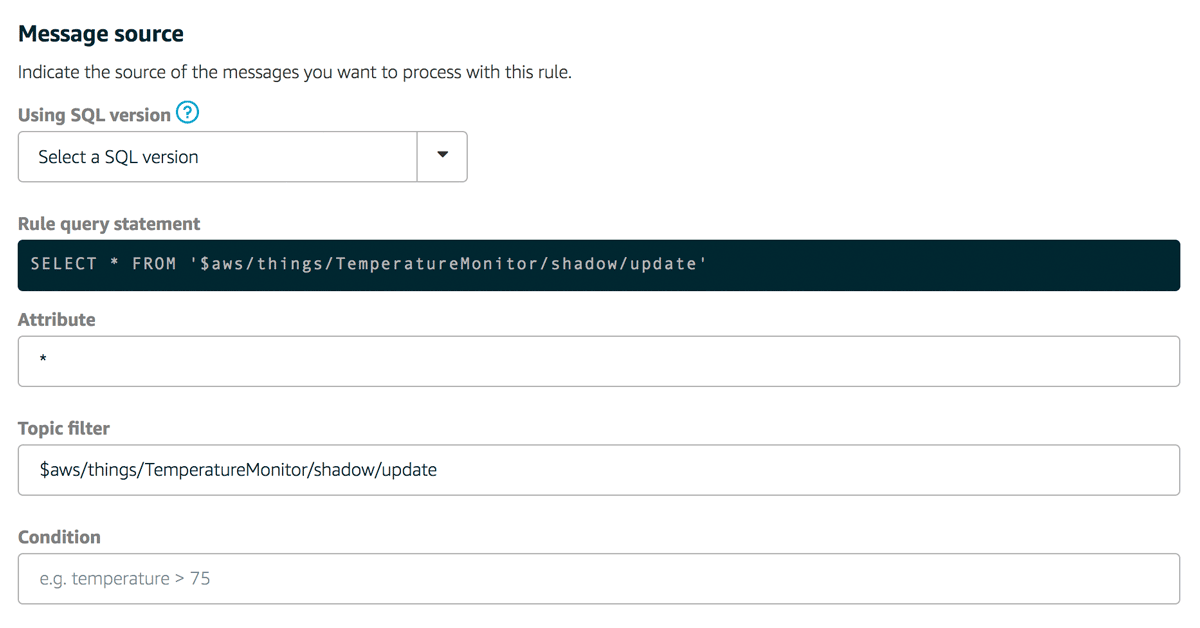
The "Message source" section sets the query that controls what data will be forwarded to the Lambda function. In my example, I've decided to send all data that was published to my TemperatureMonitor thing shadow's update topic. The supported query language is quite powerful and provides a high degree of customization over the specific data you'd like to send.
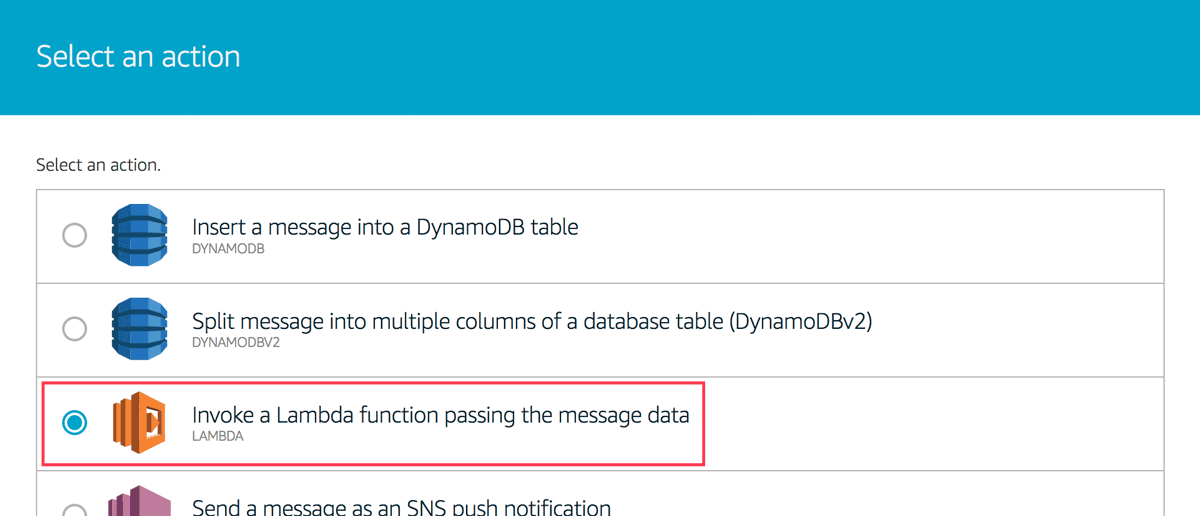
Next, add an action and select the Lambda option from the list.
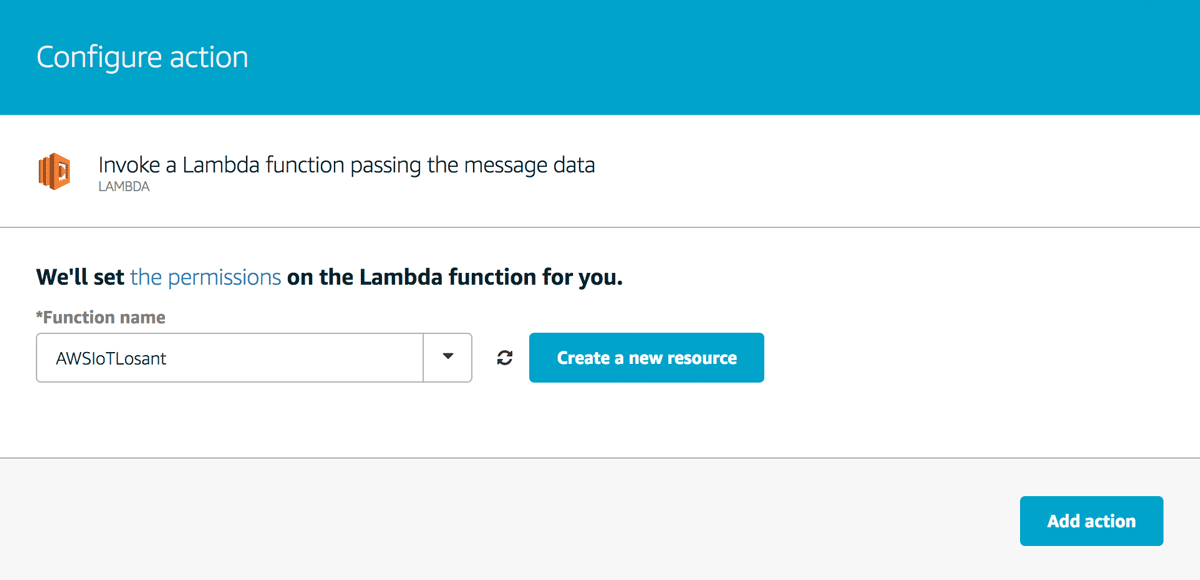
Choose your newly created Lambda function from the list and click the "Add action" button.
After you add the action, you'll be returned to the rule page. Click the "Create Rule" button to complete the process.
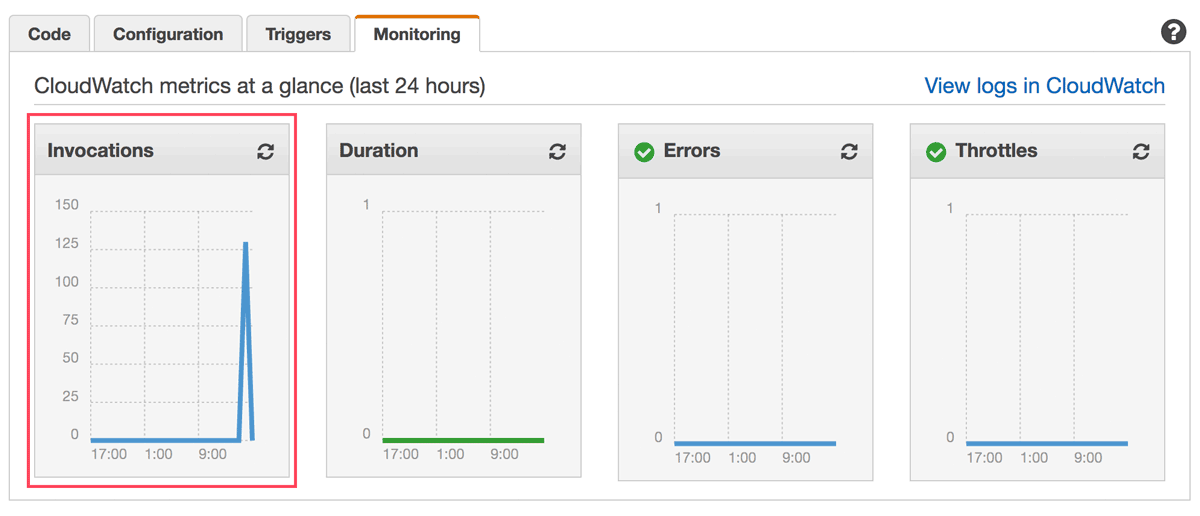
This guide assumes your device is already connected and updating its thing shadow. You can verify that your new Lambda function is now being invoked by viewing the Monitoring tab in the Lambda portal.
Create Losant Device
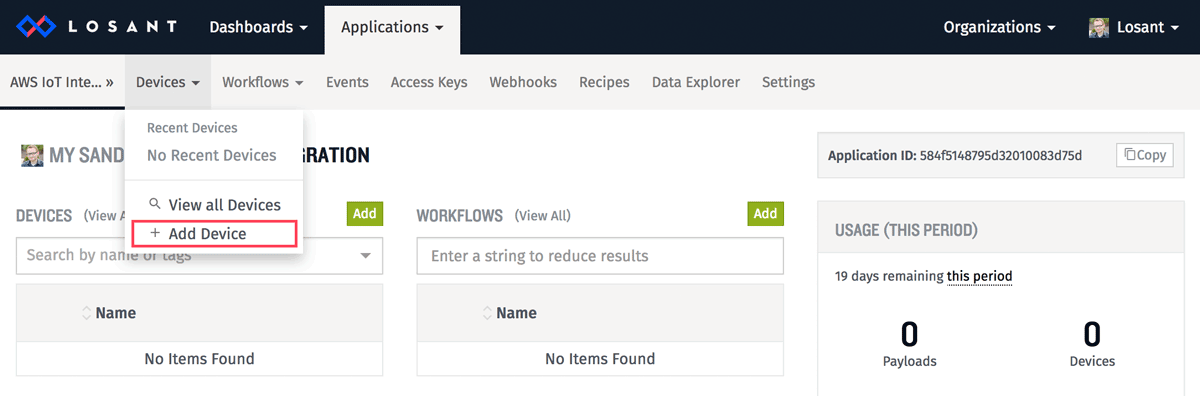
If you haven't already, sign up for a Losant account and create an application. The first thing we need is a Losant device to store the data that AWS IoT will be sending us. You can do this using the Devices -> Add Device menu.
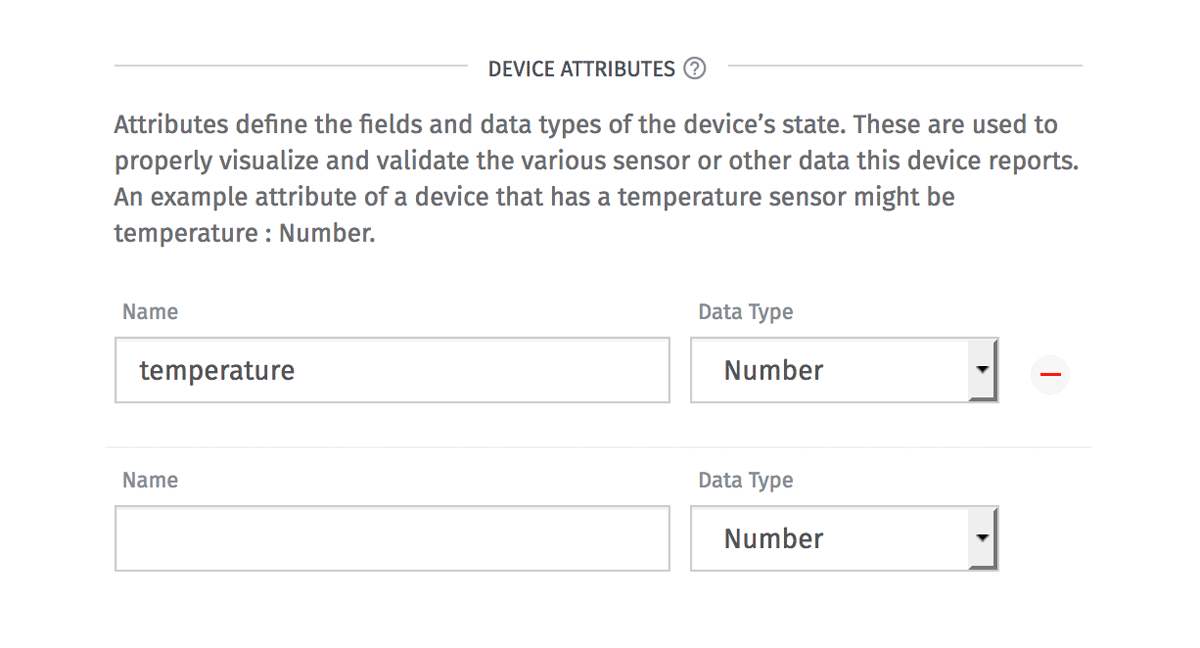
Set the device name to anything you want and add one or more attributes depending on the state information your device reports. My device is reporting the temperature, so I added one attribute named "temperature" with the data type set to Number.
In this example, I'm just creating a single device, however if you're solution uses hundreds, thousands, or millions of devices, please check out our device recipes and bulk creation features.
Create Losant Webhook
There are many ways that AWS Lambda could send data to Losant. For this example, I chose to use a webhook because it's one of the simplest to implement within Lambda and it provides a lot of flexibility within Losant once it's been invoked.
Create a new webhook using the Webhooks menu item.
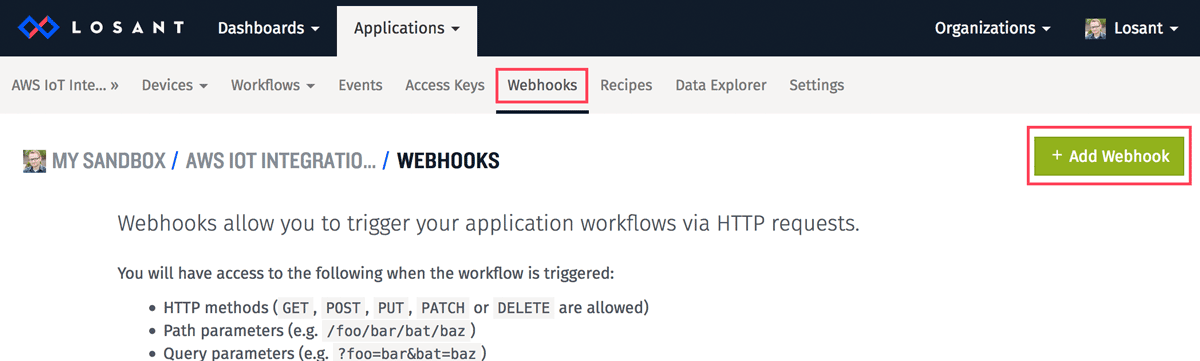
Name the webhook whatever you want and leave all other settings as their defaults. After you create the webhook, you'll be presented with its URL. Copy and paste this somewhere convenient.

Invoke the Webhook From Lambda
Now that we have a webhook to invoke, we can update our Lambda function with some pretty straightforward Node.js code to call it.
As you can see, we're using Node's built-in HTTP module to request the Losant webhook. For simplicity, we're passing the entire event, which will include the reported state.
Handle the Webhook
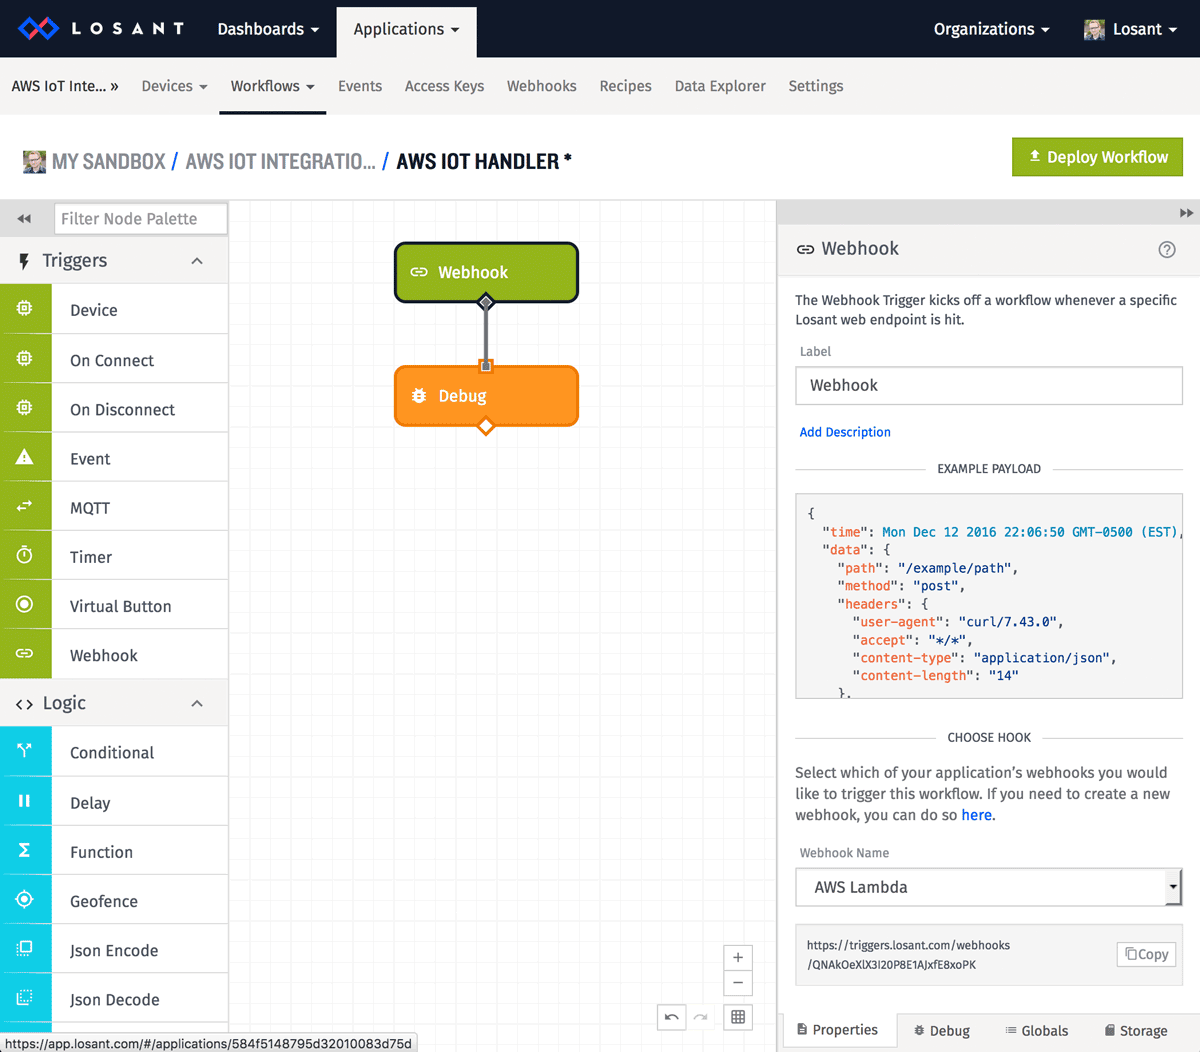
One of the most powerful features of Losant are Workflows. Workflows can do many things and are a good way to quickly and easily add complex logic to your connection solution. For this example, we're going to use a workflow to handle the incoming webhook data and store it on a device.
First, create a new workflow using the Workflows -> Create Workflow menu. You can name it anything you'd like. Next, drag a Webhook trigger onto the canvas and select your webhook in the configuration panel. Just so we can see what the data looks like coming from Lambda, drag a Debug node onto the canvas and connect it to the Webhook trigger node. Your workflow should now look like the following image.
Deploy this workflow using the "Deploy Workflow" button at the top-right of the screen. If your device is reporting state, you should now see data showing up in the Debug tab on the bottom-right.
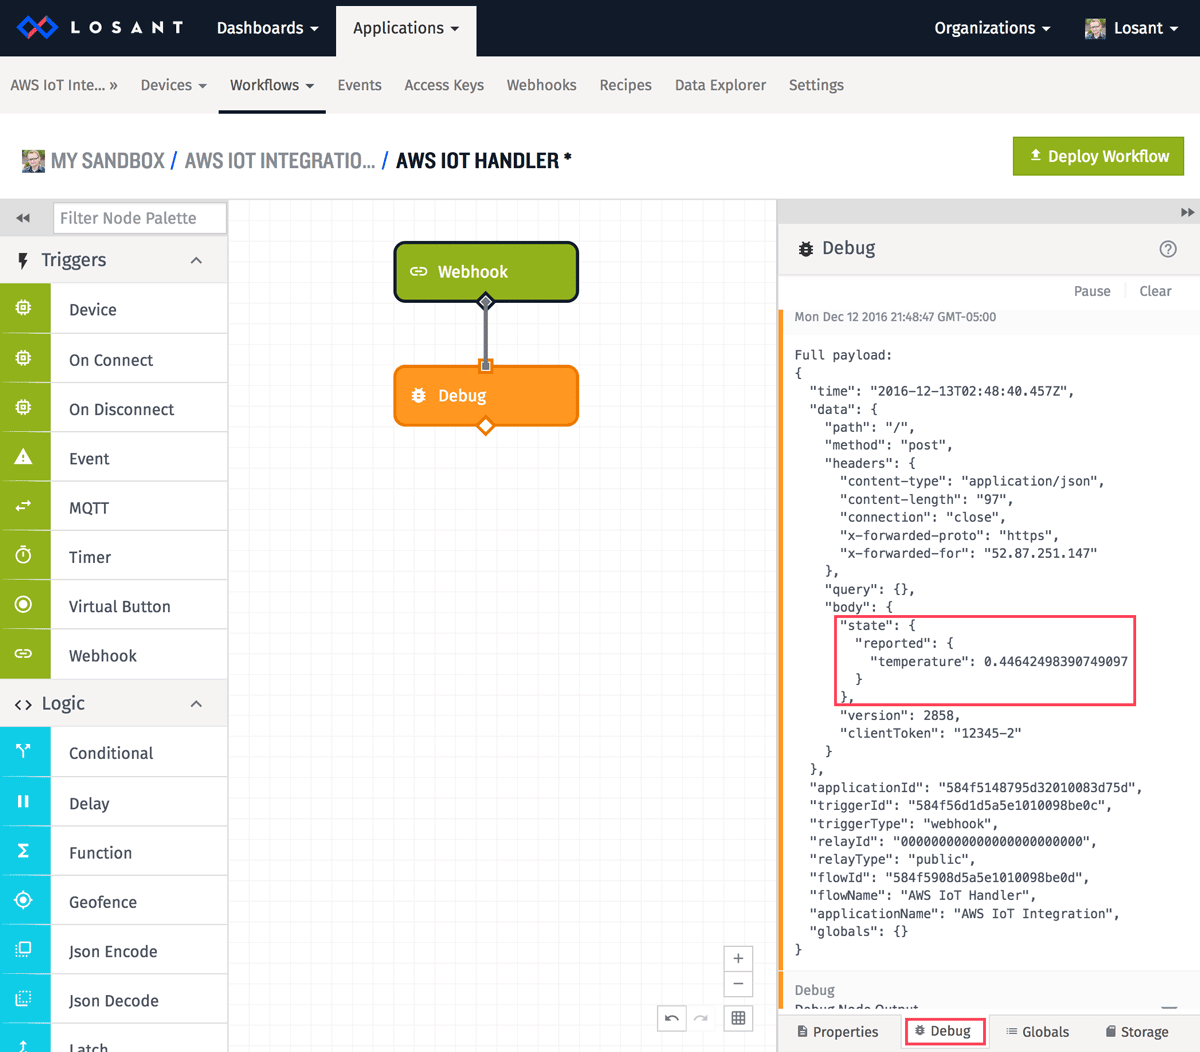
The debug tab shows what Losant calls the workflow "payload". Payloads are generated by an initial trigger and then they flow through each node in the workflow. Nodes can add information to the payload, remove information, make decisions based on the information, and much more. The debug node simply logs the payload to the debug tab.
Since this is a webhook trigger, you'll notice some typical HTTP stuff like the path, method, headers, and other items. The important information is in the body. This is what was reported by your device, sent to Lambda, and then sent to us. The last step in this workflow is to record this information on our newly created device.
Add a Device State node to the workflow.
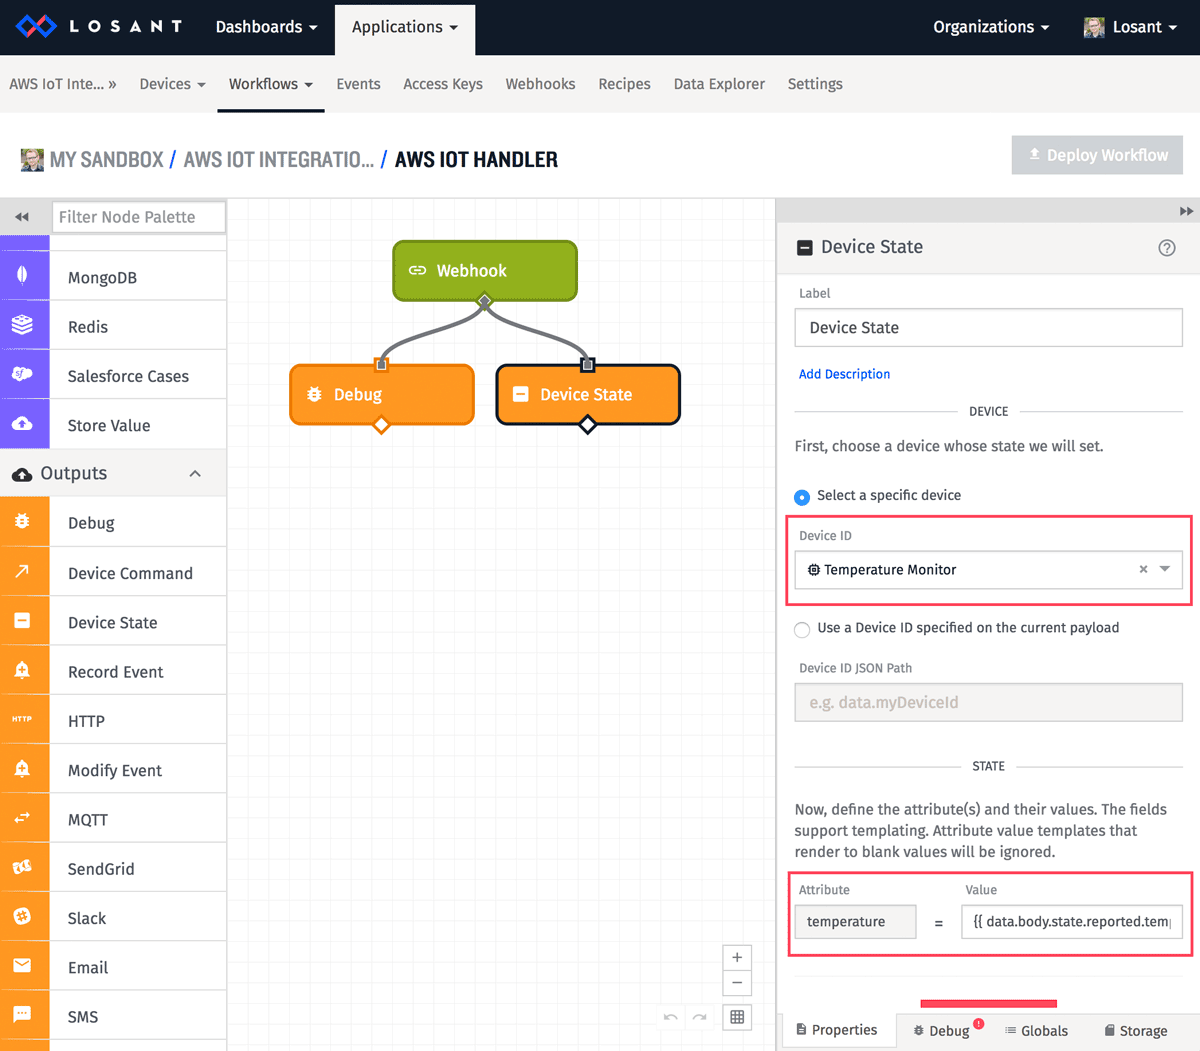
- Choose your device from the
Device IDdropdown. - Set the
temperatureattribute to:{{ data.body.state.reported.temperature }}
The value of the temperature attribute is what Losant calls a template. These are simply Handlebar templates used to access data stored on the payload. This example will pull the value at that path and store it on the device's temperature attribute.
Build Something Awesome
With this integration, each time your device updates its AWS IoT thing shadow, the resulting information will be stored on a Losant device.
With the data on a Losant device, you can now easy build complex, data-driven solutions using our dashboards, workflows, and our full API for custom experiences.
If you're new to Losant and want to learn more about building dashboards, I recommend following the Walkthrough. Once you've completed that guide, you can apply many of those learnings to the data you're now collecting from AWS IoT.