
The Onion Omega2 is a small, Wi-Fi enabled Linux computer. With the Onion Cloud platform and dock ecosystem, it's a great device to dive into hardware and IoT. Check out the Omega2 Kickstarter video:
Once you have your Omega2, you’ll likely want to do two things from the internet:
- Control GPIO - With GPIO, we can do things like control lights or servomotors. In this example, we are going to control an LED.
- React to Input - We might also want to listen for input. This input could be from things such as a button or motion sensor. In this example, we are going to react to a button press.
We can easily do this with Losant. Losant is an excellent tool to control and collect data from internet-connected hardware.
This tutorial will explain how to set up the Omega2 with Losant using Python.
Setup
Dock
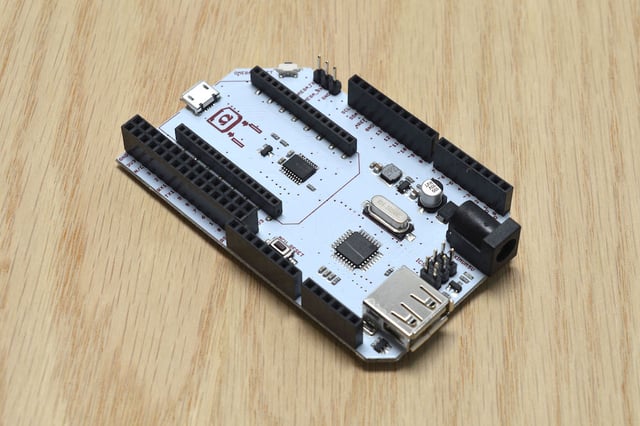
The simplest way to use the Omega2 is to use a dock. For this example, I used the Arduino Dock.
Storage
Out of the box, the Omega2 doesn't have much storage to do things with Node.js or Python. Once you have the respective platforms installed, you'll have little storage to do anything else. However, if you have an Omeaga2+, storage won't be a problem because it has expandable memory via an SD slot.
If you have the base Omega2, I recommend you use a USB flash drive to extend the storage on the device.
Internet
The Omega2 setup guide is simple. Follow their first time set up guide to get connected.
For the rest of this tutorial, you will need SSH access to the Omega2.
Python
Once you can use the terminal, we'll need to install Python. To control the GPIO, we are going use the Omega2 Python GPIO library.
Here are the commands you need to run to set up the environment:
opkg update
opkg install python git git-http ca-bundle python-pip
pip install paho-mqtt
git clone https://github.com/Losant/losant-mqtt-python.git
cd losant-mqtt-python
python setup.py install
Wiring
For this tutorial, you'll need an LED and a button. However, the ideas are the same for other hardware, like a servomotor.
Here is how you wire everything:
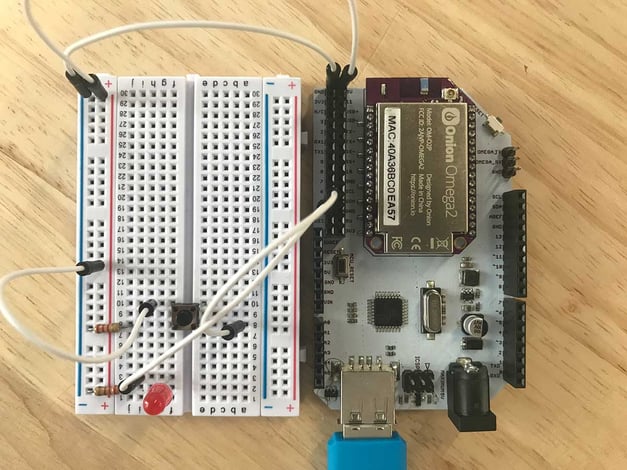
- First, connect GND to the negative column of the breadboard and 5V to the positive column of the breadboard
- Connect the LED to GPIO 0
- Using a pull-down resistor, connect the button to GPIO 1
Download example project
Using a terminal, SSH into the Omega2 and download the example project. This project is available for you on GitHub. Here are the commands:
cd ~ && git clone git@github.com:Losant/example-omega2-python.git
Here is the code in index.py:
Now, you may see that three things are missing from the code: my-device-id, my-access-key, and my-access-secret. We get this information from Losant.
To run the code:
cd example-omega-python
python index.py
Set up Losant
If you haven't already, create an account and an application in Losant. Next, add a device to your Losant application for the Omega2.
Once we create a device, we can get the Device ID (my-device-id) from the dashboard.
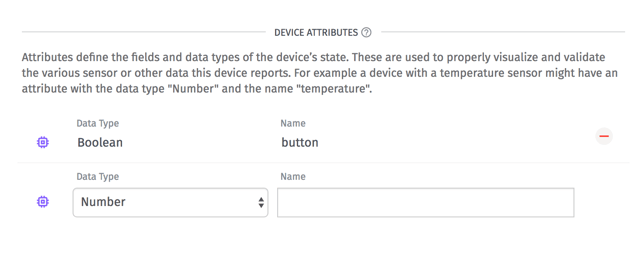
We also need to give our device an attribute. This tells Losant what data to expect from the device. The attribute should be called button and be of type Boolean.
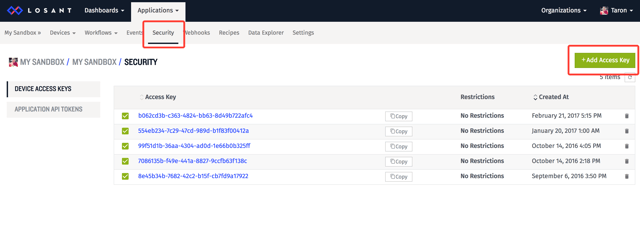
Now, we just need an access key/secret (my-access-key & my-access-secret). Go to the Security tab in Losant to create a pair:
WORKFLOW
Finally, we'll use a Workflow to control the LED and respond to the button press.
Control GPIO
In the Workflow Editor, we can use a Virtual Button and Device Command to control the LED remotely.
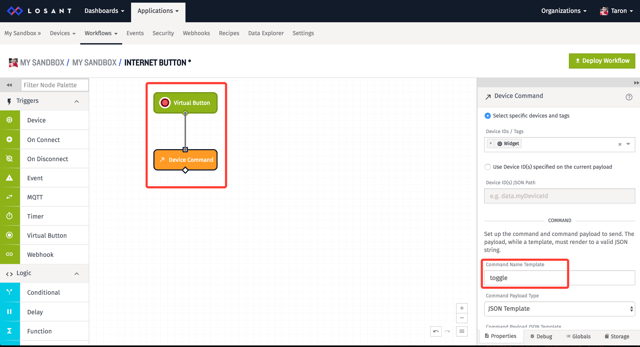
In the example firmware, it is listening for a command called toggle. When the Virtual Button is clicked, it will send the toggle command to the Omega2, toggling the LED on and off.
React to Input
To react to the button press, we need to listen for a device payload by using the Device Trigger node. In the firmware, we are sending state when the button is pressed. When Losant gets this state, it can trigger a workflow.
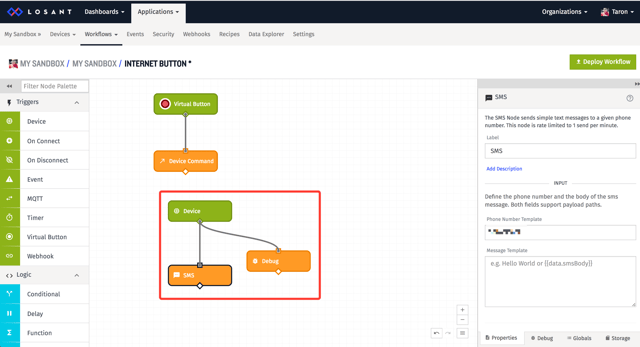
In this Workflow, we are sending an SMS message every time the button is pressed. However, the output doesn't have to be a SMS message, it could be an email, Tweet, etc. or even many things at once.
WHAT'S NEXT?
Now that you can control your Omega2 over the internet, the power is yours! You can even start to visualize data that you're collecting.
This tutorial is in a series about controlling different kinds of compute modules and microcontrollers from the internet using Losant. Check out the others:
- Getting Started with the Sparkfun ESP32
- Getting Started with the Raspberry Pi
- Getting Started with the C.H.I.P.
If you have any ideas/request, let us know! Follow us on Twitter if you want to keep up with the series.