
Now that it’s been some time since the ESP32 has been released and the software stack has matured, it’s safe to start building projects using this connected-ready hardware.
I’m a huge fan of Adafruit’s Feather boards; they are very reliable with an awesome community behind them. The Adafruit HUZZAH32 is their ESP32-based board.
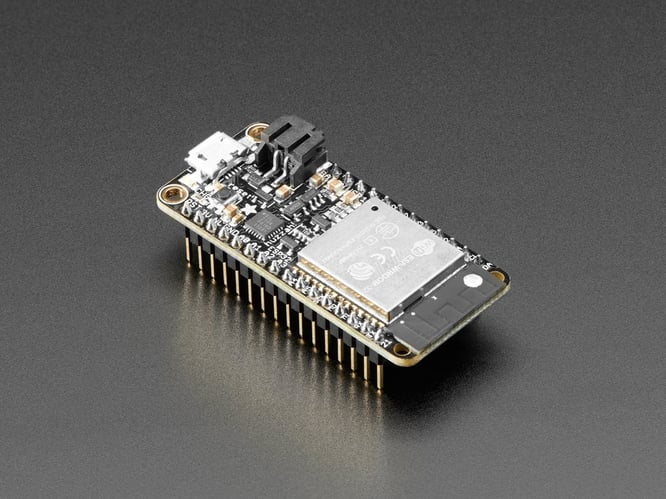
Because of the cost—it’s just $19.95—and its support of Wi-Fi and Bluetooth, it’s my recommended connected microcontroller. In this tutorial, I am going to walk you through setting up the device and connecting it to the Internet.
To illustrate this, I’ve gathered the following components:
- Adafruit Feather HUZZAH32
- 1 Solderless Breadboard
- 8 Jump Wires
- 2 Resistors
- 1 LED
- 1 TMP36 temperature sensor
- 1 Button
- 1 Micro-USB cable
Let’s get started.
Download USB Drivers
If this is your first time using the ESP32, you will have to install the USB drivers. If not, you won’t be able to flash your device. Here is where you can find the drivers:
https://www.silabs.com/products/development-tools/software/usb-to-uart-bridge-vcp-drivers
Download and Install Arduino IDE
Download and install the latest version of the Arduino IDE by following the instructions at:
https://www.arduino.cc/en/Main/Software
We will be using the Arduino IDE to flash the ESP32. Before we can begin flashing, we need to configure the IDE to support an ESP32-based board.
Install Arduino Core for ESP32
Installing the ESP32 Arduino core is a little daunting, but it should get better over time as the APIs mature. For now, you’ll have to install the board manually. There are instructions for every operating system here:
https://github.com/espressif/arduino-esp32#installation-instructions
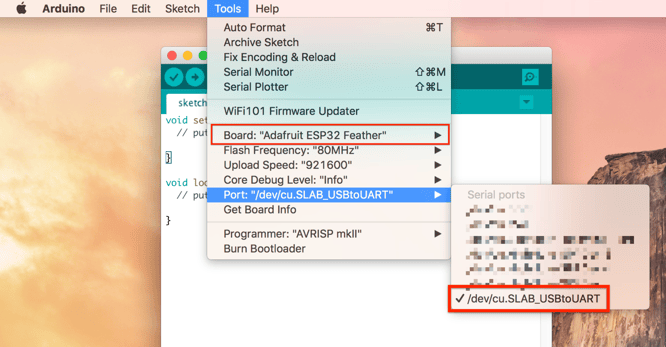
Once you have the core installed, you should be able to go to Tools > Board and select Adafruit ESP32 Feather.
Use the Tools -> Port menu to select the port of your ESP32. This will change depending on your operating system. On a Mac, it’s typically SLAB_USBtoUART. On Windows, it will be named COM and then a number, for example COM3.
Now, our environment is ready to flash the ESP32. But first, let’s get the components wired up.
How To Wire the ESP32
Here is the wiring diagram with all of the materials:

This wiring will appropriately set up the LED, the TMP36 (temperature sensor), and the switch (button).
We are so close to flashing! We need to gather some credentials from the cloud.
Setting Up Losant
To begin, we need to create a device within Losant. Before we can flash the firmware, we need to input credentials from Losant. If you don't already have a Losant account, sign up for a free developer sandbox.
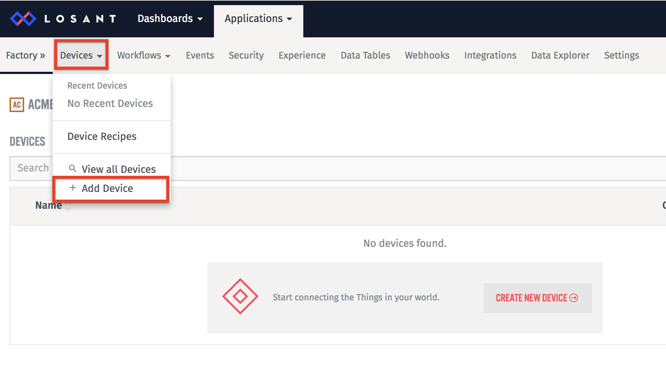
Create an Application & Device
Once you’re in Losant, create an application, then create a device.
Device Configuration
Our device will have the following three attributes:
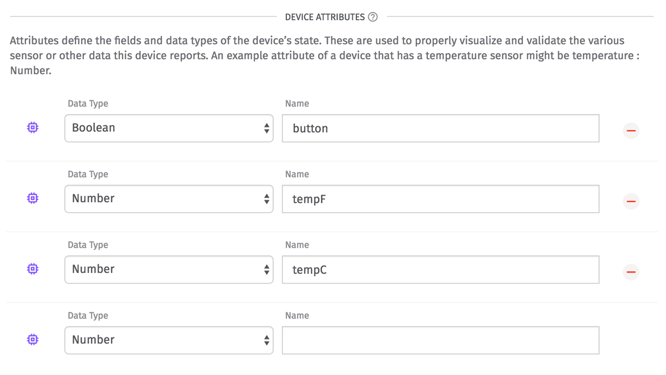
The device attributes specify what state information the device reports. The firmware that you’ll flash in the following sections will report whenever a button is pressed, the temperature in Celsius (tempC), and the temperature in Fahrenheit (tempF).
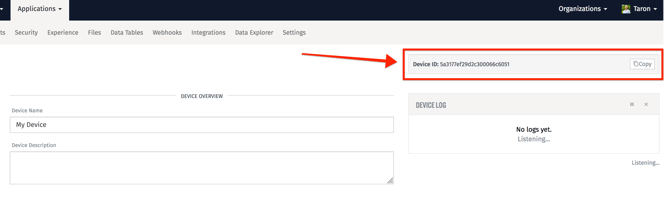
Once you create your device, you will be presented with a Device ID. Be sure to copy this ID, you will need it later.
Create Security Credentials
Now we need to generate an access key so your device can authenticate against the Losant Platform. Select Security from the application menu bar, and then Device Access Keys from the left navigation. Then click Add Access Key.
This will cause a popup to appear with your access tokens. Be sure to copy the key and secret, you will need them later.
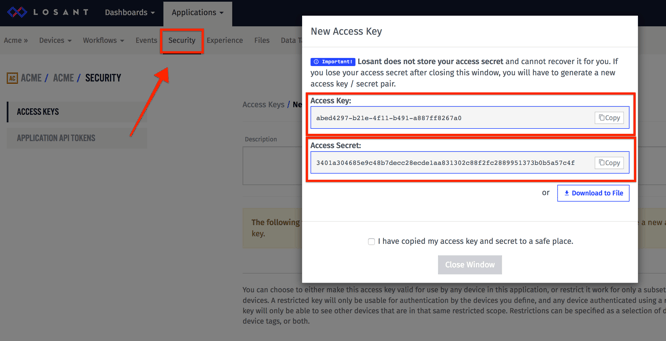
You should now have a Device ID, Access Key, and Access Secret. We will need all three to connect to Losant. It is now time to flash the firmware.
Flashing ESP32 Firmware
Open up your Arduino IDE and copy/paste the following:
At the top, there are placeholders for credentials that you need to fill out. It looks like this:
// WiFi credentials.
const char* WIFI_SSID = "WIFI_SSID";
const char* WIFI_PASS = "WIFI_PASS";

// Losant credentials.
const char* LOSANT_DEVICE_ID = "LOSANT_DEVICE_ID";
const char* LOSANT_ACCESS_KEY = "LOSANT_ACCESS_KEY";
const char* LOSANT_ACCESS_SECRET = "LOSANT_ACCESS_SECRET";
You’ll need to provide:
- WIFI_SSID: The name of your WiFi network.
- WIFI_PASS: Your WiFi password.
- LOSANT_DEVICE_ID: After creating your device, the Device ID is printed on the page in a gray box. You can also find it next to the name of your device on your application's "View All Devices" page.
- LOSANT_ACCESS_KEY: Set this to the access key you generated after creating the Losant application.
- LOSANT_ACCESS_SECRET: Set this to the access secret you generated after creating the Losant application.
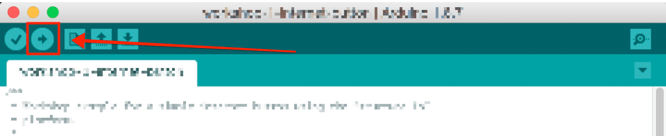
Next, you can begin the flashing process by pressing the upload button:
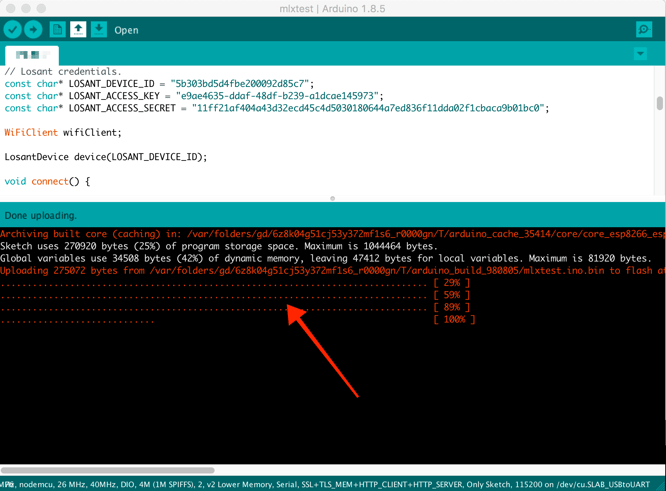
Then, you should see a successful upload message like so:
Verifying Connection
Once you have successfully flashed, we can check Losant to verify that it’s reporting data. The best way to do so is by looking at the device logs. You can find this by looking to the right of your device's settings.
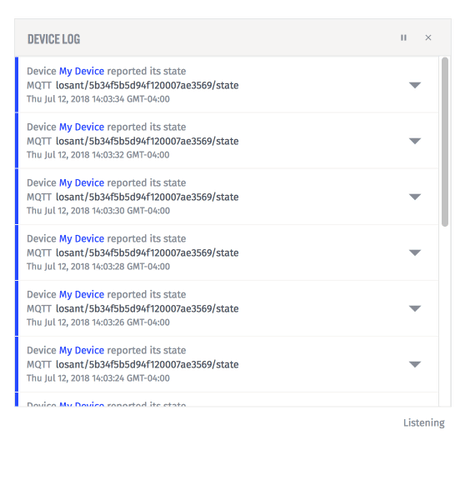
If you see logs, your device is connected and reporting properly.
That’s a Wrap
Now that you have data being sent to the cloud, there is a lot you can do with it. You can react to it using the Losant Workflow Engine or even create a Dashboard. There is a lot to explore.

Resources:
For more information and inspiration, check out these tutorials:
- How to Build an Interactive Google Assistant Action with No Code - Part 1
- Use Losant to Track NHL Stats Without Writing a Line of Code
- How to Read the TMP36 Temperature Sensor with Pycom and Sigfox
- Detecting Motion Using a PIR Sensor, ESP8266, and Mongoose OS
Until next time, stay connected.